Enchanted Rose Cake, Beauty and the Beast
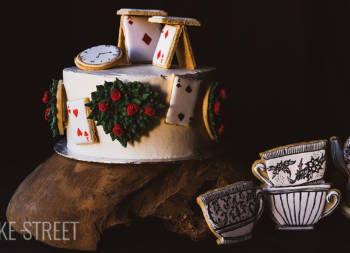
I guess you’ve already realised how much I love to make themed cakes…. Disney, yes. I have discovered a new way of expression in which, not only I feel very comfortable, but it also allows me to enjoy my work even more. I started with the Alice in Wonderland cake, then the Sleeping Beauty cake, and, this time, the Enchanted Rose Cake, Beauty and the Beast.
For those of you who follow me on social media, you’ll know that this year I’m going to share several cakes in this style, and I’m excited to publish them little by little! They will only come in small doses, as they are elaborations that require a lot of time, dedication and work… The whole process of this post has taken me a week of work. But the satisfaction of seeing it finished is such that I would do it a thousand times more!

Beauty and the Beast.
La Belle et la Bête is a traditional French fairy tale. There are countless variants of this tale, although it is thought that its origin may be a story by Apuleius in his book “The Golden Ass“, entitled “Cupid and Psyche“.
The first published version was a work by the French writer Gabrielle-Suzanne Barbot de Villeneuve in 1740. Although there are apparently other sources that attribute the recreation of the original story to Gianfrancesci Straparola in 1550.
The most popular written version is an abridged revision of Gabrielle’s original work published in 1756 by Jeanne Marie Leprince de Beaumont. The first English translation was made in 1757. This version is the most famous of all and the basis for most subsequent adaptations.
The French tradition of the time was to elaborate everyday stories against a background of human emotions in unexpected places or for magical purposes. All bloody or cruel situations were eliminated. They wrote directly and briefly, in a sober and unadorned style.
French storytellers adapted their stories to their own classical, logical and rational preferences.
Some authors and experts suggest that the tale of Beauty and the Beast may have been inspired by a true story.
Petrus Gonsalvus, born in the 16th century on the island of Tenerife (Spain), was brought to the court of King Henry II of France. Petrus suffered from the disease hypertrichosis, which caused him to have abnormal hair growth on his face and other parts of his body.
Henry II was infatuated with this hairy boy who corresponded to the myth of the wild man because he came from remote islands and, above all, because his face and body were “covered with a fine layer of hair, about five fingers long and dark blond in colour”, as a diplomat described him after his arrival in Paris. The king did not want to show him to the nobility as a mere curiosity and made him one of his own, freeing him from his “wild” side. He changed his Spanish name to its Latinised version, Petrus Gonsalvus, more in keeping with his new status. He was educated in Latin, the language reserved for the aristocracy, and instructed in the liberal arts, which ranged from grammar, rhetoric and dialectic to geometry, arithmetic, music and astronomy.
He married a beautiful Parisian woman named Catherine.
This song can’t be missed…
Interpretations of the story.
There are many ways of interpreting the tale of Beauty and the Beast. One of them symbolises the animality embedded in the human condition, a prince turned by sorcery into a wild or monstrous animal, who is redeemed by the kiss and love of a maiden.
It can also be interpreted as a girl’s coming of age and sexuality. Conceiving the love of her father, who adored her above all her sisters, as pure love, the girl perceives sexuality as perverse, and any man who feels sexual desire for her is a beast. Only when Bella is able to assimilate sexual relations as a human and adult can she achieve happiness.
Another interpretation could be a criticism of marriages of convenience: the union of a young girl with a man older than her, without her consent, could be the metaphor in the narrative. The story criticises these practices, but at the same time claims that, if women look inside their old husbands, they can find the kind being that hides behind the appearance of Bestia. Or that they themselves can achieve this transformation through their love.
The story can also be placed in a psychological context. For the Greeks and Romans, the rose was the symbol of pleasure, associated with luxury and extravagance. It represented the flower of love and romance. It highlights Bella’s love for her father, asking him to bring her a rose. When her father falls ill, it can be interpreted that Belle’s love is no longer for her father, but for the Beast.

Carrying out the Eternal Rose Cake, Beauty and the Beast.
This time I knew that the cake had to be beautiful on the outside and inside. I decided to make a cake inspired by the Neapolitan cake. A combination of 3 sponge cakes; vanilla, strawberry and chocolate. I decided to add a hint of caramel flavour to the latter.
The filling is a whipped ganache, the same one I used to make the Circus of Horror cake. Result is wonderful in terms of texture and taste. The outer decoration is a Swiss Meringue Buttercream with chocolate and caramel. It is a cream that I really like to decorate the outside of cakes as the finish it leaves is very clean, it is very easy to work with and allows you to create very varied designs with tips. Not to mention how stable it is and how well it stands up to the passage of time.
The cake is not very high as it simulates the table on which the Eternal Rose rests. For the top I decided to make a milk chocolate and white chocolate marble. Well, at least I tried to make it look like one!
And, the main protagonist, the Enchanted Rose. It’s funny that in the film the story revolves around it, but it doesn’t get as much attention from the viewer. That was one of the reasons I chose it. And that it is beautiful, of course!
You know I don’t like fondant…. I try to model all plastic chocolate or marzipan. To make the rose I used plastic chocolate. The red is bought and the dark chocolate is homemade. In this post I show you how to do it.
The final touch is given by the beautiful glass dome. It would have been nice to make it in isomalt, but it seemed too complicated! So I decided to buy it to finish decorating the cake.
I have to admit that I really enjoyed making this cake, a lot. I love being able to combine in the same process things that I love to do; cooking, creating, modelling, photographing, recording and editing the videos. Giving that magic touch to the elaboration to allow us to move them a little more to the moment and space that I show you.
I hope you enjoy it a lot!
Recipe Enchanted Rose Cake
Mould 18 cm diameter
VANILLA SPONGE CAKE:
- 150 g pastry/cake flour
- 90 g sugar
- 113 g unsalted butter at room temperature
- 113 g eggs, about 2 units
- 90 g whole milk
- 7 g baking powder
- 1 tsp vanilla extract
- pinch of salt
STRAWBERR SPONGE CAKE:
- 150 g pastry/cake flour
- 90 g sugar
- 113 g unsalted butter at room temperature
- 113 g eggs, about 2 units
- 90 g whole milk
- 7 g baking powder
- 1 tsp strawberry extract
- pinch food coloring paste, Claret color
- pinch of salt
CHOCOLATE CARAMEL SPONGE CAKE:
- 170 g pastry/cake flour
- 20 g cocoa powder
- 130 g sugar
- 2 large eggs
- 125 g Greek yoghurt
- 68 g unsalted butter, melted and cooled
- 5 g baking powder
- 1 tsp caramel extract
- pinch of salt
BLACK CHOCOLATE WHIPPED GANACHE:
- 175 g fat cream, very cold + 1 Tssp of icing sugar
- 65 g fat cream, warm
- 68 g 70% black chocolate
CHOCOLATE CARAMEL SMBC:
- 110 g egg whites, at room temperature
- 200 g sugar
- 260 g unsalted butter at room temperature
- 140 g black chocolate 70%
- 2 tsp caramel extract
- pearled sprinkles for decorating
MARBLE CHOCOLATE:
- 120 g milk chocolate
- 20 g white chocolate
ENCHANTED ROSE:
- 125 g red plastic/modelling chocolate (I bought this one)
- 50 g modelling/plastic chocolate (recipe at this link)
- ruby, green, white and bronze metallic powder colouring
- green and black flower sticks
- one wooden skewer
MATERIAL:
- round cutter, 4 cm in diameter, for making the petals
- cutters in the shape of a rose leaf
- piping bag
- wires, green and black, for flowers + 1 wooden skewer
- cake cutter for cutting the cakes
- silpat
- adjustable rolling pin
- tipse for decorating the outside: Wilton 67, PME 13, Wilton 199, Wilton 150 and Wilton 2
- Mould(s) 18 cm
- Glass dome for the rose (optional)
Instructions
FIRST DAY
Prepare the sponge cakes (vanilla and strawberry).
- IMPORTANT NOTE: I prepared the vanilla and strawberry sponge cake batter at the same time, but before adding the extracts and the colouring, I divided the mixture in two and, at that moment, I added the corresponding extracts to each one and the colouring to the strawberry one. But if you prefer, you can do it separately.
- Preheat the oven to 320ºF/160ºC with heat up and down.
- Grease with butter and sprinkle with flour, removing the excess, 2 moulds of 18 cm in diameter, set aside.
- Sieve the flour together with the baking powder and salt. Set aside.
- In a bowl add the eggs and the milk, whisk until the mixture is homogeneous.
- In the bowl of the KA or a mixer, add the butter and sugar. Beat at medium speed until a creamy, airy and white texture is achieved.
- Begin to integrate the dry ingredients, alternating them with the liquids.
- Add 1/3 of the egg white mixture and beat at the lowest speed for a few seconds. Stop, lower the mixture on the sides and add 1/3 more of the dry ingredients mixture. Beat again on low speed for a few seconds.
- Repeat the same process with the rest of the egg white mixture and dry ingredients mixture. Mix on low speed just until the mixture is homogenised.
- Divide the mixture into two equal parts.
- In the first half, add the vanilla in one of them and mix for a few seconds to integrate it.
- In the second half, add the strawberry extract together with the colouring and mix for a few seconds until fully integrated.
- Pour the mixture into two moulds, tap to settle and place in the oven at medium height.
- Bake for 40-45 minutes or until a toothpick comes out clean.
- Remove and leave to stand for 5 minutes in the mould.
- Remove from the mould and leave to cool completely on a wire rack.
- Once completely cool, wrap in plastic wrap and refrigerate until the next day.
Prepare chocolate and caramel sponge cake.
- Preheat the oven to 320ºF/160ºC with heat up and down.
- Grease with butter and sprinkle with flour, removing the excess, 2 moulds of 18 cm in diameter, set aside.
- Sift the flour together with the cocoa powder, baking powder and salt into a bowl and mix with a silicone spatula. Set aside.
- In the bowl of the mixer, add the sugar and eggs and beat with the whisk on speed 1 until whip.
- Add the yoghurt and mix again until the mixture is smooth.
- Replace the whisk with the flat beater and add the flour mixture. We do this in three batches, waiting to add the next one when the first one has been integrated. It is very important to mix only until the flour is integrated into the batter, not for longer because we will compact its texture.
- Finally, add the melted butter in a thin, continuous stream while mixing.
- Pour the mixture into the mould, tap gently to settle and bake in the oven for 40-45 minutes or until a toothpick inserted in the centre comes out clean.
- Take out, leave to stand for 5 minutes, unmould and leave to cool completely on a wire rack.
- Once completely cooled, wrap in cling film and refrigerate until the next day.
Modelling Enchanted Rose.
- To model the rose I used red plastic chocolate (bought) and homemade plastic/modellable chocolate, I left you a tutorial some time ago (you can buy it, if you prefer).
- Heat the red plastic chocolate in the microwave for 3-4 seconds. This will soften its texture and allow us to work with it.
- Place on a silpat and knead for 40-60 seconds, the aim is to achieve a homogeneous mixture as it is possible that there may be cocoa butter that has not been integrated.
- Roll out with the help of an adjustable rolling pin to a thickness of 2 mm. Let it harden a little.
- Cut 15 petals with the help of a round cutter with a diameter of 4 cm. I advise you to cut some more in case there is a mishap with any of them.
- In order to shape the petals we need to transfer a little heat. We can place them between a plastic or teflon sheet, or we can do it with our fingertips.
- We only refine half of the petals by sliding the fingertips over the petals. Do not do this too finely, otherwise the petals will crack when forming the rose.
- Form the central part of the rose by rolling the petal as shown in the video, without closing it completely.
- Overlap two more petals and roll up. As you place the petals, give them shape and movement before the chocolate solidifies again.
- We will place the petals, always inserting part of the first one into the last one. You can see this step better in the video.
- Once we have our rose assembled, cut part of the base as it will be very thick and shape it into a rosebud. Do this gently so as not to damage the petals.
- Create 3 loose petals to place on the base and simulate that they have fallen.
- Place a disc of black chocolate plastic on the base.
- Insert a support made of 4 strands of green wire into the rose. I intertwined several wires to make it stronger.
- Create the leaves coming out of the rose bud, I made them without a cutter, and attached them to the base of the rose.
- Place the rose inside a bottle and leave to dry for 24 hours.
- To make the petals, roll out the plastic (dark) chocolate to a thickness of 2 mm.
- With the help of rose leaf cutters, cut out the leaves.
- Texture the surface by creating marks on the surface and shape to give movement to the leaves.
- Leave to dry for 24 hours.
SECOND DAY
Make whipped ganache.
- Before we get ready to whip the cream, we must make sure of two things:
- The cream must be at least 24 hours in the fridge.
- The bowl where we put the cream must be cold. I recommend you use an aluminium one and put it in the freezer 20 minutes before preparing to whip the cream.
- Pour the cream (350 g) into the cold bowl and start to whip it with an electric mixer at speed 1.
- Once it starts to whip, add the sugar little by little and without stopping beating. We will increase the speed gradually but without ever reaching the maximum. The ideal is an average speed.
- Be careful not to over whip it or we'll make butter...
- Cover the bowl with film and refrigerate it until we use it.
- On the other hand, in a saucepan add 130 g of heavy cream and place it at medium heat.
- Leave until it reaches a gentle boil.
- Remove from heat, add the chocolate in pieces and mix until it is evenly mixed.
- Transfer the mixture to a large bowl and leave to stand for 20 minutes to lose heat.
- Add a little whipped cream and mix, making smooth and enveloping movements, with the help of a silicone spatula.
- Continue adding whipped cream, little by little, and integrating following the same process.
- Transfer to a smaller bowl, cover with film and refrigerate until use.
Make chocolate Swiss Meringue Buttercream.
- In a heat-resistant bowl, add the egg whites along with the sugar.
- Place on a water-bath at medium low heat. Stirring constantly, leave until the egg whites reach 165ºF/74ºC. For it we will help ourselves of a digital thermometer.
- Remove from the heat, pour the egg whites into the bowl of the KitchenAid or a stand mixer and whip at medium high speed until a firm and shiny meringue is obtained.
- Once we have the firm meringue, begin to add the butter cut into squares little by little and at the same time the mixer continues whipping.
- Once we have all the butter added, increase the speed and finish whipping.
- Stop, scrap the cream with the help of a spatula and add the chocolate and caramel extract.
- Whip again at high speed until the ingredients are completely integrated.
- Set aside.
Cut the sponge cakes.
- With the help of a cake cutter, cut one of the marbled sponge cakes in 3 equal parts. On this occasion, I recommend that you start at the bottom and, from there, proceed to cut the layers.
- With the help of two smooth cookie cutters, cut each layer of sponge cake into 3 circles of different sizes . The idea is to intersperse chocolate sponge cake with vanilla and strawberry sponge cake.
- Once we have all the discs cut and separated, we proceed to intercalate them.
- Take a big disc of vanilla and put inside it a medium disc of chocolate and one of strawberry.
- Repeat the same process with the rest of the sponge cakes.
- Cover with film and place in the fridge for 30 minutes.
Assemble the cake.
- Place an anti-slip at the base of the cake stand to fix the cake disc.
- Put the disc and a small amount of cream on it, this will help us to fix the cake.
- Place one of the cakes and press lightly. Make sure you put a sponge cake on the base that has the lower part of the base baked, as well as reserving the other one to put it on the top.
- Spread a layer of the chocolate filling and smooth it.
- Put another tricolor sponge cake and press slightly.
- Spread a layer of the chocolate filling and smooth it.
- Put the last layer of cake. Press carefully.
Cover the cake with SMBC.
- Spread the SMBC with a spatula over the entire surface and remove the excess with the help of an edge smoother. This layer will help us to "pick up" possible crumbs from the cake that could come to the surface when we decorate it.
- Refrigerate for 30 minutes for the SMBC to harden.
- Remove from the cold, place another layer of SBMC all over the surface, smooth out the excess and cool for 60 minutes.
- At this point, we can leave it refrigerated until the next day. In my case that's what I did.
- Cover the rest of SMBC with film and leave it at room temperature.
THIRD DAY
Create marble chocolate.
- Melt the milk chocolate on one side and the white chocolate on the other in a bain-marie.
- Pour the milk chocolate onto a silpat placed on a tray and spread lightly with a spoon.
- Create lines with the white chocolate and at the same time spread with the help of a pastry knife.
- Draw lines again and integrate with the rest of the mixture. You will see this step better in the video.
- Gently tap the tray on a work surface. In this way we not only help it to get a smooth surface, but we also expel any air bubbles and make the marble effect more beautiful.
- Refrigerate for 1 hour.
Cut the marble disc and place it on the cake.
- Cut the chocolate disc, using a cutter with the appropriate diameter or, as I did, a cake disc with the same diameter as the cake we have made.
- Place on the chocolate and cut with a sharp knife.
- Lift carefully and place on top of the cake. In case it doesn't fit well, we can place small amounts of SMBC on the top of the cake to fix the chocolate disc.
Decorate the cake.
- Put the SMBC into a piping bag with a small tip adapter. That way you can change tips several times without having to use many piping bags.
- Decorate the outside as I show you in the video, alternating different designs and types of tips. This will give a very vintage look. I follow the amazing designs by thepetitepudding.
- If desired, add pearl sprinkles to highlight some of the details.
- Refrigerate while we assemble the eternal rose.
We finished assembling the eternal rose.
- To create the stem of the rose I used green and black wire + a wooden skewer to give stability (the rose weighs 95 g) and to be able to insert it into the cake.
- I use the black wire to create an invisible effect in the background so that the rose appears to float.
- I attached the skewer to the first stem I created and wrapped several wires around it to bind it together. Don't skimp on using as much as you need in order to make the rose and the stand very stable.
- To attach the leaves to the stem, I placed wires alternately on the stem and then inserted the leaves by pinching them at the back.
- To give more life and volume to the rose, I painted the petals with ruby and bronze metallic powder colouring to give them a shiny look.
- The leaves were painted with metallic green and metallic white powder colouring to create glitter.
Place the enchanted rose on the cake.
- In order to prevent the marbled disc from breaking, heat a skewer and create a hole in it to insert the rose.
- Before inserting the rose, make sure that the height of the skewer does not exceed the height of the cake.
- Place the rose on the cake. I advise you to place the rose leaves once the rose is inserted in the cake.
- Arrange the 3 petals at the base of the rose so that they appear to have fallen off.
- Finally, place the glass dome over the rose.
- Enjoy!


Notes
- The baking time of each cake will vary depending on the size of the mould you use.
- Si no disponemos de extracto de fresa, se puede reemplazar por frambuesa o cereza.
- If we refrigerate the sponge cake overnight, we help the flavors ripen as well as facilitating the process of cutting the sponge cake. It crumbles less.
- The sponge cakes are not tall, so when you cut them with a cake cutter, you only have to remove the top and bottom with a flush cut.
- To make the modeling chocolate you can use chocolate for desserts, coating, black chocolate...
- Respect the rest time of the modeling chocolate to be able to work with it. If it is very cold, you can give it warmth with your hands or a slight heat stroke in the microwave (1 or 2 seconds).

- Remember to cover every piece of chocolate paste. When they are in contact with the air for a long time, they begin to dry out.
- The modeling chocolate can be stretched between two sheets of Teflon to work better with it. In addition it will help us to contribute final texture. If you do not have Teflon sheet, stretch it with baking paper or some material that allows us to work in this way.
- Follow all the steps to obtain a good SMBC.
- If we have SMBC left over, we can refrigerate it for 2 days or freeze it for 30 days.
- I used pearl sprinkles to give more detail to the outer decoration of the cake.
- To hold the rose I used a wooden skewer and green (to simulate the stem) and black flower wire (to blend in with the background). But you can do it in another way if you prefer.
- To cut the cake I advise you to heat a knife with a blowtorch. That way we melt the chocolate marble without breaking it and we will have very clean cuts and impeccable portions.
- To preserve the cake we must keep it refrigerated for 3-4 days.
- Ideally, before consuming it, it should be tempered for a while, depending on the outside temperature

I don't think I could find a better way to wish you a wonderful Valentine's Day this year than with this Enchanted Rose Cake, Beauty and the Beast. It is true that it is one of those creations that takes several days to get ready. But the moment you can taste it? My goodness, how marvellous!
I send you a big kiss and wish you a wonderful weekend!
Eva
Sources: Historia National Geographic, Wikipedia