Hocus Pocus Book Cookie {Tutorial Video}
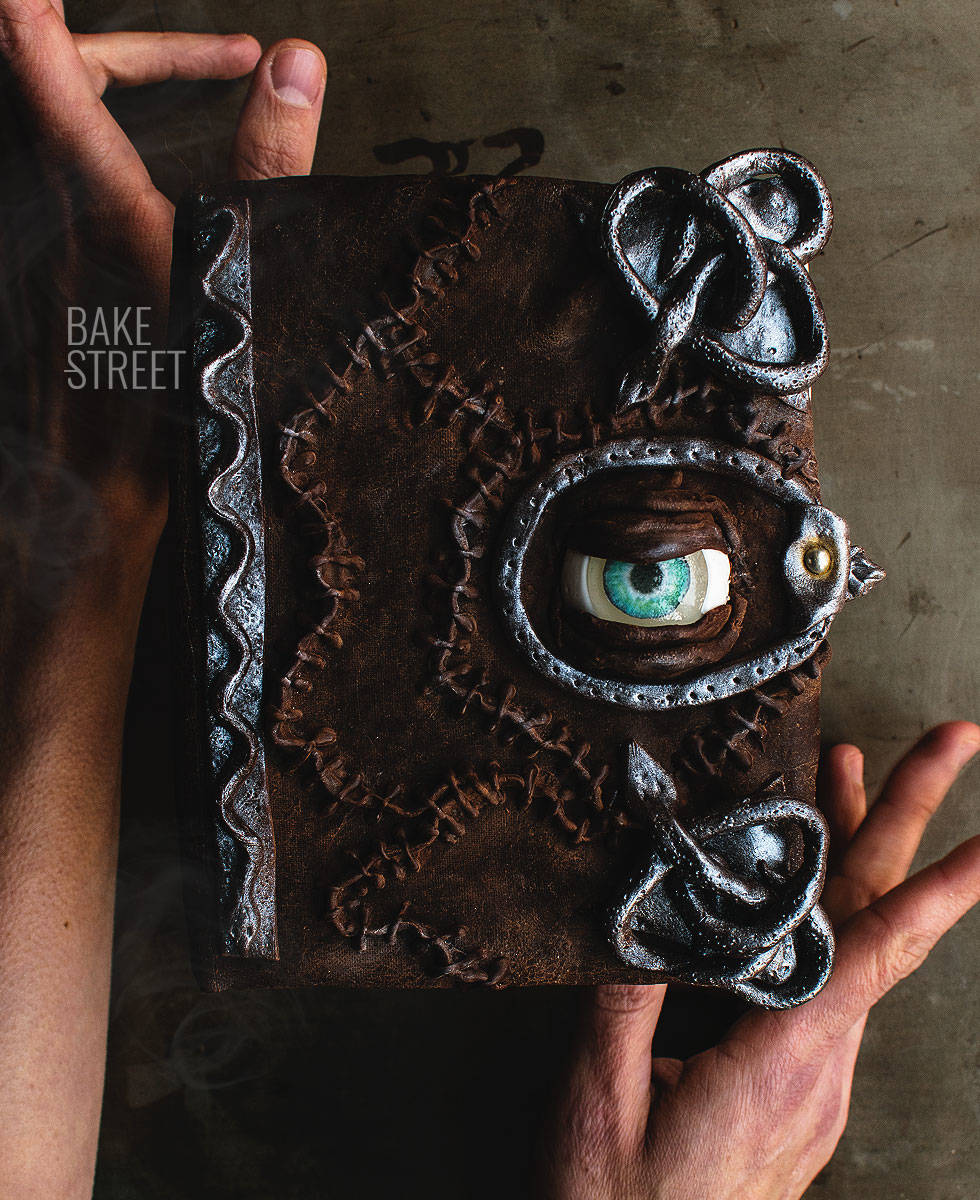
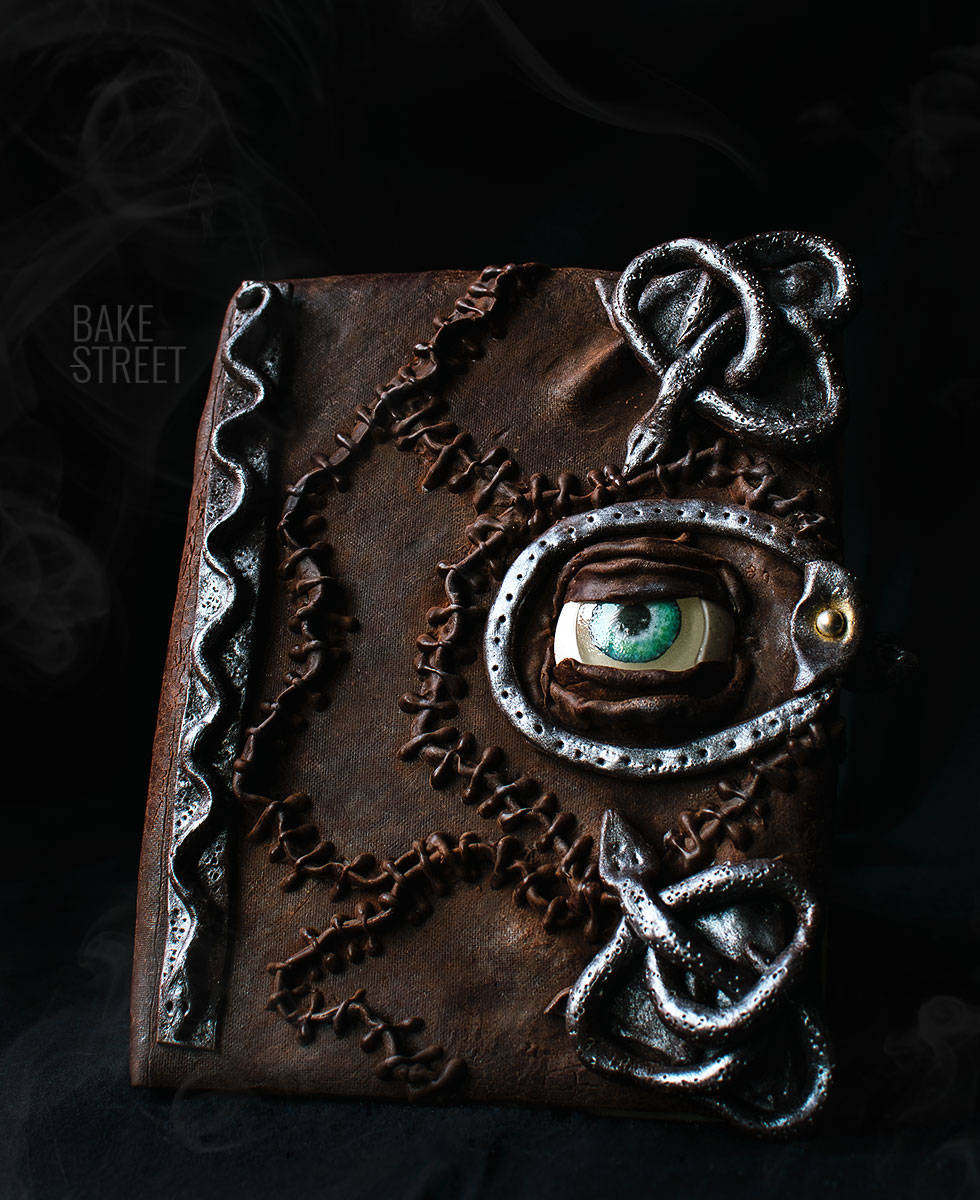
Today’s recipe has been totally unexpected, in fact I wasn’t planning to make a Halloween post this year. But things aren’t always as planned. I already had a recipe prepared and scheduled for today! But over the weekend I changed my plans. The fact is that this past Friday I had an idea when I saw some crafts from the Hocus Pocus book and I decided to do a test taking it to the edible format. First of all say that it is not made with fondant but with modeling chocolate.
It occurred to me to make a giant cookie from Winifred Sanderson’s Hocus Pocus book. Yes, as you might have guessed, this was my favorite movie when I was little. Ok, “Hocus Pocus” it’s still one of my favorites and we still see it at home from time to time. I’ve seen it a hundred thousand times, I could tell you the whole script by heart. And, of course, my favorite is Winifred Anderson. I adore her! – “Another glorious morning, makes me sick!” – . Only if you have seen the film, you can understand, hahaha.
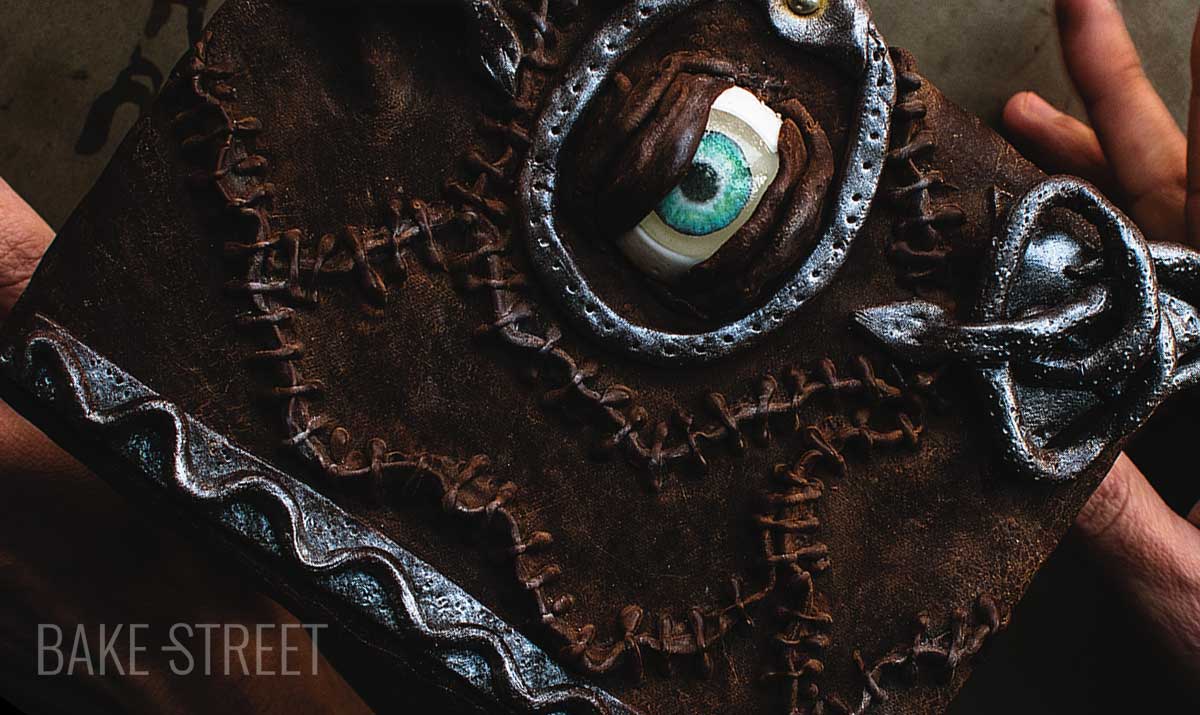
The litmus test to make this idea that came to me without me wanting it, were the eyes. If there is one thing that attracts attention in the book, it is the eye. It’s a pity that the one who left you can’t move… But at least it’s quite similar.
Looking for how to make an eye for the Hocus Pocus book.
The first thing you think about wanting to create the book is that the eye can be made with modeling chocolate. The idea is not bad, but I wanted to make something “more real and faithful” to its appearance. I wanted it to shine, almost like a toy.
So I decided to search Youtube for how to make edible eyes and I came across a wonderful tutorial. In fact, thanks to it I have been able to let you how to make this book. This was my litmus test. I had to recreate what this girl was doing at home.
Luckily I had isomalt, white dye powder (she uses liquid), silicone mold that could be adjusted to the size of an eye and a friend with a sugar paper printer. The most complicated thing was in my hand, now all that was left was to put it into practice.
The result was very satisfying, so I decided to make the tutorial to prepare this Hocus Pocus book cookie for Halloween.
Preparing all material.
I had the idea on Friday afternoon, so I decided to prepare the cookie dough and bake it just in case on Saturday morning everything went well with my isomalt eye. I got up very early and started to work.
I prepared the modeling chocolate, since it needed a few hours of rest, and I prepared the isomalt eyes. If something had gone wrong, I would have saved this chocolate for another recipe and the cookie… Well, I would have eaten it! 😉
In the video you will see that the process is quite simple to carry out, only that it requires time, patience and love. Modeling the book is like doing crafts, we need to devote attention and not do it quickly and running.
The material you will need to prepare the 6,1 inch x 4,7 inch (15,5 cm x 12 cm) cookie is as follows:
- Baking tray, two teflon sheets, adjustable roller and small roller
- Piping bag and 1 JEM tip
- Chocolate and Corn Syrup
- Isomalt, white dye powder or liquid
- Silicon mould 1,57 inch/4 cm diameter semi-spheres
- Sugar paper with 0,3 inch (1,8 cm) diameter eye print (you can google it to find websites where they sell it personalized )
- Brushes for food use, cocoa powder and dye gold and silver powder
Ingredients for one cookie
FOR VANILLA COOKIE DOUGH (for 1 cookie 6,1 inch x 4,7 inch/12 cm x 15,5 cm):
- 125 g pastry flour
- 80 g unsalted butter at room temperature
- 40 g icing sugar
- 3 g baking powder
- ½ tsp vanilla extract
- pinch of salt
FOR MODELING CHOCOLATE (1 cookie):
- 200 g black chocolate
- 100 g Corn Syrup
FOR ISOMALT EYE (4 pieces):
- 150 g isomalt
- 1/4 tsp white dye powder + 1 g water (can be replaced by liquid or gel dye)
- sugar paper with eye prints (these have a diameter of 0,3 inch/1,8 cm)
FOR COLORING AND DECORATING:
- silver dye edible powder
- golden dye edible powder + a small round silver candy ball
- cocoa powder
- 50 g black chocolate, melted
Instructions
Make vanilla cookie.
- In a medium bowl, sift the flour together with the icing sugar, baking powder and salt. Set aside.
- In a large bowl, it can be done by hand or in a kneading machine, beat the butter with the help of the flat beater until it is whitened.
- Without stopping beating, gradually add the icing sugar until a homogeneous mixture is obtained. Add the vanilla extract and mix again.
- Finally, add the flour little by little until you get a homogeneous mixture without any lumps.
- Remove the dough from the bowl and stretch it.
Spread biscuit dough.
- We will do it between two sheets of Teflon or oven papers, in this way we will avoid the dough adheres to the work surface and breaks when lifting it. We will use a roller of guides giving a thickness of 0,23 inch/6 mm.
- Put it in the fridge and let rest for about 2 hours. The colder and harder the dough is, the cleaner and more perfect the cuts will be.
- After that time, remove from the fridge and proceed to cut the cookie with a sharp knife. Make a 6,1 inch x 4,7 inch/15.5 cm x 12 cm rectangle, you can make it with a template made with paper.
- Place on a tray lined with Teflon sheet or baking paper. Place also the dough leftovers, they are delicious and there is no need to discard them :)
- Once the cookie has been cut, store it in the fridge for 1 hour.
Bake.
- Preheat oven to 355ºF (180ºC).
- Bake for 8-9 minutes.
- Remove from the oven and leave to cool completely before handling. I recommend you to bake it the day before decorating it.
Prepare the modeling chocolate.
- Add the chocolate in a water-resistant bowl and melt in a water bath.
- Remove from the heat and add the corn syrup. Mix very well until completely integrated.
- We will obtain a dense and slightly oily paste. Don't worry about the latter.
- Store the pasta in a freezing bag. Stretch lightly, remove all the air from inside and refrigerate for 2-3 hours.
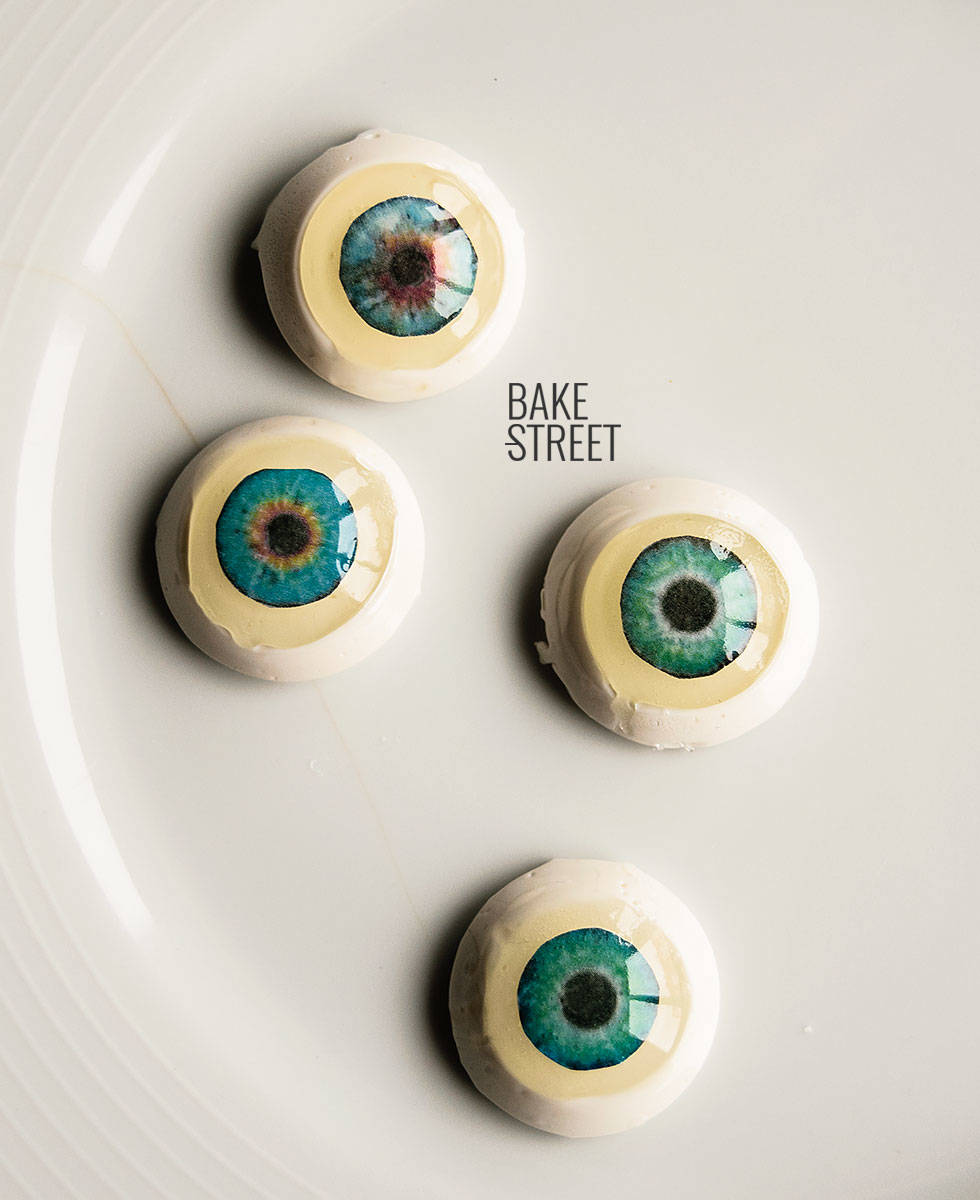
Make the isomalt eyes.
- Cut the eyes from edible paper, set aside.
- In a saucepan add the isomalt and place at medium heat.
- Leave until it melts completely, but without exceeding 320ºF/160 ºC since it would take a yellowish coloration. The perfect melting point, you will reach around 230ºF/110 ºC.
- Remove from the heat and pour a small amount into the silicone mould.
- Quickly, place the paper eyes into the isomalt. We will help ourselves of a stick to submerge them well and to place them.
- Let the isomalt cool completely.
- Dissolve the powdered dye with the water, mix very well.
- Our isomalt will have cooled down, so we put it back in the heat so that it acquires the right consistency again.
- Once it is melted again, pour the mixture of colorant and mix very well so that it integrates completely.
- Pour over the eyes, which have already cooled, and let them cool completely.
WORK THE MODELING CHOCOLATE TO DECORATE THE BOOK
Make the cover book.
- Take, more or less, 2/3 of modeling chocolate. The rest is kept in the bag to prevent it from drying out.
- Place inside a Teflon sheet and stretch with the help of a roller. Try to stretch the chocolate paste until it slightly exceeds the size of our biscuit. The dough should not be thick, but rather thin.
- Place the chocolate sheet on top of the biscuit and check the size. With the help of a knife, cut the surplus and adjust the size.
- Put some melted chocolate with the help of a piping bag and a 1 JEM tip, on the cookie. This will help us to fix the chocolate paste to the cookie.
- Place the book cover over the cookie and adjust.
- With the help of a long wooden stick, make folds in the corners (this part is better seen in the video).
- Finish adjusting all the edges so that it is perfectly fixed.
Make the book decorations.
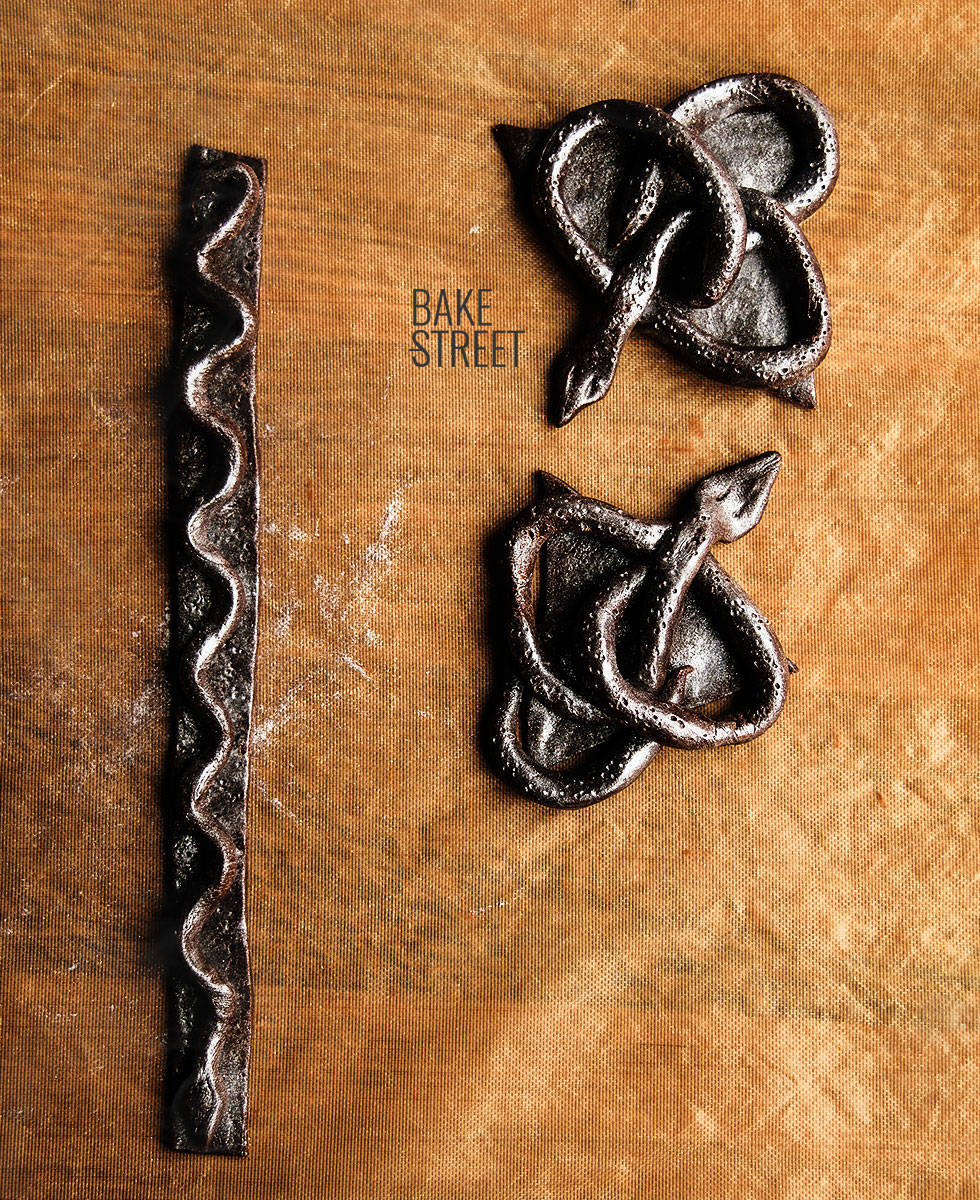
- In the video you can see how to make the 2 snakes that decorate the corners of the book, the central brooch and the side decoration.
- Once we have everything modeled, paint with powdered silver edible dye.
- Set aside.

Unmould the eyes and make the eyelids.
- Very carefully, unmold the eyes. You will notice that on the surface there are some bubbles and a slightly opaque coloration.
- Use a blowtorch on the surface of the eyes to remove bubbles. They will become very bright and crystalline.

- Let them cool for a few minutes to be able to manipulate them.
- Meanwhile, take a small portion of chocolate paste and begin to shape the eyelids. These must be very fine.
- Once they have cooled completely, decorate the eye with the eyelids.
Decorate the book.
- Place the snakes in the corners, press gently to fix them on the book.
- Put the lateral decoration, for it we will place 3 small amounts of chocolate paste and, on these, the elongated snake. Press gently to fix.
- Take a small amount of chocolate paste and place under the eye, press carefully on the book to fix it.
- To give a more "real" look, stretch a small amount of chocolate paste and simulate folds around the eye. This part is better appreciated in the video. Adjust well.
- Place the brooch around the eye, adjust carefully.
- To create the brooch´s button, place a ball of silver caramel and brush with golden dye powder.
Make the scars.
- To create the scars of the book, we will take small portions of chocolate paste, stretch very well and fold by the central part.
- Place on the book and carefully adjust on it. We will give shape as we place it.
- Once we have all the scars of the book, we will create the threads that cross them. For it we will use the chocolate that we have in the piping bag.
- Since time will have passed, the chocolate will have hardened. Place the piping bag inside a zipper bag and put it in a saucepan with water. Leave a few minutes in the heat until it melts.
- With the help of the same tip, create the threads on the scars.
- Let it cool completely.
Create shadows and brightness.
- Finish decorating the book creating shadows and shines. Use cocoa powder and white dye powder for this.
- Brush the scars, the threads and the eyelids. You can see this step better in the video.
- And... after all this work, we already have our Hocus Pocus book ready ;)
- Enjoy!
Notes
- I recommend you to leave the cookie baked the day before. That way it will cool completely and improve its consistency.
- To make the modeling chocolate you can use chocolate for desserts, coating, black chocolate...
- Respect the rest time of the modeling chocolate to be able to work with it. If it is very cold, you can give it warmth with your hands or a slight heat stroke in the microwave (1 or 2 microseconds).
- Remember to cover every piece of chocolate paste. When they are in contact with the air for a long time, they begin to dry out.
- The modeling chocolate can be stretched between two sheets of Teflon to work better with it. In addition it will help us to contribute final texture. If you do not have Teflon shhet, stretch it with baking paper or some material that allows us to work in this way.
- We must work fast with isomalt, hardens quickly.
- In case you can't have sugar paper with the impression of the eyes, you can always paint it on the transparent isomalt and then pour the white isomalt. Another option that occurs to me, but that will make them no longer edible, is to print them on normal paper. Only this will make the eyes can not be eaten.
- To give a brighter look to the eyes and get rid of the bubbles, we will heat them with the help of a blowtorch and with great care.
- The chocolate inside the piping bag will harden in a few minutes. To reuse it without removing it from the sleeve we will do the following. Place the sleeve inside a zipper bag and put it in a saucepan with water. Leave a few minutes in medium heat until it melts.

I hope you liked the idea of this Hocus Pocus Book Cookie and put it into practice for this Halloween! I, for my part, tell you that I will not let anyone eat this cookie since I have already put it in a bag and I have it on a shelf along with my other freak stuff, hahaha
I think it's the first time I've done something edible and I'm not going to eat it... I can say that I am very sorry to bite it, to break it or whatever! I'll keep it very well, although I'll probably do it again some other time. I really enjoyed doing it, but above all, having been able to share it with you in time.
This Friday there will be no publication due to the holidays, so see you again next Monday.
Big hugs and happy Halloween!
Eva
