Chocolate spiral cookies
For some time now you have been asking me for a recipe for eggless biscuits so that you can make your little ones intolerant of this ingredient. The truth is that when I saw these beautiful and wonderful cookies, I didn’t doubt for a moment that I would make them. Not only because of how beautiful they are… Well yes, they are beautiful! As soon as I could, I started to prepare these chocolate spiral cookies eggless.
The fact is that finding the recipe for the biscuits has not been easy… The shaping I saw it in a IG profile, from there I came to Youtube videos, but between that the translator of Google did not translate me very well the texts in the different languages and that the quantities of the ingredients were quite inaccurate (for example, flour, all the one that admits…) I had to search and try until I found a result that worked.

Patient.
If there’s one word that can define these cookies, it’s patience. The process itself is quite simple. A cookie dough that we can mix in the stand mixer and does not even need time to rest. Then we only have to divide the dough into 3 pieces and color 2 of them with cocoa powder in different shades. So far so good.
What is the laborious part? Making little balls.
Yes, believe me when I tell you that you will be cutting and shaping pieces of cookie dough for a while. It’s not a laborious thing to do, but you have to do it in a moment of the day that you know you can be calm modeling. Maybe it can be a wonderful excuse for your children to help you and keep them entertained.
Once we have all the dough made pieces, we will have to form a ring of 6 pieces using 2 of each color. That way we’ll be able to create a much more attractive spiral. Of course, it goes without saying that if it’s too tedious for you to dye two doughs, you can only make two colors. The white and cocoa, I leave that to your choice.

Now comes the part where we create the spiral by joining all the pieces together. A simple gesture like spinning the dough between our hands, but that won’t always give us that precious spiral. In my case, there were some of them that turned too much or that integrated the colors too much… In any case, they were just as rich as the ones that were beautiful. So if any of them don’t come out, there’s nothing to worry about. You have a lot of opportunities to do it (between 25 and 30 more or less! 😉 )
Decorating our cookies.
All the versions that I have found of this type of cookie, left them as they came out of the oven. If you wish, you can do it too. But I wanted to add some more things, not only to decorate them but also to provide more flavors and textures.
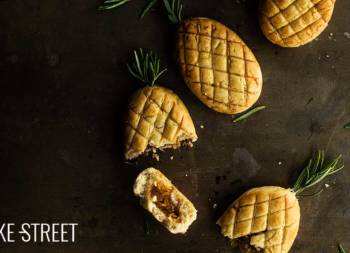
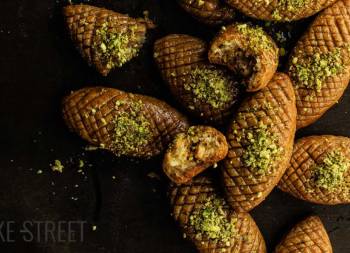
I decided to bathe the base of each cookie with 70% dark chocolate, which can be milk chocolate, white or the one you like best, and decorate them with almonds and grated coconut. The result is extraordinary, in fact the biscuits are even richer from one day to the next. It not only improves the taste but also the texture of the biscuit.
Ingredients for 25-30 pieces
FOR THE DOUGH:
- 125 g unsalted butter at room temperature
- 65 g icing sugar
- 45 g cornstarch
- 250 g pastry/cake flour
- 53 g sunflower oil
- 1 tsp vanilla extract
- 1 tsp baking powder
- pinch of salt
- 2 tsp + 5 tsp unsweetened cocoa powder
FOR DECORATE:
- 125 g 70% black chocolate
- fried almonds with cinnamos (70 g raw almond + 1 y 1/2 tsp icing sugar + 1/2 tsp cinnamon powder)
- grated coconut
Instructions
Cook the almonds.
- In a large frying pan, add the almonds along with a tablespoon of olive oil and place on medium heat.
- Cook until lightly golden browned and fragrant.
- Remove from heat and blend until a slightly thick texture is obtained.
- Add the sifted icing sugar and cinnamon, mix to homogenize.
- Transfer into a bowl and let it cool completely.
Make the cookie dough.
- Sift the flour together with the baking powder on one side and the cornstarch on the other. Set aside.
- In the bowl of the stand mixer incorporate the butter and beat with the help of the flat beater at speed 1 until a creamy and aerated texture is obtained.
- Add the icing sugar and mix again.
- Add the cornstarch together with the salt and mix until it is completely integrated.
- Start adding the flour little by little as we mix. We will do it in batches. If necessary we will stop the kneader to lower the dough from the sides.
- Once we have a compact dough, soft and with the texture that I show you in the video, dump on a clean work surface and knead until amalgamate completely. We must obtain a soft dough to the touch and modelable.
- Divide into 3 equal pieces, make a ball with each of them and cover with film to prevent it from drying out.
Add cocoa powder.
- Take one of the reserved pieces, place in a bowl and add 2 teaspoons of cocoa powder.
- Mix very well making sure that the cocoa is distributed and completely integrated over the whole surface of the dough.
- Make a ball and cover again with film.
- Take another of the pieces, place in the bowl and add 5 teaspoons of cocoa (more or less). I recommend you to add 3 the first time, knead very well and add the other 2 in different batches. That way you will be able to work the dough well, as well as observe the final color.
- It is likely that this second dough will end up being drier, in that case add 1-2 teaspoons of sunflower oil and knead very well to integrate.
- All the pieces must have the same consistency to be able to shape the biscuits without problems.
- Once it is ready, make a ball and cover again with film.
Divide the dough.
- Take the white piece and divide into 2 parts, more or less equal.
- Roll on the table trying to form a strip with it and cut into pieces. The size must be something bigger than a hazelnut. Don't worry if one piece is a little bigger than the other, that´s ok.
- Make balls with each of the pieces and covered with film to prevent drying. It will take a while to form all the balls.
- Stretch the other white piece, cut, divide and make balls.
- Repeat the same process with the other two doughs that we have reserved.
Shape the cookies.
- For each cookie we will need 6 balls of dough, 2 of each color. We will place them alternating the range of color; white, light brown and dark brown.
- Place them in a circle, press gently to join them and then lengthen the top very slightly. You will see this part better in the video.
- Take the piece, place between both hands and roll gently. In this way we will create the spiral in the cookies.
- Flatten lightly, place on a table or tray and repeat the same process with the following ones.
- Once we have all the cookies ready, refrigerate for 30-40 minutes before baking.
Bake.
- Preheat oven to 320ºF (160ºC).
- Bake for 20 minutes.
- Remove and leave to cool completely on a rack. Be careful because they are very delicate freshly baked.
Decorate.
- Melt the chocolate in a water bath and pour into a bowl.
- Fill another bowl with the almond and another with the grated coconut.
- Dip one of the biscuits in the chocolate bowl, we must bathe only the base.
- Carefully remove, drain and place in the almond bowl. Make sure that all the chocolate is covered with almonds.
- Remove and place on a board or tray lined with baking paper.
- Repeat the same process with the rest of the cookies. Alternate the decoration between almond and coconut.
- Once they are all decorated, let the chocolate harden at room temperature for 40-45 minutes.
- Serve.


Notes
- It is probable that the darkest cocoa dough will end up being drier due to the addition of cocoa. In that case add 1-2 teaspoons of sunflower oil and knead very well to integrate.
- The texture of the three doughs must be the same or very similar in order to form the cookies.
- I recommend that you refrigerate the cookies before baking to help them maintain their shape during baking.
- In case you don't want to create a cookie of three shades, you can divide the dough in two and dye only one of them with cocoa.
- Decoration is totally optional, you can even leave the cookies as they come out of the oven without having to bathe them in chocolate or cover them with nuts.
- The texture of the cookie is crunchy and buttery.
- We can keep them for 15 days stored in an airtight container or refrigerated if it is very hot.


These Chocolate Spiral Cookies are the perfect biscuits to accompany your coffees and teas of the weekend. What's more, here they predict a rainy weekend, undoubtedly the ideal environment to start preparing wonders in the kitchen.
I hope you have a wonderful weekend, enjoy it a lot and rest. See you on Monday!
Big hugs,
Eva