Pain Brié, Norman bread
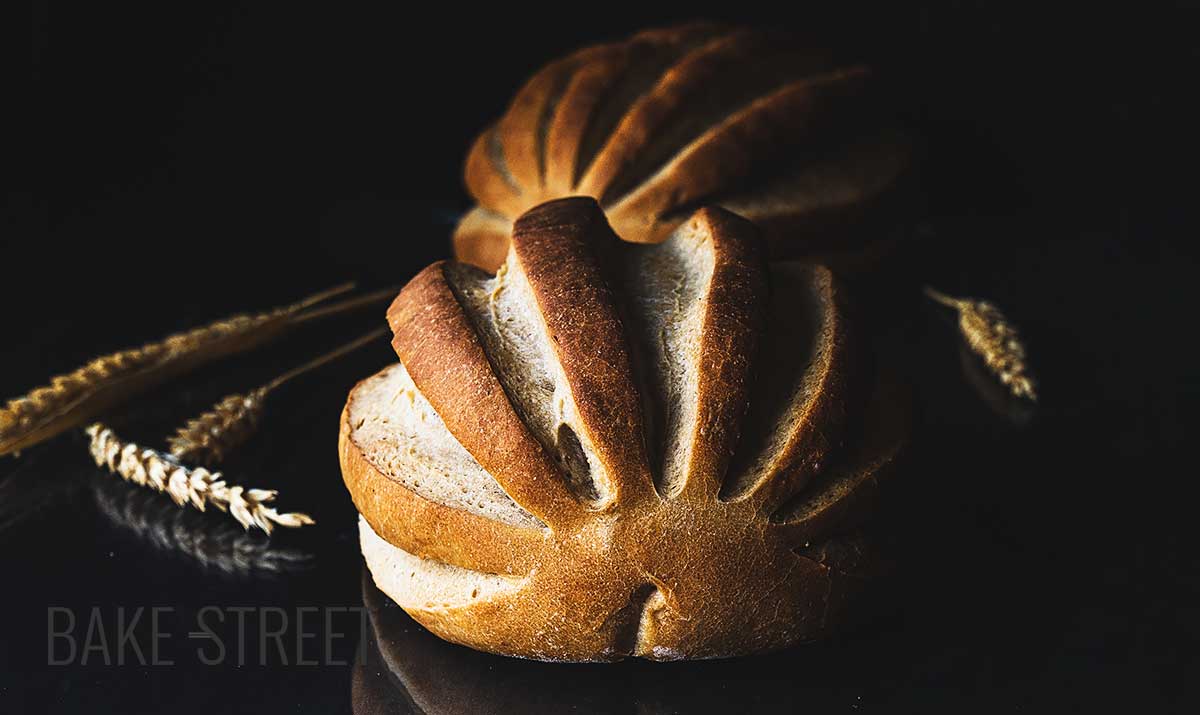
If there is a bread that is aromatic, soft, with a texture and flavor that will pleasantly surprise you (without adding sourdough) that is, without a doubt, Pain Brié. I can assure you that it is a bread worth the effort to make and try. Don’t be fooled by appearances… It is possible that when you see its crumb, of dense and tight consistency, you think that it is a hard bread and not very pleasant to eat.
Nothing beyond reality, it is a bread that will make you fall in love. The first thing you will notice will be its fascinating aroma, sweet and with notes of butter. Yes, there’s butter on it. But also the texture, soft, tender… Even the crust. And as if that weren’t enough, it keeps in perfect condition for two or three days.
Pain Brié origin.
It is a bread of French origin, concretelly from Normandy. Its name comes from the beating that the dough receives during its kneading/refining process, “brie“. It is derived from the old Norman French, the verb “brier” which means “to beat“. According to Richard Bertinet, the term Brié is believed to come from an ancient tool that was used to beat the dough.
The preparation of this bread is carried out with a long kneading process that develops the gluten. The result is a bread with a tight crumb, but with a soft and spongy texture. It is said that this bread used to be given to fishermen and sailors.
It may remind us a lot of Candeal bread, but they have nothing to do with it. Both are low hydration breads with a dense and soft crumb, but when it comes to making them, their procedures are completely different.
Pain Brié is made with a high percentage of pâte fermentée.
Pâte Fermentée is a preferment, based on a French bread recipe, which is left to rise and then rest overnight in the fridge or at room temperature, depending on the outside temperature.
Once made, this preferment can be kept in the refrigerator for 3 days to be used in doughs.
The function of the pâte fermentée is to ferment the freshly made dough more quickly. This will bring fantastic flavours and aromas to our bread, unlike if we do it with a direct method. That is, by adding the yeast directly to the dough. This preferment can be used not only for this bread, but we can also use it to make a wide range of breads or doughs such as pizzas, focaccias… By using a preferment we will always prolong the useful life of what we make.
This preferment is the same formula that is used to make the baguette, only it is left to ferment overnight to mature the aromas and flavors. Remember that when the hot weather comes, we must refrigerate it to avoid it becoming over fermented. As a curiosity, know that this is the only preferment that uses salt in its formula.
Making Pain Brié.
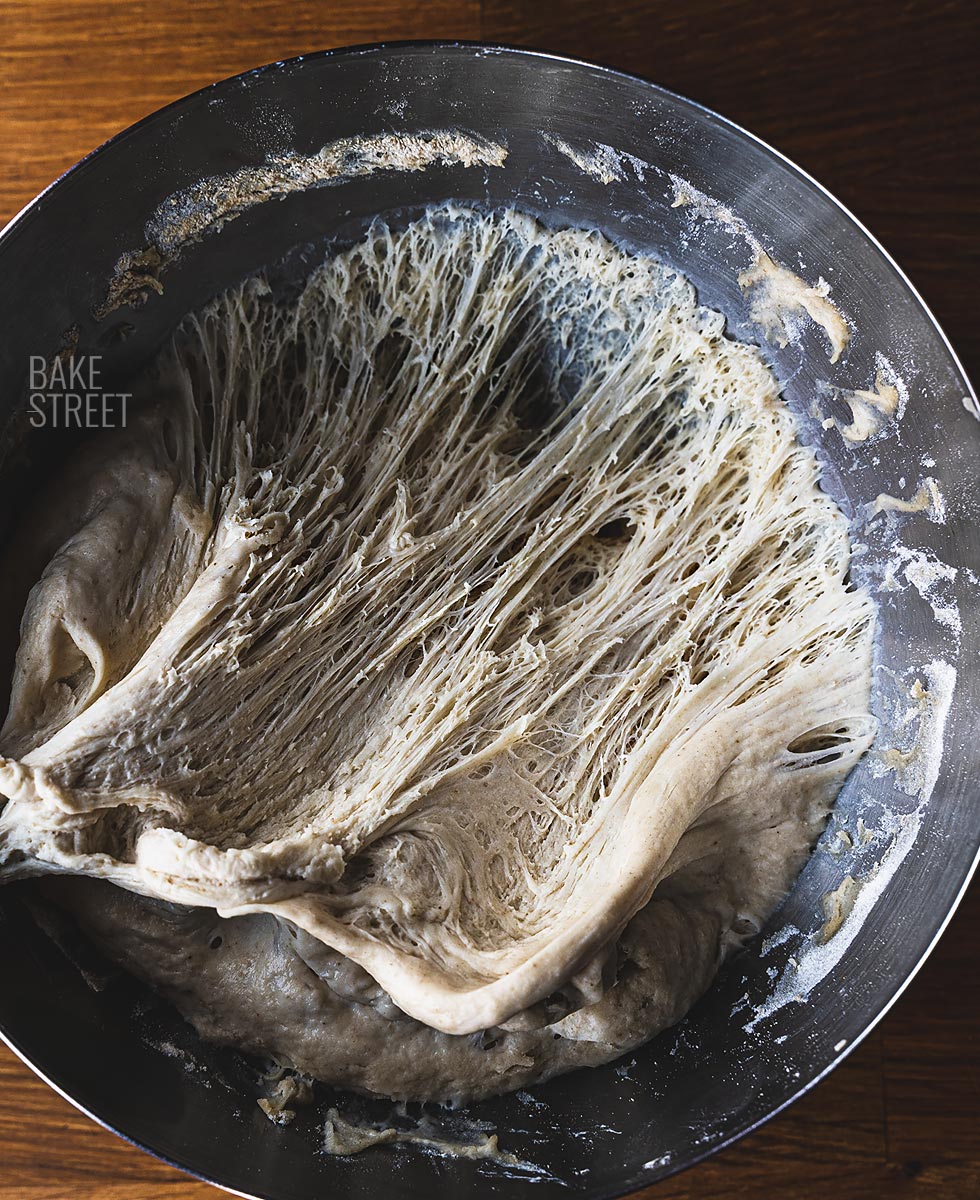
In my case, as you will see in the video, I do not beat the dough to carry it out. On the contrary, what I do is knead a lot and combine it with rest. That way I can develop the gluten into a smooth dough.
It’s true that its hydration is not as low as candeal bread, even if it’s very low, and it allows us to work the dough in this way. The recipe I leave with you is based on the Pain Brié from the book “Le Grand Livre de la Boulangerie“. In my case I have modified the type of flour, since this bread is made with a T65 and some small variation in the final hydration.
To shape the bread we will make a batard. In the video I show you two ways to do it so that you can make the one you prefer or it is easier for you. It is a type of bread that must have a short fermentation before going to the oven, for two reasons:
- That way we can score the bread more easily without it losing strength and/or becoming deformed.
- The result will be more voluminous and the cuts will open much more during the baking.
Baking.
To bake the pieces we will do it with steam during the first minutes. In this way we favour the expansion of the steam without sealing it, obtaining a bread with less volume. And we will finish with a baking without steam that will leave us a golden bread.
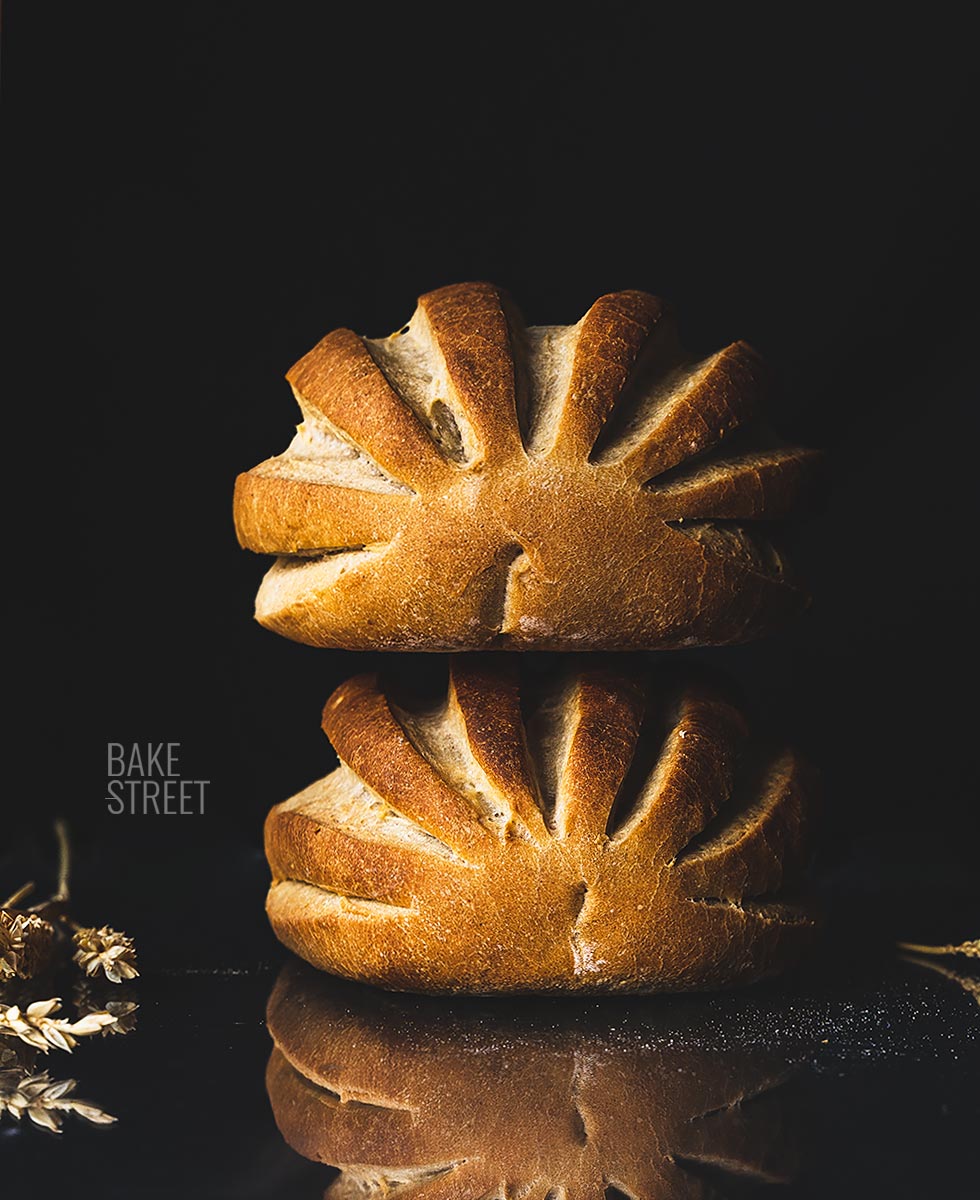
The result is a very spongy and soft bread, accompanied by a firm crust, but not crunchy like sourdough breads that we are used to making. Its texture is more similar to candeal bread. The taste… is a thing of another world, as is the aroma. You’ll fall in love.
Recipe Pain Brié
Ingredients for 2 pieces, 500 g
FOR PÂTE FERMENTÉE:
- 450 g bread flour
- 270 g water
- 1,5 g dry yeast
- 8 g salt
FOR THE DOUGH:
- 690 g pâte fermentée
- 250 g bread flour
- 65 g water*
- 45 g unsalted butter at room temperature
- 1,3 g dry yeast
- 4,4 g salt
* If we use a flour with less strength, we must reduce the amount of water. Initially add 20 g and rectify, little by little, while kneading. Observing the final consistency of the dough not to exceed the final hydration.
Instructions
NIGHT BEFORE (23:00 pm)
Prepare pâte fermentée.
- In the KitchenAid bowl, or we can mix everything by hand, add all the ingredients and mix with the hook at speed 1.
- You should not develop gluten or do intensive kneading, just mix until no dry ingredients remain.
- Cover the bowl with a shower cap or film and leave it to stand for 10-12 hours at room temperature. In my case 70ºF/21.5ºC.
- In summer we will do it differently. Once we mix the ingredients, we let it stand at room temperature until it grows 1/3 of its volume and we refrigerate it until the next day.
NEXT DAY (9:30 am)
Make Pain Brié dough.
- In a large bowl add 690 g of pâte fermentée along with the flour, water and yeast. Mix until you get a homogeneous dough.
- Add the salt and mix again until it is integrated.
- Finally, add the butter and knead to integrate it and develop the gluten.
- It is a dough with low hydration, not as much as candeal bread, but not as comfortable to work with as a dough with 65% hydration. So, in order to carry out the kneading without suffering too much, I recommend you to knead combined with rest time to make it more bearable. Remember to cover the dough at each rest because it dries out very easily and the surface can be crusted.
- Knead until you get a dough with a smooth and soft surface.
- Once the dough is perfectly developed, cover it and leave it to rest for 15 minutes.
Divide and preshape.
- Divide the dough into two equal pieces, about 515 g each.
- Preshape each piece, remember to place the possible dough leftovers in the center and do not exert too much tension. Preshape gently.
- Cover with film and leave to rest for 15 minutes.
Shape and make final proof.
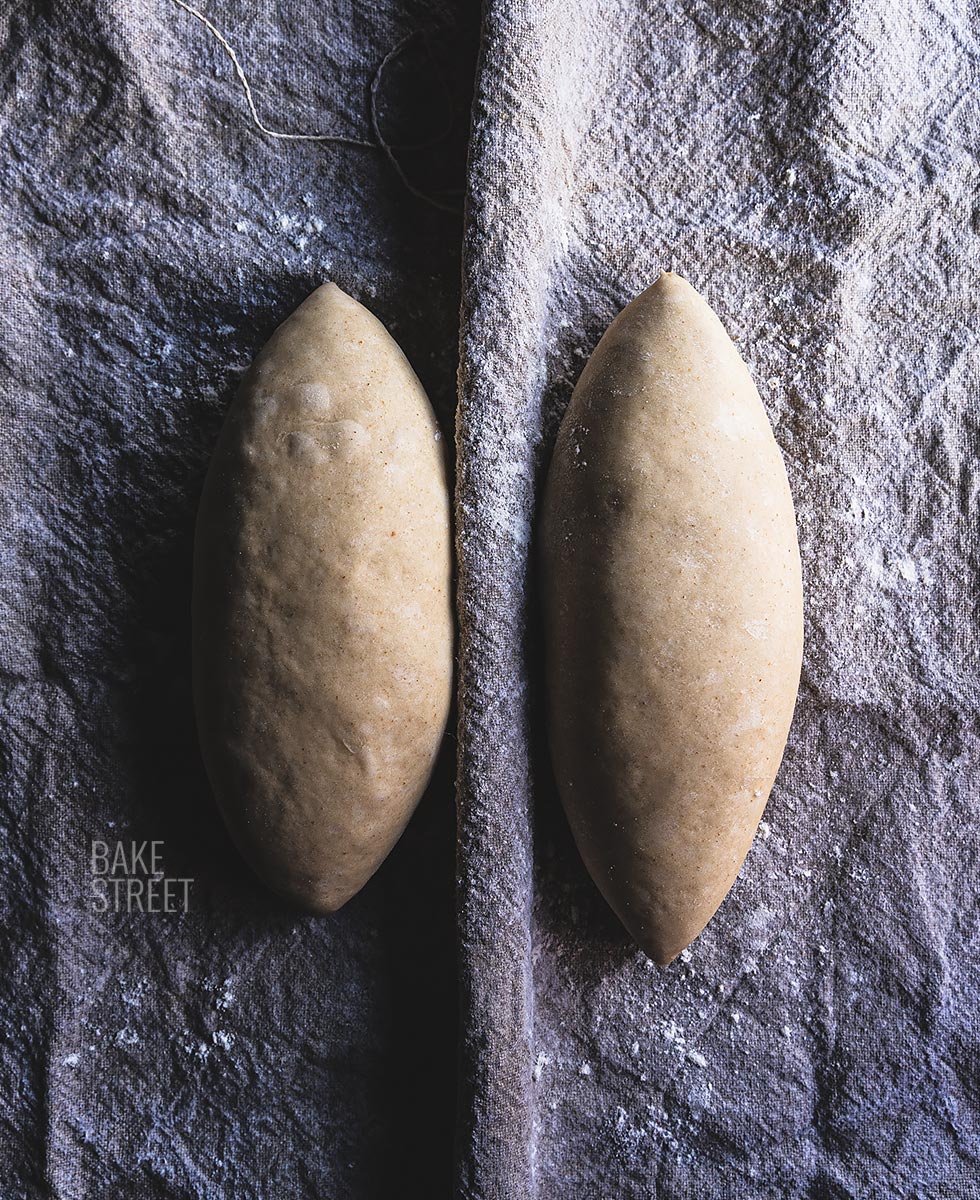
- Take one of the pieces and shape it into a batard. In the video I show you 2 ways to shape batards, although there are many. I have shown you two of the ones that I think are very good for the hydration of the dough and the finishes that we want to get in the ends of the bread.
- Put the piece on a linen, slightly sprinkled with flour.
- Repeat the same process with the other piece and place it on the linen. To separate both pieces, we will create a fold with the linen itself.
- Cover with film, it is a dough that dries very easily, and with the linen.
- Let it ferment for 90-120 minutes. In my case they were 2 hours at 73,4ºF/23ºC, but the final time of fermentation will be marked by the outside temperature.
- It is a bread that must enter a little short of fermentation, like candeal bread. The volume should almost double.

Bake.
- Preheat the oven to 445ºF/230ºC.
- Place the tray, stone or steel plate in the lowest part of the oven and a container/tray with volcanic stones that we will place inside since we turn on the oven, this way they will also take temperature. We can place them under the plate that we bake or just on one side of it, leaving space for the bread. The ideal is to preheat from 30 to 40 minutes before.
- Five minutes before placing the bread in the oven, heat water (a little more than half a cup), we can do it in the microwave.
- Put the bread on a wooden board lined with baking paper. To move the piece we can help us with a scraper.
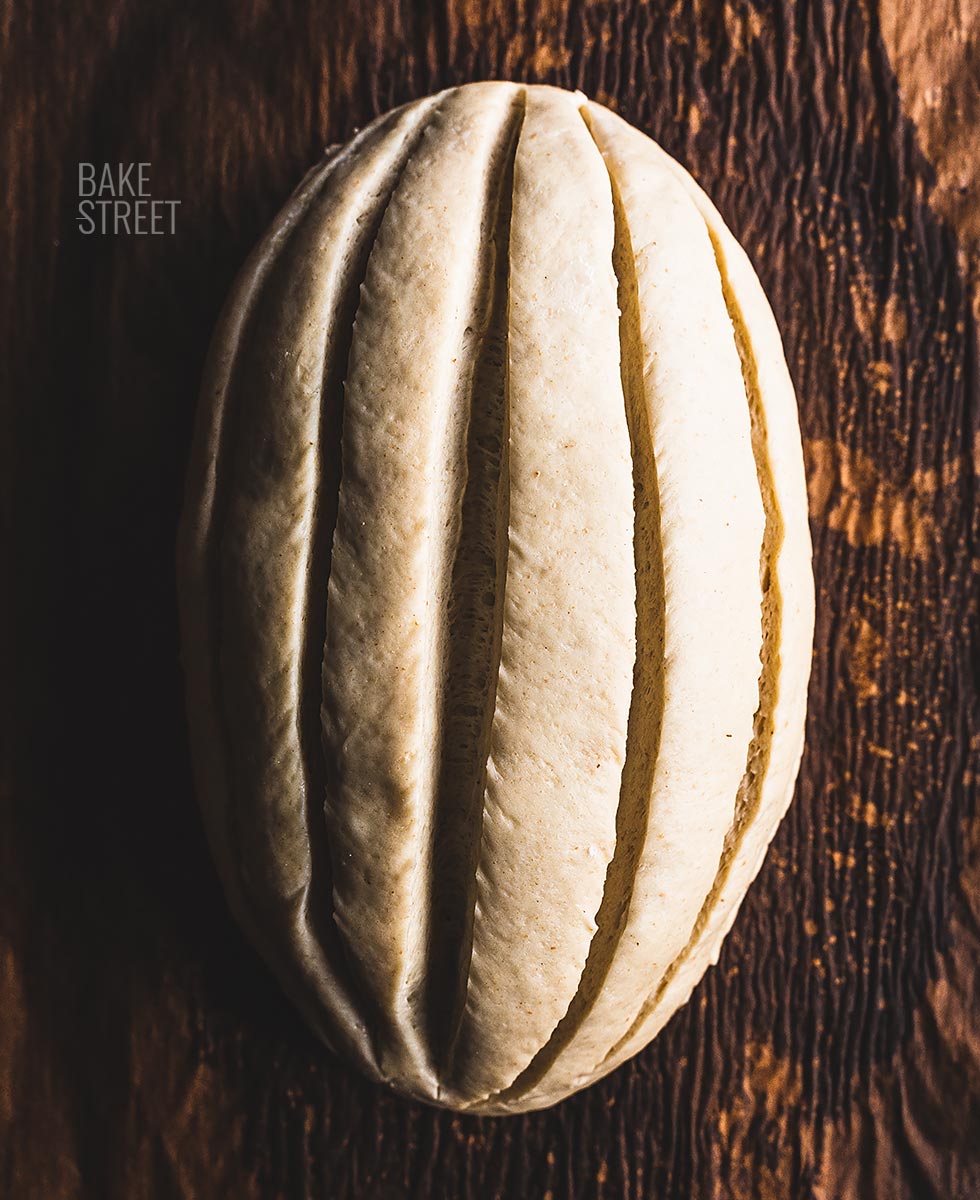
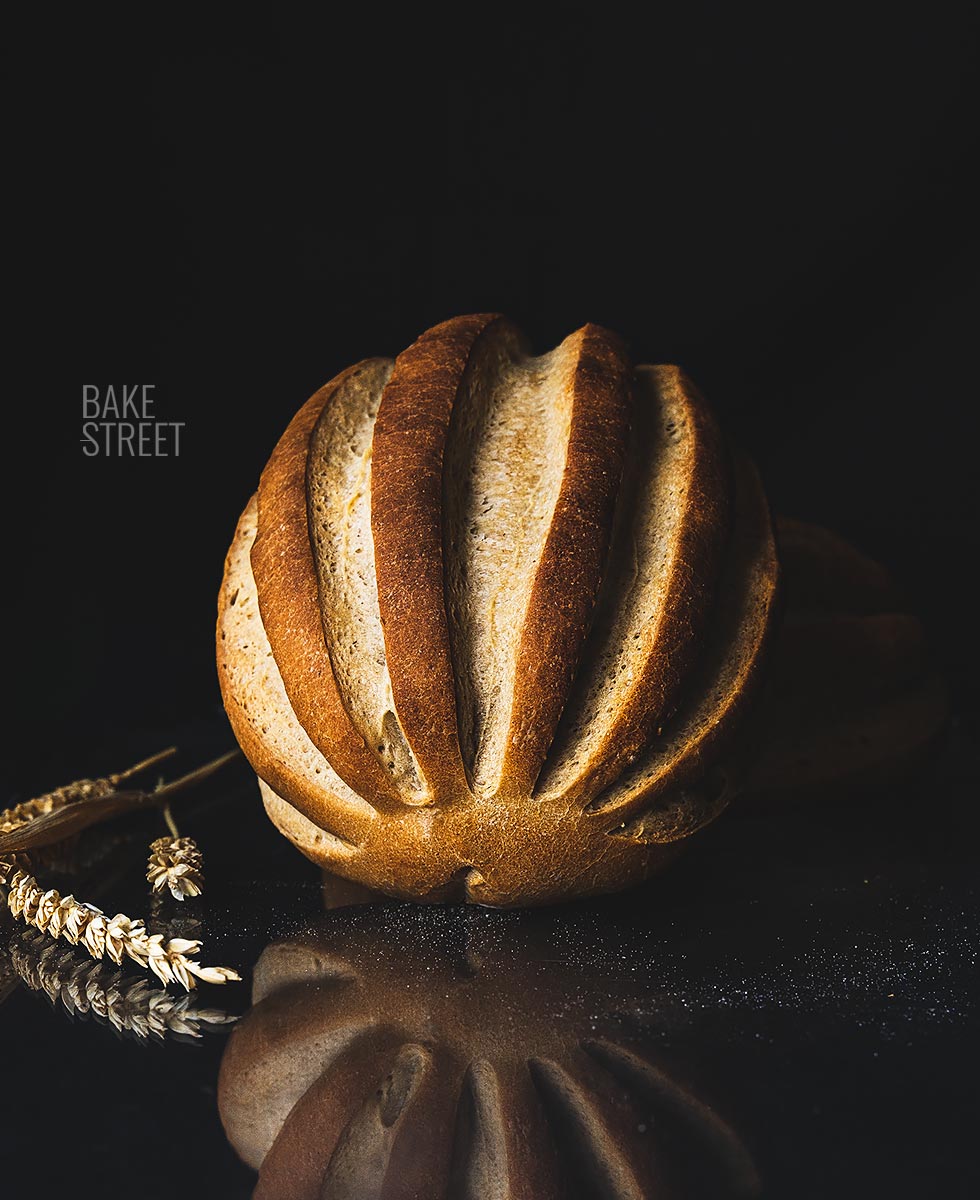
- With the help of a blade, make a central and vertical cut that goes from one end to the other of the bread, from one end to the other.
- Now we must make 3 parallel cuts on each side of the center cut.

- We can moisten the blade to help it slide well into the dough.
- The cuts should be deep, not superficial because our purpose is to open the bread. For this same reason it is important that the hydration of the bread is not high and that it enters short of fermentation.
- Place the bread in the oven helping us with the wooden board (sliding the bread on the steel) and pour boiling water on the tray with stones, close the door. We must try to do it as soon as possible so as not to lose the interior temperature of the oven.
- Bake for 10 minutes with heat only below and steam, we turn off the top resistance*. By turning off the heat at the top we favour the expansion of the bread and prevent the crust from sealing up prematurely. We will obtain a bread with great volume.
- After these first 10 minutes, open the door slightly to release all the steam from the inside, being very careful not to burn yourself, we take out the tray/container with stones and close the door again.
- Bake for 15 minutes more to 428ºF/220ºC with heat up and down.
- Take the pain brié out of the oven and let it cool completely on a rack before cutting it.
- Bake the other piece, although this type of bread can be baked together due to its small size.

Notes
- Pain Brié is originally made from T65 flour, a type with 9% protein that is usually used to make baguettes. In my case I didn't have this type of flour and instead used a flour with a strength W=200. For that reason, I had to slightly modify the final hydration. you can use bread flour.
- Pâte fermentée, in the summer, will rise much faster. I advise you to leave it at room temperature until it has grown by 1/3 of its volume and then refrigerate it until the next day. Before using it for baking, we should temper it for 1-2 hours.
- The amount of yeast we use may not seem much to you. But keep in mind that we are adding a lot of dough, previously fermented.
- Remember that for every gram of dry yeast, 3 g of fresh yeast are used. If you use the latter, you must increase the amount.
- The quality of the butter will always influence the final taste.
- Kneading is less laborious than when we make candeal bread. I recommend you to do it by hand because as it is a low hydration bread, the kneading machine (the ones we usually have at home) do not give good results.
- It is important not to exceed the final hydration, otherwise the bread will lose its shape when scoring.
- The cuts should not be superficial, but rather should be deep (without exceeding). We want the bread to open up (oven spring) during baking.
- It is a bread that must enter the oven short of fermentation to encourage it to open well. In this case we are not looking for a honeycombed crumb, on the contrary, it is tight, but soft and tender.
- It can be kept in perfect condition for 2-3 days wrapped in film or in a zip-lock bag. Although the ideal is to consume it during the day.
- It can be frozen, sliced, and defrosted in the toaster.

I can assure you it's worth the effort we have to put into making this Pain Brié. For me, it's definitely one of my favorite breads.
As I mentioned above, it is a combination of taste, aroma and texture. It can almost remind us, vaguely, of brioche thanks to the addition of butter. Of course, the better the quality of the butter, the better the aroma and taste of the bread. Even if you have a good quality butter within reach, you can still make your own homemade butter. Not just to make the bread, but to enjoy it later.
Accompanied by bitter orange jam is a real delicacy... And with Bourbon apple butter, wow!
What I'm going to tell you is that you don't already know... I can't wait to see your breads and tell me about your experience!
I wish you a wonderful Sunday!
Big hugs,
Eva
Sources: La Chef Panadera
This post contains affiliated links
