
Wheat Spike Bread
I had long wanted to make a Wheat Spike Bread. I find it so beautiful and striking that I don’t know how I haven’t thrown myself with it before… Well, I do. I don’t have enough hours in the day to do everything I want! So I’ve finally brought it to you and, besides, I’ve made a video so that you can see in detail how to make them at home. These are always of great help depending on what processing.
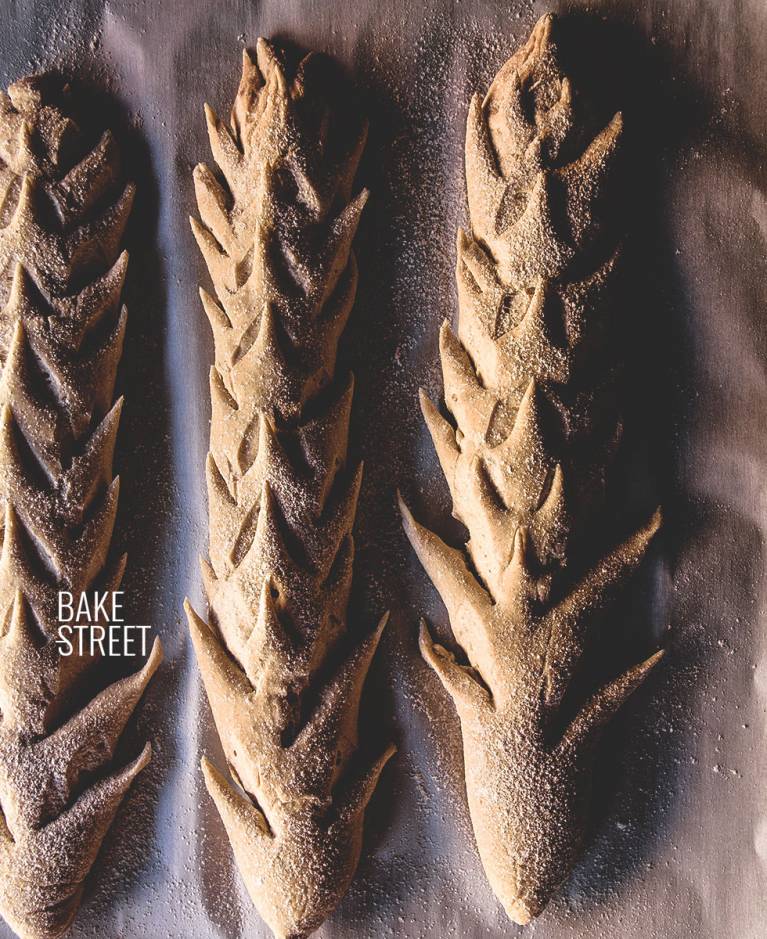
This bread is made with the same dough that we would prepare to make a baguette. Like the shaping process, we will follow the same steps as when we made this variety of bread. The difference, in this case, lies in the final appearance that we will give it by providing cuts along its surface to simulate a spike.
This wheat spike bread can remind us of epi bread, but this is something different, especially when making the cuts to score it. But in the end, the process is still the same.

Going beyond….
One day watching Pinterest… – said this way it seems that I use it every now and then, but no, I visit it every day and several times! I was looking at boards, pictures… and I got epi breads. Of course, as you can imagine, I felt like doing it and I kept some photos because I would know that I would do it soon.
At first they were going to be epi breads, but since it happens to me many times, I changed it on the fly. It’s not an easy scoring, but it’s worth giving it a chance to feel like “baker sculptors”. In the end we know that the result is going to be good, because the bread will be.
Should I take anything into account when I’m getting ready to cut this bread?
Yes.
When we score/cut a bread, we do it for a purpose that goes beyond making explosive and beautiful bread. What we do is direct and guide our bread so that it “explodes” where we indicate it to and release the gases, avoiding unpleasant surprises.
From this point of view, we know from experience that one of the consequences that we suffer when we make a fail scoring is that the crumb is damaged. Apart from the displeasure of seeing bread we don’t like. This is a bad thing for the trade and we’ve all experienced it.
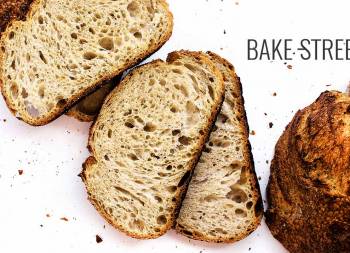
In this case, we are making many cuts along its entire surface. We are therefore creating many escape routes for the gases that will also damage our crumb. You can’t have everything and sometimes you have to choose. This time, don’t expect a superb crumb where we have made many cuts.
But the result is very gratifying, without a doubt it is worthwhile to make one day of Edward Scissorshands and enjoy while we sculpted our breads.
| INGREDIENTS | BAKER´S % | SOURDOUGH | REST | TOTAL |
|---|---|---|---|---|
| Wheat flour Shipton Mill | 11,4% | 34 g | 34 g | |
| All purpose or T45 flour | 85% | 255 g | 255 g | |
| Rye flour Shipton Mill | 3,6% | 11 g | 11 g | |
| Water | 71,6% | 45 g | 170 g | 215 g |
| Salt | 2% | 6 g | 6 g |
Ingredients
SOURDOUGH 100% HYDRATION:
- 3,2 oz (90 g) 100% hydration starter refreshed with 80% Shipton Mill wheat flour and 20% Shipton Mill rye flour
Here you can read how to make water yeast fruits or here how to make common sourdough (By the moment, both are only available in Spanish)
FOR THE DOUGH:
- 9 oz (255 g) all purpose flour (W=280)
- 6 oz (170 g) water
- 0,21 oz (6 g) salt
Instructions
Make the dough.
- In a large bowl add the flour along with water, mix until both ingredients are fully integrated, no remains of dried flour and the result must be a homogeneous dough.
- To knead the dough we can do it manually or in a kneader with the help of the hook. We will always mix at the lowest speed.
- Cover the dough with a cotton cloth and make autolysis for 60 minutes.
- Add the sourdough and knead with the hook at low speed for 10 minutes. Add salt and continue kneading.
- Transfer the dough to a clean work surface, without any flour, and finish kneading by hand.
- Combines kneading with resting time. Knead 2-3 minutes and let stand 5-6 minutes. The total time of hand kneading was 4-5 minutes.
Make bulk fermentation.
- Place the dough in an airtight container or bowl previously greased with olive oil. Cover with its corresponding lid or film, to prevent the dough from drying out, and let it ferment for 2 hours at room temperature, in my house made 78,8º F. The dough should grow a little.
- Put it in the fridge until the next day. In my case it was 18 1/2 hours.
- The next day remove from the fridge and leaves at room temperature until it has doubled in volume. In my case it was 2 hours at 75,2º F.
Preshape and shape.
- Slightly flourish the work surface and dump the dough.
- Divide into three equal portions, about 6,5 oz (185 g)/ piece, and preshape.
- Cover the pieces with a cotton cloth and let stand for 20 minutes. After this time, shape the loaves.
- Prepare a couche or, in the absence of a linen or cotton tablecloth, sprinkle with flour and set aside.
- Place the piece on a work surface and flatten very gently. It folds on itself trying to exert some pressure and tension while we continue to roll the piece.
- Place both hands on the dough and slide to the sides with a continuous swing that will allow us to lengthen the bread.
- Finish by pressing a little more on the ends to fine tune the peaks.
- Place the bread on the couche and repeat this step with the other two pieces.
- Sprinkle some flour over the breads´surface, cover and let it stand for about 2 1/2 hours. These will increase their volume and pressing them will leave a slight indentation on it. Signal that the fermentation point is correct.
Bake Epi breads.
- Preheat oven 445ºF* at least 30 minutes prior to baking with your stone or steel sheet on it positioned on final rack. Put inside a pan with volcanic stones, this helps to get steam in the baking.
- Carefully pour the breads over a baking sheet lined with baking parchment, which will help us transport them.
- With the help of scissors, he cuts the surface to create the shape of a spike.

- Place the breads into the oven and pour boiling water over the pan with volcanic stones. Close the oven door immediately to trap the moisture.
- Bake for 10 minutes.
- After first 10 minutes, open the oven door to allow steam goes out, remove the track with volcanic stones with kitchen gloves and reduce oven temperature to 425ºF. Bake for 10 minutes.
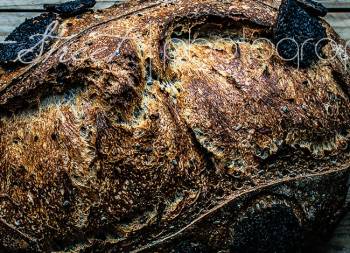
- Finally bake with convection at 375ºC for 5 minutes. Bread will get a better crust this way. The total baking time is 25 minutes.
- Once bake has ended, turn off the oven and let sit the bread inside the oven with the door ajar for 10 minutes. Remove from the oven and let cool over a rack.
Notes
- I made this recipe with sourdough, but it can be prepared with baker's yeast if you prefer. Just take into account the amount of water and flour that carries the dough to add to the total dough.
- How much yeast should I add? For 300 g flour, 1 g dry yeast or 3 g fresh yeast will be enough.
- The fermentation process will be so long? No, it will be much lower because commercial yeast works faster. And, if you wish, you can do it without retarding in cold.
- To transfer the breads to the baking tray lined with baking paper, if you don't have a board, you can do it with another tray.

This Wheat Spike Bread is a variety that we can serve at the snacking with a cheese board, charcuterie... and surprise our friends and family. It will undoubtedly be perfect.
Don't be afraid when it comes to carrying it out, we'll just have to create cuts on the surface. The first spikes may not be beautiful, but they will be yours and you will enjoy them very much.
I wish you a wonderful weekend, see you on Monday!
Big hugs,
Eva

Comentarios