Vienna Bread
I have been wanting to make the classic Vienna Bread for quite some time to share it with you and make it part of the recipe book. I am well aware that it is a very classic and traditional recipe, which I am sure many of you already know and have made. But I really wanted to include it in the recipe book because there are some things that you just can’t miss… Like this one.
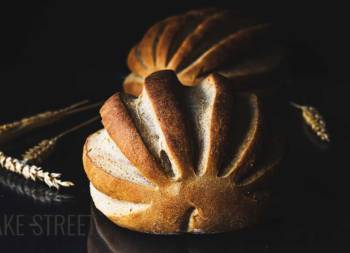
And even more so with this format, which is somewhat different to the usual one, but in a subtle way, as it maintains its original line. I was looking for information about this bread, and I found several Chinese websites showing how to make this bread in the format that I am introducing today on the blog. An elongated, thin bread roll with many cuts on its surface. I found it extremely elegant and I couldn’t resist making it the same way they do.

I have to admit that I was left wanting to try the filling that many of the websites suggest. A cream made with butter, sugar and condensed milk. They put a small amount inside and decorated it with raisins…. I’ll have to try it because I really wanted to!
Vienna Bread origin.
Although today the main focus of the bread world is on France and Italy, a few years ago it was in Austria. It was in the Austro-Hungarian Empire, specifically in Vienna in the 19th century, that the technique of adding steam to ovens was developed. An indispensable and revolutionary step in the world of baking that came from the Viennese bakers.
Vienna bread is a variety of bread made by the method developed in Vienna, using steam to bake the bread. The ovens inject steam while the bread is baking, resulting in a bread with a better expansion and a tender crumb. In addition to achieving a crispy crust.

What distinguishes Vienna bread from French or Italian bread is the enrichment of the dough. The use of sugar and malt helps the bread to brown and the butter together with the egg gives it a soft, fluffy and spongy texture.
The quality of the grains used to make Vienna bread is one of its characteristics.
In 1875, the American scientist Eben Norton Horsford published a report on the so-called “Vienna bread”, in which he highlighted the following characteristics:
- A new type of milling was carried out, known as Hungarian high milling, which combined the grinding of stone rollers and cylinders.
- Careful and excellent selection of the flours obtained.
- The use, for the first time, of pressed baker’s yeast instead of sourdough or brewer’s yeast.
- Uniform and adjustable baking according to the size of the loaves, with steam being used for large loaves to prevent the crust from browning too much. The dough is placed in a low oven and steam is injected as soon as the loaves are placed in the oven. This allows moisture to be transferred to the crumb of the bread and delays the formation of the crust, making the crust more extensible, which results in a lighter, fluffier and more evenly baked bread. When the steam dissipates, the dry heat of the oven toasts the crust, producing its characteristic very fine and slightly crunchy texture.
- Breads are smaller in size than the usual loaves, so that the consumer can eat them on the same day, preventing them from becoming stale or hard.

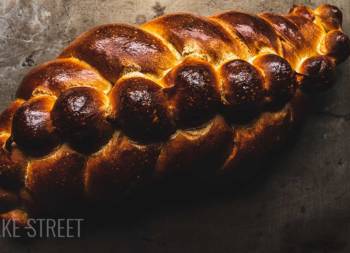
With the passage of time, Vienna bread has become a loaf of brioche-type bread with a thin, shiny crust (thanks to the beaten egg) to which milk, sugar and butter are added.
From this point on, many breads have emerged with a great similarity to it or some pieces in which ingredients are used to enrich the dough, such as butter, to achieve different aromas, flavours and nuances in the final result. Like this Viennoise deux couleurs (only available in Spanish) that I left you some time ago.
Recipe Vienna Bread
Ingredients for 12 pieces
FOR THE DOUGH:
- 500 g bread flour
- 240 g whole milk, cold
- 3 g dry yeast or 9 g fresh yeast
- 55 g egg
- 40 g unsalted butter at room temperature
- 40 g sugar
- 8 g salt
FOR THE FILLING (optional):
- whipped cream
- strawberries cut into eighths
- ruby powder for sprinkling
MATERIAL WE WILL NEED:
- scraper
- perforated tray
- digital baking thermometer (optional)
- pastry brush
- rack
Instructions
FIRST DAY
Make Vienna bread dough.
- In the bowl of the stand mixer/kneader, add flour together with the milk, egg, dry yeast, salt and sugar. Knead at speed 1 for about 8-10 minutes. We will have to get a semi-developed dough.
- Stop the stand mixer/kneader and start adding the butter little by little. Let it fully integrate into the dough before adding more.
- Knead the dough until the gluten is well developed. It should be elastic, soft, smooth and not break.
- Make a ball with the dough and place inside a bowl or hermetic container. Cover with film or with its corresponding lid.
- Let it rise until it almost triples in volume, a little more than doubling. Depending on the temperature may take more or less time.
- If we want to divide the process in 2 days, once it has grown 1/3 of its volume, refrigerate until the next day. In my case it was 2 hours and 30 minutes at 68ºF/20ºC and 9 hours at 39ºF/4ºC.
SECOND DAY
Divide and preshape.
- If you have decided to put the dough in the fridge, remember to remove it 1-2 hours before to shape the buns. If it has not reached the desired volume, leave until it reaches this point.
- Divide the dough into 12 pieces of 71 g each.
- Shape smoothly, without exerting too much tension. Remember that if you have created leftovers when dividing the dough, they should always remain in the centre of the piece.
- Cover with film and let rest for 15 minutes.
Shape Vienna Bread.
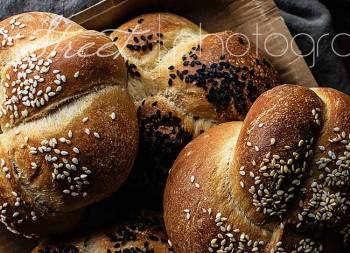
- I shaped the rolls in two ways; elongated and round. To make the long ones, I explain the process below. To make the round pieces, we gently roll each of them again and make transversal cuts in the way I show you in the video. I made 6 pieces of each of them.
- With the help of a rolling pin, roll out one of the pieces, trying to give it an elongated shape.
- Roll it up on itself to form an elongated piece. If the dough does not stick well to itself, brush the surface with a little water.
- Seal the final part with the dough.
- Place both hands on the piece and slide it across the surface, in the same way as you would lengthen a baguette, to give it length.
- Place the pieces on a perforated tray lined with baking paper. You will need two trays.
- Make cuts along the entire surface of the bread.
- Spray with water, cover with film and leave to rise until they almost double in size. In my case they were 4 hours at 69,8ºF/21ºC.
Bake.
- Preheat oven to 374ºF/190ºC.
- Brush with beaten egg the whole surface.
- Bake at medium height for 12 minutes. Remember that the inside temperature must reach 190º-194ºF/88º-90ºC for the baking to be finished.
- Remove from the oven and let it cool completely on a rack.


Notes
- Respect all the steps, rests and rising time to obtain a good result as much in flavor as in texture and sponginess.
- I recommend you to use a good quality butter because this will affect the final taste of the dough.
- It is important to shape the pieces well so that they do not lose their shape during baking. If you notice that the dough does not stick well to itself, brush it with water before rolling to prevent it from opening during baking.
- We must make the cuts before making the final fermentation. It is important to do this safely and not to go over the cut you have already made.
- They can be eaten as they are or filled with whatever you like.
- They last in perfect condition for 4 days stored in a zip-type bag at room temperature (if it's not too hot). From here, they will begin to lose tenderness.


There are endless recipes that we are tired of seeing and, I think, for the same reason we don't try to make them at home. This is a big mistake, because we can miss out on great things like this Vienna Bread.
So don't hesitate for a moment to try making it, either in a long or round format, and with the fillings you like best. This bread is great with both sweet and savoury ingredients, so I'll leave it there :D
I wish you a wonderful weekend!
Best wishes,
Eva
Sources: Araceli Conty