Lime and Ginger Cake
I had long wanted to make a lime cake, in fact, since I tasted a wonderful cake from my friend Raúl, “El Oso con Botas”. He is the best cooking, he manages to bring out super intense flavors in each of his elaborations. And, finally, I can leave you this Lime and Ginger Cake.
Another thing I really wanted to make was a tall, very tall cake, with many layers. In fact, since I started making cakes, I’ve only made one very tall one and it was for my sister’s birthday last year. This cake must have been zombie style, but ended up being something in that way with a pop-vintage style, hahaha. It had several sponge cakes (strawberry, vanilla and chocolate), with their corresponding filling. Then I decorated it with some toppings that I printed of a waitress from the 60’s zombie, some hands and bugs … Ok, hahaha.

Back to this cake. The fact is that it was very tall, but I couldn’t publish it because I couldn’t cut it to show you the inside… And from that day on, I had the desire to do it.
LITTLE BREAK, GOOD NEWS!
New edition for my online bread workshop “Homemade bread for beginners”. It will begin next October 21th, 2019.
It is a workshop for all those who want to make bread at home and do not have extensive knowledge about baking or these are very basic. It is a workshop with a duration of just over 4 weeks during which we will work breads with yeast, preferments and sourdough. In addition we will work doughs with different types of hydration, flours, shapings and types of fermentation. During these weeks you will receive daily emails to segment the information, being divided into theory, videos and exercises. You can access from anywhere in the world and in any type of device. For more information you can click on this link.
I continue with the cake 😉
Lime and Ginger Cake.
First of all, I want you to know that in order to make this cake you will need a lot of egg whites. When I say a lot, they are a lot. I designed this recipe to give out all the egg whites I had in the fridge, surpluses that have been coming out of making panettones. So, when you bake this cake, either you make it to take advantage of that surplus of egg whites or you have a recipe in mind that is carried out with yolks. Because you’ll have plenty of them.
To make this cake we will have to make two sponge cakes; one of lime and another of vanilla. We will cut them in 5 layers each one of them, although in reality useful we will have 4 because the superior one of all will be slightly domed, in addition to being thinner.
Then we’ll make a lime syrup to moisten and intensify the aroma and flavor of the sponge cakes. Is there anything in the world more wonderful than the smell of lime? Yes, to be on holidays. But until next year nothing at all.

The filling on this occasion will be quite simple.
To hold the filling and not overflow, we will have SMBC cords on the edges of the sponge cakes. It probably wouldn’t have been necessary, but I was much calmer doing it this way.
The filling will be familiar from other cakes, like the one I left you last week with Red Velvet and goat cheese mousse cake. It is a cream made with cream cheese or mascarpone, cream and ginger jam. Spectacular.

I’m pretty sure you won’t find it hard to find ginger jam in stores, although you can also use it homemade, of course. I live in Madrid and I can buy it in several supermarkets, there are different qualities and the truth is that there is a difference. If you can, I recommend you to buy the brand Robertson´s, I’ve also tried Cartwright & Butler and it’s great… But this last one is very expensive. For something like that, it’s not worth it. Almost better to enjoy on toast 🙂

Decoration.
This time I wanted to try something similar to a marble or mixture of different shades of color that fused on the surface of the cake. I chose green because it’s a color I really like, and it would go well with the chocolate leaves decoration I had in mind.
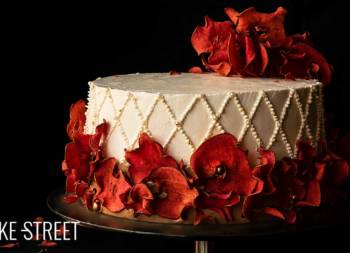
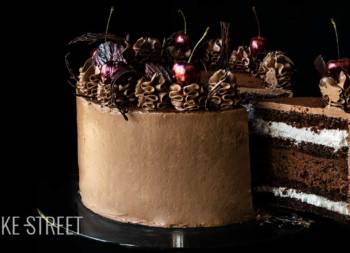
It is not the first time that I leave you a decoration with these leaves. I already did it in the Autumn Cake and in the Schwarzwälder Torte. But I like them so much that from time to time, I have to make them…
The combo is wonderful. The lime sponge together with the syrup is something from another world… A wonderful intensity of flavour. But if we already join it with the ginger cream, then we are already lost. A truly surprising and refreshing combination. Let’s go with the process 😉
Ingredients for a 8 inch cake
FOR LIME SPONGE CAKE:
- 300 g cake/pastry flour
- 180 g sugar
- 225 g unsalted butter at room temperature
- 225 g egg whites
- 180 g whole milk
- 14 g baking powder
- pinch of salt
- 2 lime zest
- 2 g green paste food colouring "Party Green"
FOR VANILLA SPONGE CAKE:
- 300 g pastry/cake flour
- 180 g sugar
- 225 g unsalted butter at room temperature
- 225 g egg whites
- 180 g whole milk
- 14 g baking powder
- 2 tsp of vanilla extract
- pinch of salt
LIME SYRUP:
- 200 g water
- 50 g lime juice
- 250 g sugar
- one lime zest
GINGER AND CHEESE CREAM:
- 630 g cream cheese or mascarpone
- 630 g dheavy cream
- 350 g ginger jam, good quality
WHITE CHOCOLATE SMBC:
- 150 g egg whites
- 300 g sugar
- 430 g unsalted butter at room temperature
- 200 g white chocolate, good quality
FOR GREEN SMBC:
- 85 g egg whites
- 175 g sugar
- 250 g unsalted butter at room temperature
- green and black food colouring paste or gel
FOR DECORATE:
- sprinkles to your choice
- chocolate leaves
CHOCOLATE LEAVES:
- 100 g black chocolate 70%
- edible silver powder
- edible gold powder
- edible green metallic powder dye
- natural leaves
Instructions
FIRST DAY
Make lime sponge cake.
- Grease a 8 inch Push-Pan, with butter. Sprinkle flour, remove the excess and set aside.
- Preheat the oven to 320º F/160ºC.
- Sift the flour together with the baking powder and salt. Set aside.
- In a bowl add the egg whites together with milk, whisk until the mixture is homogenized.
- In the bowl of the KA or of a stand mixer, add the butter together with the sugar. Beat with the flat beater at medium speed, until a creamy, aerated and white texture is achieved.
- Add the food colouring paste together with the lime zest and mix again.
- Begin to integrate the dry ingredients alternating them with the liquids.
- Add 1/3 of the egg white mixture and beat at the lowest speed for a few seconds. Stop, lower the mixture from the sides and add 1/3 more of the dry ingredient mixture. Mix again at low speed for a few seconds.
- Repeat the same process with the rest of the egg whites and dry ingredients mixture. Mix at low speed only until the mixture is homogenized.
- Pour the mixture into the mould and place in the oven at medium height.
- Bake for 70-75 minutes or until you prick it with a toothpick and it comes out clean.
- Remove and let stand 5 minutes in the pan.
- Unmould and leave to cool completely on a rack.
- Once it is completely cold, wrap in plastic film and refrigerate until the next day.
Make vanilla sponge cake.
- Grease a 8 inch Push-Pan, with butter. Sprinkle flour, remove the excess and set aside.
- Preheat the oven to 320º F/160ºC.
- Sift the flour together with the baking powder and salt. Set aside.
- In a bowl add the egg whites together with the vanilla and milk, whisk until the mixture is homogenized.
- In the bowl of the KA or of a stand mixer, add the butter together with the sugar. Beat with the flat beater at medium speed, until a creamy, aerated and white texture is achieved.
- Begin to integrate the dry ingredients alternating them with the liquids.
- Add 1/3 of the egg white mixture and beat at the lowest speed for a few seconds. Stop, lower the mixture from the sides and add 1/3 more of the dry ingredient mixture. Mix again at low speed for a few seconds.
- Repeat the same process with the rest of the egg whites and dry ingredients mixture. Mix at low speed only until the mixture is homogenized.
- Pour the mixture into the mould and place in the oven at medium height.
- Bake for 70-75 minutes or until you prick it with a toothpick and it comes out clean.
- Remove and let stand 5 minutes in the pan.
- Unmould and leave to cool completely on a rack.
- Once it is completely cold, wrap in plastic film and refrigerate until the next day.
Make the lime syrup.
- Pour the water with the sugar in a saucepan. Place at medium heat and let it boil. The sugar should be completely dissolved.
- Once it comes to the boil, turn off the heat, add the lime zest and let it cool completely.
- Place the syrup in a bottle with the help of a funnel.
- Set aside at room temperature.
SECOND DAY
Make white chocolate Swiss Meringue Buttercream.
- In a heat-resistant bowl, add the white chocolate. Place in a water-bath and leave until it completely melts, stirring occasionally.
- Remove from heat and reserve.
- In another heat-resistant bowl, add the egg whites along with the sugar.
- Place on a water-bath at medium low heat. Stirring constantly, leave until the egg whites reach 165ºF/74ºC. For it we will help ourselves of a digital thermometer.
- Remove from the heat, pour the egg whites into the bowl of the KitchenAid or a stand mixer and whip at medium high speed until a firm and shiny meringue is obtained.
- Once we have the firm meringue, begin to add the butter cut into squares little by little and at the same time the mixer continues whipping.
- Once we have all the butter added, increase the speed and finish whipping.
- Stop, scrap the cream with the help of a spatula and add the melted white chocolate. We will do it in a fine continuous thread while the mixer is mixing at the slowest speed.
- Whip again at high speed until the ingredients are completely integrated.
- Cover with film and set aside.
Make vanilla Swiss Meringue Buttercream with green tones.
- In a heat-resistant bowl, add the egg whites along with the sugar.
- Place on a water-bath at medium low heat. Stirring constantly, leave until the egg whites reach 165ºF/74ºC. For it we will help ourselves of a digital thermometer.
- Remove from the heat, pour the egg whites into the bowl of the KitchenAid or a stand mixer and whip at medium high speed until a firm and shiny meringue is obtained.
- Once we have the firm meringue, begin to add the butter cut into squares little by little and at the same time the mixer continues whipping.
- Once we have all the butter added, increase the speed and finish whipping.
- Stop, scrap the cream with the help of a spatula and add the vanilla extract.
- Whip again at high speed until the ingredients are completely integrated.
- Divide the SMBC into 4 bowls and 3 of them will be dyed with green food colouring giving different intensities. If you want to achieve a darker green, use black as well.
- Cover with film and set aside.
Make mascarpone & ginger cream.
- In a metallic bowl, previously cooled in the freezer, add the mascarpone together with the ginger jam.
- Beat until a smooth and homogeneous mixture is obtained.
- Pour the cream, very cold, and beat again. You will observe that the cream will begin to acquire consistency and volume. This is due to the fact that the cream will be whipped, so be careful not to exceed the whipping time so that we will get butter.
- Refrigerate for 30 minutes before placing it on the cake.
Assemble the cake.
- Divide the ginger cream and cheese into 7 equal parts. Reserve in the fridge.
- With the help of a cake cutter, cut the sponge cake in 5 equal parts. This time, I recommend you start at the bottom and, from here, proceed to cut the layers.
- Place an anti-slip disk on the base of the Push-Pan mould 8 inch/20 cm to fix the cake disc.
- Put the disc and a small amount of SMBC on it, this will help us fix the sponge cake.
- Place a sheet of acetate inside the mould. This will help us to remove the cake in a cleaner way.
- Place one of the lime sponge cakes and press lightly.
- Generously moisten the cake with lime syrup.
- Pipe a double SMBC cord, that way it will help to hold the filling better. Spread the ginger and cheese cream in the middle. Smooth lightly.
- Place a vanilla sponge cake and press lightly.
- Pipe a double SMBC cord, that way it will help to hold the filling better. Add the ginger and cheese cream tin the middle. Smooth lightly.
- Repeat this process with the rest of sponge cakes. In total we will use 4 lime sponge cakes and 4 vanilla sponge cakes.
- Place the last layer of sponge cake, which will correspond to a vanilla one, and we will do it placing the golden part upwards. Press carefully.
- Cover the surface with film and refrigerate for a minimum of 4 hours or, if you wish, until the next day.
THIRD DAY
Make chocolate leaves.
- In this post, you can see how to make chocolate leaves and paint them.
- Once they are made, keep them refrigerated until you place them on the cake.
Cover the outside of the cake with white chocolate SMBC.
- Unmould the cake and remove the acetate carefully. Place it on a cake stand.
- Spread the SMBC with a spatula over the entire surface and remove the excess with the help of an edge smoother. This layer will help us to "pick up" possible crumbs from the cake that could come to the surface when we decorate it.
- Refrigerate for 30 minutes for the SMBC to harden.
- Remove from the cold, place another layer of SBMC, smoothed removing the excess.
- Refrigerate for 10 minutes.
Decorate the outside of the cake with SMBC in green tones.
- Put small amounts of green SMBC alternating colors over the entire surface of the cake.
- Smooth the surface to unify the thickness of the SMBC.
- Put white SMBC in different parts of the cake and smooth again.
- Decorate with sprinkles of different sizes to our liking.
- Finally, decorate with the chocolate leaves painted with edible metallic powder.
- Refrigerate for 1 hour or until we are going to consume it.
- Remember that the SMBC is best when we leave for a while at room temperature.


Notes
- I used a Push-Pan 8 inch/20 cm, but this quantity is valid for moulds with a diameter of 9 inch/23 cm.
- The baking time of the sponge cake will vary depending on the size of the mould you use.
- If we refrigerate the sponge cake overnight, we help the flavors ripen as well as facilitating the process of cutting the sponge cake. It crumbles less.
- Follow all the steps to get a good SMBC.
- If we have SMBC leftovers, we can refrigerate it for 2 days or freeze it for 30 days.
- Decoration can be totally to your choice, in my case I have chosen this option that I hope you like.
- To preserve the cake we must keep it refrigerated for 3-4 days.
- The ideal thing before consuming it is to temper it during a while, it will depend on the external temperature.


I think there's no better way to start the weekend than enjoying a piece of this Lime and Ginger Cake. I recognize that unless you have a massive event, it is unlikely that you will make a cake of this size. But that moment may come and then we will know what to prepare. This huge and incredible cake.
And if not, you can always reduce the cake to lime cake and reduce the amounts of filling and SMBC. So you can enjoy it anyway.
I wish you a wonderful weekend, rest what you can!
Big hugs,
Eva