How to make Viennetta
There can’t be a single summer in which we don’t enjoy the mythical Viennetta. I think that along with the Whisky Chilled Cake and the Pijama, it is one of the classic, old and legendary desserts that will always remain fashionable in our hearts… And palate.
These desserts never disappoint and always please. Unless we have had enough of them, in which case, as with any other food, we never want to see it again. But otherwise, they are enjoyed with every spoonful. It is a dessert that revives emotions, experiences and feelings since it was part of our childhood. Or youth!
Viennetta origin.
It could be said that Viennetta, better known in Spain as Comtessa, is, has been and will be an icon of family desserts. An ice cream of soft waves of cream with very thin layers of chocolate that break with every spoonful. This dessert has been enjoyed by families in the UK and Ireland for over a quarter of a century.
The idea of creating an iced cake that alternated layers of chocolate, mimicking a mille-feuille, was developed in 1981 by Kevin Hillman, a product development manager at Wall’s Ice Cream. Registered as a unique design, the Viennetta was launched as a holiday specialty in 1982.
During the 1990s, the brand focused on developing new flavors such as mint, strawberry, cappuccino and praline. It was also the decade in which Viennetta was made with thicker and wider chocolate layers, specifically 25% more.
A very attractive promotion was launched in 1993; 10 sets of diamond necklaces and 100 sets of diamond earrings, each valued at £5,000.
In 2004, Viennetta launched the Selections range. This included flavors such as forest fruits and double chocolate brownie crunch.
- To celebrate its 21st birthday, the traditional “ice cream wave” cake was increased to its original size.
- To celebrate the 25th birthday in 2007, Walls broke the world record for the longest ice cream by making a 22.7-meter-long Viennetta.

Renaming the ice cream cake.
In 1998, the brand decided to rename the famous “Comtessa” ice cream cake as “Viennetta“. This change was not well received in Spain where, despite the name on the packaging, most people still called it as it was originally.
Ten years later, the brand decided to create an online poll asking followers which of the two names they preferred. In less than 24 hours, nearly 20,000 people chose. As expected, the classic and original name, Comtessa, won. Along with this relaunch, the brand introduced a new “Nougat” flavor. Layers of cream and nougat ice cream sandwiched by thin slices of chocolate.
This new flavor became a companion to the classic cream Comtessa and the chocolate and hazelnut Comtessa.
By the way…
In this link you can see, listen and add songs to the playlist I created “Música años 80-90’s {Bake-Street}” for this post some time ago. So you can dance and sing while you prepare these ice cream or every 80’s recipe! I plan to do it 😉
Making homemade Viennetta .
When I searched for how to prepare this ice cream cake at home, something that surprised me (and a lot!) was that we don’t need an ice cream maker to make it. It is an ice cream cake, super easy and quick to make. The cake itself, without the decoration, will not take more than 15 minutes. It is as simple as whipping, mixing, and pour into the mold.
Of course, we must let it spend the appropriate time in the freezer so that it acquires the desired consistency.
The decoration that I leave you may be a little laborious. It is easy to carry out, only that we need to keep the cake in the freezer several times to prevent the cake from losing temperature (especially at this time and with this hot weather). But, in case you want to simplify this step, just decorate it with whipped cream just before serving 😉
Viennetta recipe
Ingredients for 23 x 13 x 8 cm mold
Recipe adapted from Ho Voglia di Dolce
VIENNETTA:
- 400 g fat/heavy cream
- 250 g condensed milk
- 80 g egg whites+ 40 g icing sugar
- 10 g rum
- 1 tsp vanilla extract
FOR DECORATING:
- 450 g fat/heavy cream + 60 g icing sugar
- 150 g dark chocolate 70%
- chocolate sprinkles
- unsweetened cocoa powder
MATERIAL WE WILL NEED:
- stand mixer or electric hand mixer
- 2 bowls, one of them metallic
- silpat
- silicone spatula
- pastry spatula
- piping bag
- 150 de Wilton tip
- 789 de Wilton tip
- 23 x 13 x 8 cm mold
Instructions
FIRST DAY
Prepare chocolate.
- Melt the chocolate in a bain-marie.
- Pour onto a silpat and with the help of a pastry spatula or a scraper, spread to form a thin sheet.
- Refrigerate for at least 30 minutes. If desired, it can be stored in the freezer.
Whip the cream for Viennetta .
- Before we get ready to whip the cream, we must make sure of two things:
- The cream must be at least 24 hours in the cold.
- The bowl in which we whip the cream must be cold. I recommend using an aluminum bowl and putting it in the freezer for 20 minutes before whipping the cream.
- Pour the cream into the cold bowl and begin to whip with an electric hand mixer or stand mixer on speed 1.
- Increase the speed gradually, but never reach maximum speed. The ideal is a medium-high speed.
- Beat until you obtain a full-bodied cream. Be careful not to overbeat it or we will make butter.
- Pour the condensed milk over the cream in 2-3 batches. Add a little and mix with the help of a spatula making smooth and enveloping movements.
- Repeat the same process until it is all integrated.
- Refrigerate the bowl until ready to use.
Whip egg whites for Viennetta.
- In a bowl add the egg whites together with icing sugar. Whip the egg whites at the lowest speed.
- Gradually increase the speed and beat until a firm and shiny meringue is obtained.
- Add the rum together with the vanilla and mix again for a few seconds at medium high speed to help it distribute evenly.
Mix cream with meringue.
- Add a small amount of meringue to the whipped cream.
- Integrate with smooth and enveloping movements.
- Repeat the same process until all the meringue is integrated into the cream.
Fill the mold.
- Line a rectangular mold with film, in my case it measures 23 x 13 x 8 cm. This will make it much easier to unmold the ice cream.
- Cut the chocolate into sheets smaller than the dimensions of the mold. We must reserve a strip of chocolate that we will place on top of the decoration.
- Pour a little of the Viennetta cream and spread with a spatula.
- Place a chocolate sheet on top of the cream and carefully adjust.
- Pour another layer of cream, spread with a spatula and place another chocolate sheet.
- Repeat the same process until the entire mold is filled.
- Smooth the surface of the Viennetta and line with film.
- Store in the freezer for at least 12 hours. In my case I left it overnight.
SECOND DAY
Whip the cream for top decoration.
- Before we get ready to whip the cream, we must make sure of two things:
- The cream must be at least 24 hours in the cold.
- The bowl in which we whip the cream must be cold. I recommend using an aluminum bowl and putting it in the freezer for 20 minutes before whipping the cream.
- Pour the cream into the cold bowl and begin to whip with an electric hand mixer or stand mixer on speed 1.
- Once it begins to firm up, gradually add the sugar while whipping. Increase the speed gradually, but never reach maximum speed. The ideal is a medium-high speed.
- Beat until you obtain a full-bodied cream. Be careful not to overbeat it or we will make butter.
Decorate Viennetta.
- Put the whipped cream in a piping bag with a 150 Wilton tip.
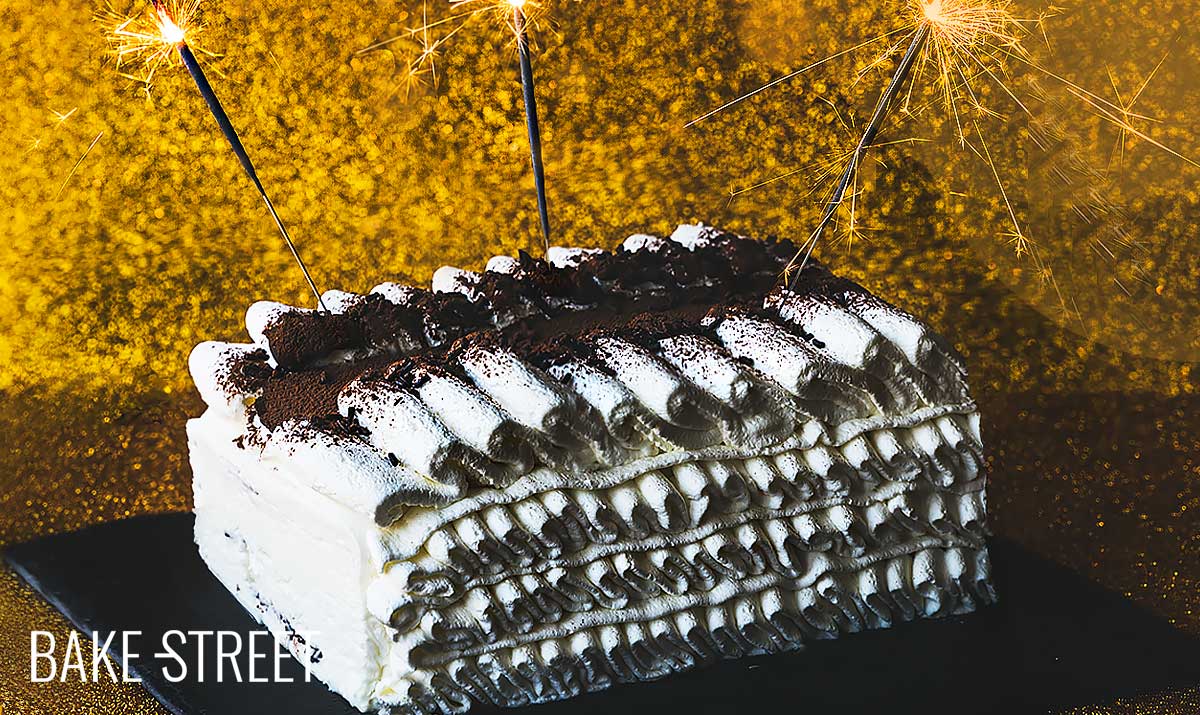
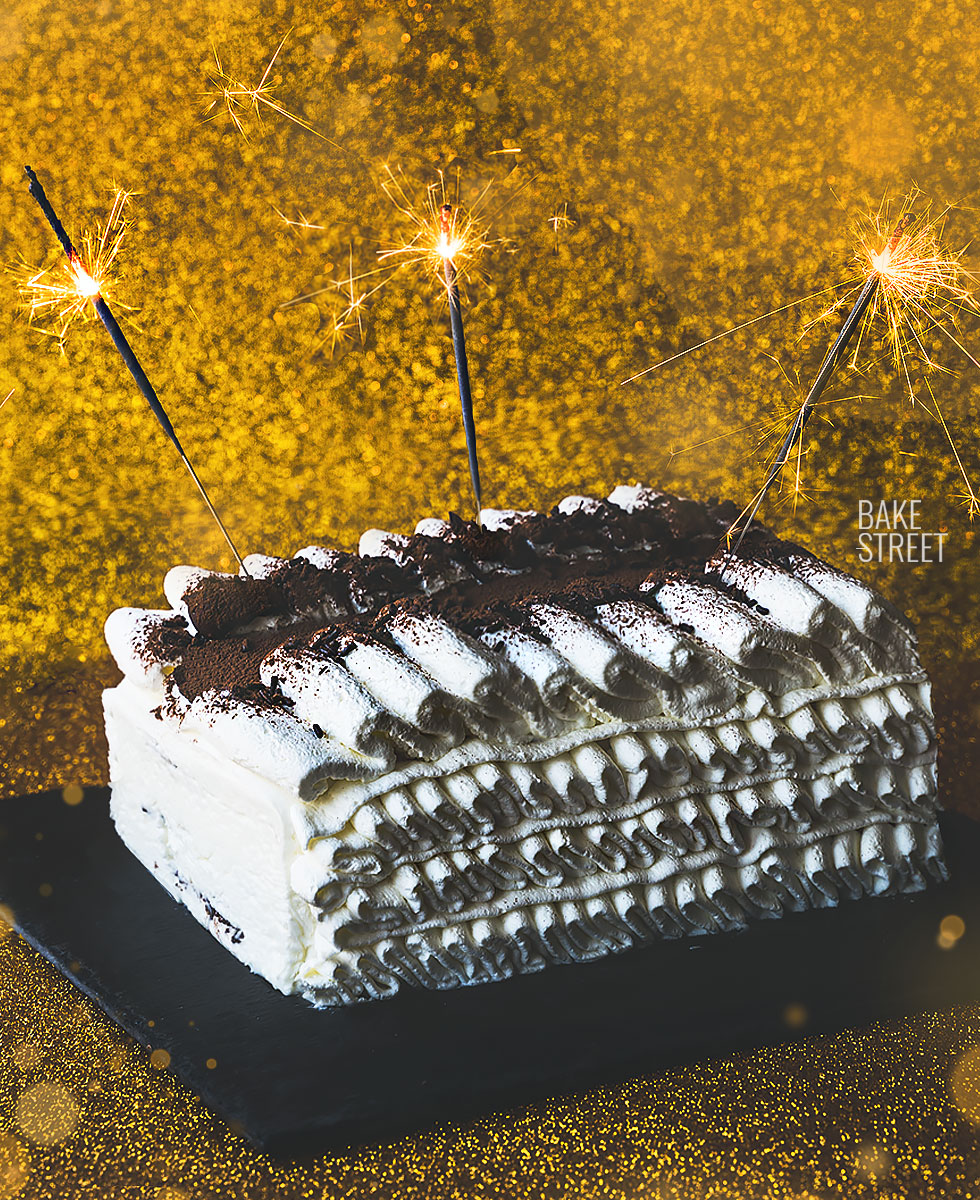
- Decorate the sides, for this I recommend you to watch the video. Create a first wavy layer and on this we place a smooth layer. Repeat this process until we reach the height of the ice cream.
- Repeat the decoration process on the other side of the Viennetta.
- Keep in the freezer for 15-20 minutes to allow the cream to harden and not damage it while decorating.
- Prepare another piping bag with the 789 Wilton tip and fill with whipped cream.
- Decorate the top as shown in the video.
- Store in the freezer for 30 minutes.
- Melt 25 g of dark chocolate.
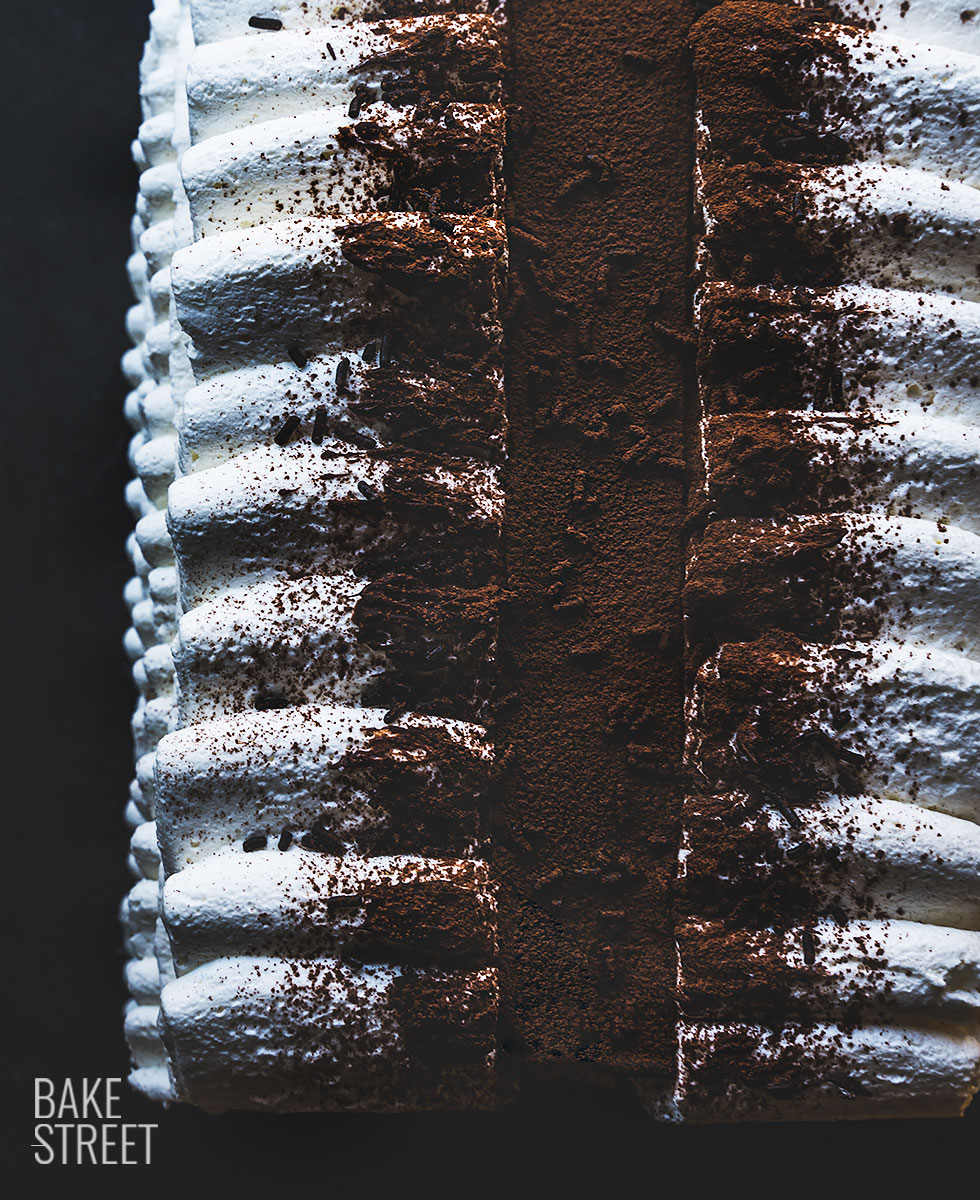
- With the help of a silicone brush, brush the top of the cream to create a gradient effect. This step is completely optional.
- Place a chocolate sheet with the size of the central hole.
- Sprinkle with chocolate sprinkles and cocoa powder.
- Store in the freezer until serving time.

Notes
- We must whip the cream very well so that when integrating the condensed milk into it we achieve a suitable consistency since it will liquefy slightly.
- The cream must be refrigerated for 24 hours before working with it. If we refrigerate the bowl where we will later whip the cream, we will facilitate the whipping process.
- The egg whites must be at room temperature to make the meringue.
- The egg whites must be whipped until they are firm and shiny. The better the quality of the eggs, the better the meringue obtained.
- The liquor is not noticeable in the final result, but it makes the consistency of the ice cream cream creamier. Alcohol is a natural antifreeze, it shares chemical structure with sugars.
- If we use alcohol without measure, the ice cream will lose consistency and will be soft in spite of being in our freezer. In this type of ice cream we must control the amount of alcohol very well and never use dextrose. We will always use regular cane sugar. In some ice cream elaborations with alcohol, it may be necessary to use some kind of additional thickener, such as corn starch, to make the ice cream more solid and better resist the tendency to melt quickly.
- The chocolate sheets must be very thin, otherwise it will be a complicated step to eat the central part of the Viennetta.
- We can use 70% chocolate, milk chocolate or any other variety of chocolate we wish.
- It will be somewhat complicated to manipulate the chocolate with the hot weather, always try to work trying not to manipulate the sheets too much or they will melt in your hands.
- To place the top sheet of chocolate, the one that decorates the Viennetta, I had to do it with the freezer open (the Viennetta inside) and the refrigerator open (where I had the chocolate). With the help of a pastry spatula I quickly passed the chocolate from the refrigerator over the Viennetta in the freezer. I tried to record the normal process, but it was so hot that it melted (even with the air conditioning at 64,4ºF/18ºC Lol).
- To decorate the Vienneta, I advise you to keep it in the freezer whenever I detail or whenever you need it. The outside temperature will be a factor that directly influences us at this point.
- The exterior decoration is totally optional. In fact, if you wish, you can unmold the ice cream and decorate just before serving the top with whipped cream. It will be just as spectacular and you will find the process much easier.
- It can be kept frozen for 15 days.

Without a doubt you can't fail to make or try this wonderful Viennetta, the famous Comtessa ice cream cake. It is easy, quick to make and absolutely spectacular.
Something that surprised me a lot is that the texture and consistency of the cake is practically perfect a few minutes after taking it out of the freezer. Creamy, smooth and with an impressive flavor.
On the other hand, it is true that the whipped cream in the decoration keeps its firmness for a longer time, unlike the cake, it retains its temperature much better. If we decorate with cream just before serving we will not have this "problem", but if we do it as I show you, you will notice that change of firmness during the first spoonfuls.
I can't wait to see yours! I wish you a wonderful start of the week.
Big hugs,
Eva
Sources: Unilever, Financial Food


