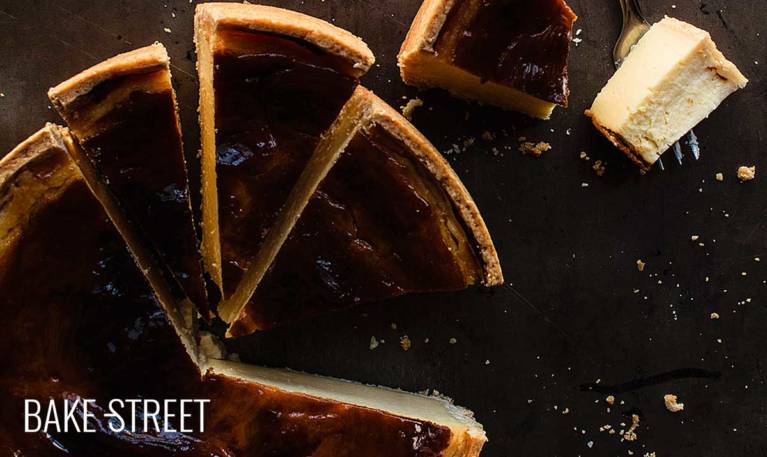
Flan Parisién or flan pâtissier
Today’s recipe is one you usually like. Without many complications, simple, rich and very eeffective. Perfect to prepare when we have guests or when we want to give ourselves a whim because we deserve it. We will only need to make two preparations to make an incredible dessert of French pastries, Flan Pâtissier or also known as Flan Parisién.
I am sure that many of you already have the pleasure of knowing this dessert and you will have enjoyed it. For those of you who don’t, I’ll tell you a little more about this incredible treat and how to make it at home. In addition, it is of this type of elaboration that we can leave prepared in advance improving, even more so, its flavor.

What is flan pâtissier?
At first glance, it may look like a soft, creamy cheesecake. Knowing its name, we can think that it is a baked flan on a basis of pastry dough, brisée, puff pastry…. But in reality, it is a cake made with a base that can vary (depending on the pastry chef who makes it, it can be puff pastry, brisée, sucrée dough…) and a pastry cream filling that, after being made, will be baked together with the dough to give rise to an incredible and absolutely delicious dessert.
In spite of having used the pastry cream for countless recipes, even many of them baked, I would never have thought of making a cake whose filling would be this ingredient. But also, bake it afterwards so that it finishes curdling and acquires that wonderful creaminess and consistency.
The filling has a peculiarity and is that it has a part of cream to whip, unlike how a traditional pastry cream is made. We only use milk, eggs, sugar, vanilla and cornstarch to thicken. I imagine that the addition of this ingredient will guarantee that the result will be much more creamy and smooth, as well as favouring the curdling process. Not all bakers use it, but a small amount will make the cake much tastier.
If it’s not a flan, why do they call it a flan?
The word flan is a very broad term that derives from the French word “flado” and means “cake, galette, crepe”, first documented in the 12th century, evolving as we know it today during the 14th century according to Claudine Brécourt-Villars. They are also called various salty and sweet preparations such as “a poured or moulded cream perfumed in different ways” or “a cake composed of salty or sweet ingredients baked on a crust” according to Larousse.

Different ways to carry out a pâtisissier flan.
When it comes to preparing this cake, we can find different recipes from a more “simple/comfortable” to a more “complex” degree. This grade will also influence the final result, since the difference between one and the other is to use good quality physical ingredients or to use custard or flan powders.
According to Rémi Héluin, a bakery connoisseur and author of Painriesien, many bakers use powdered flan to prepare this cake. The use of this ingredient can be appreciated by an excessive yellow coloring of the filling, an extremely pronounced vanilla flavor and an extremely gelatinous texture. When carried out in this way, its melting texture is completely lost when tasted.
Another ingredient that is often used to make this cake is frozen custard. As simple as defrosting, whipping, pouring and baking. If at any time you buy pastry custard in a bakery and you find yourself with a very yellow color, an excessive vanilla flavor or a rubbery/gelatinous texture, you know why.
Many confectioners prefer the top gold to be lighter, turning blond, rather than a very intense coloring. At this point I must admit that I am a crazy person with toasted colors (I’m sure you’ve already noticed) and it’s very hard for me to bake something without giving it that shade. Of course, this can be “stopped” or avoided by covering the cake with aluminium foil before it starts to brown.

The crust.
To make the base of this cake is usually used broken pastry in general lines, but many bakers use cuttings of other doughs or even puff pastry. They do recommend that the base is not extremely thin so that it retains its crunchy texture and a crispy, creamy contrast can be appreciated.
When it comes to baking the base, there are bakers who usually pre-bake it and others who do not. In my case I baked the whole set at once and the result was very good and with perfect cooking by both elements.
Educating the palate.
Today, many of us have a “rude” palate, by which I mean that the industry has accustomed us to extremely sugaryt sweets with excessively pronounced flavors. For this reason, as soon as we consume other less sweet, less powerful products, they seem to us that they are not good.
Actually, what happens to us is that we don’t know how to appreciate the real flavors. A sweet doesn’t have to be cloying or have all the flavor of the world concentrated in one bite. The sweetness must be testimonial, subtle and delicate. And the taste must conquer our sense of taste with every bite. This is to achieve a good preparation using good ingredients and in a natural way.
The recipe that I leave you is based on several elaborations. Mainly the one we found on the Slate´s blog , Michalak and my own cream pastry recipe.
Ingredients for a 7 inch (18 cm) pan
FOR THE BROKEN PASTRY:
- 8,8 oz (250 g) pastry/cake flour
- 5,8 oz (165 g) cold unsalted butter
- 1 large egg
- 0,9 oz (25 g) sugar
- 0,09 oz (2,5 g) salt
FOR THE PASTRY CREAM:
- 24,7 oz (700 g) whole milk
- 8,3 oz (235 g) cream
- 8 large egg yolks
- 6,35 oz (180 g) sugar
- 2,65 oz (75 g) cornstarch
- 2 tsp vanilla extract
FOR BRUSH (OPTIONAL):
- 1 y 1/2 Tbsp apricot jam
Instructions
Make the pastry.
- Sift the flour, set aside.
- Grate butter into a large bowl.
- Add pastry flour with the grated butter and mix between your hands until combined. Texture must be grainy.
- Add sugar and salt, mix lightly.
- Add the egg and mix again until you obtain a more or less homogeneous dough.
- Transfer the dough to a counter and knead making fraisage technique. It will be useful to get an homogenous dough but without gluten developed.
- Put the heel of the hand over the dough and push to the front little by little to get a merged dough but without being elastic. We can see how to make it in the video.
- Once the dough is homogenous, roll it between two teflon sheets. The surface must be larger to the pan to be used, remember that it must cover the base and sides.
- Place on a tray and refrigerate for at least 1 hour.
Place the dough on the pan.
- Rremove one of the Teflon sheets.
- Place the dough on the pan and remove the other sheet.
- Adjust this inside the pan, both at the base and at the side, keeping the excess from the outside.
- If you break the dough, don´t worry, adjust the portions so that there are no cracks.
- Refrigerate the pan for 30 minutes to allow the dough to harden.
- With the help of a knife, cut off the upper surplus.
- Store the mold in the freezer for 5-6 hours.
Make the pastry cream.
- In a medium saucepan pour the milk together with the cream and vanilla. Place at medium heat and leave until it reaches a gentle boil.
- Meanwhile, in a large bowl, beat the yolks together with the sugar and the cornstarch, previously sieved, until completely homogenized.
- Once the milk has reached boiling point, pour a little over the egg yolk mixture with the help of a sieve to prevent cream or vanilla seeds from seeping in.
- Beat quickly with the whisk to temper the yolks and prevent them from setting into lumps.
- Add the rest of the milk little by little and mix well each time.
- Pour the mixture back into the pot and place on medium-low heat, stirring constantly. You will notice that the texture will become denser, but it will take a while. Patience.
- Once the cream has a creamy texture, like the one I show you in the video, remove it from the heat.
- Pour into a pan/bowl (the wider the pan, the better because it will cool down faster).
- Cover with transparent film and let it cool completely.
Bake.
- Preheat the oven to 390ºF (200ºC).
- With the help of a whisk, beat the pastry cream so that it acquires a soft and creamy texture.
- Remove the pan from the freezer, pour the cream (which must be completely cold) inside and smooth the surface with a spatula.
- Place in the medium-height oven, reduce the heat to 345ºF (175ºC) and bake for 90 minutes.
- It is probable that after cooking the flan will have an intense golden color. To avoid burning or excessive browning, cover with aluminum foil.
- Remove from the oven and leave to cool completely and inside the pan on a rack. The consistency of the cake will be shaky, like a flan. This is completely normal, as it cools it will lose its consistency as well as lower its volume (it will come out very swollen from the oven).
- Once it has cooled completely, brush with the apricot jam (previously melted), cover with film and refrigerate until the next day.
- Remove from the pan and serve.


Notes
- The dough can be made manually as I show you in the video or in a KA/stand mixerr. If the latter method is used, add the flour together with the cold butter cut into cubes. Mix with the flat beater, add the rest of the ingredients and mix again until homogenized. Then you proceed in the same way as I specify in the elaboration.
- If the dough is too dry, you can add some very cold water/frost, from the refrigerator.
- To line the mould with the dough, if you wish, you can cut a circle the size of the base and then the sides. Be sure to seal the joint of the base and sides together well.
- It is important that the dough is frozen before pouring the filling and baking, this way we can guarantee that it will keep its shape better.
- Do not forget to temper the yolks to prevent them from curdling and forming lumps.
- Be patient when you are making the pastry cream, it takes a while to curdle and acquire consistency. Don't be tempted to increase the heat because you run the risk that some part of the base will burn and transfer the taste to the cream.
- I couldn't film the cake coming out of the oven, but it must be wobbly like a flan. As it cools, it will lower and take on a firmer consistency.
- The pastry cream must be cold when pouring into the cake because if it is hot, there is a risk that it will explode inside the oven.
- The dough remains crispy as the days go by.
- I recommend that you leave it in the fridge overnight, it will improve the taste a lot.
- You can keep it in an airtight container for 4-5 days.


The flan pâtissier is one of those simple and traditional desserts that if you have not already tried, you should do it. They guarantee us a resounding success in front of all audiences, believe me on what I say.
As you can see, the process is not long and does not require very complex processing. Quite the contrary. The only thing that you need to follow perfectly is the process of the pastry cream because in it lies our success.
We must be very patient in the cooking process. Do not work with very high temperatures when it is curdling, a soft heat and kept together with a constant movement of your whisk will make the cream soft, silky and incredibly tasty.
It can certainly be the perfect dessert for this weekend, don't you think? ;)
I hope you have a great time, see you again on Monday.
Big hugs,
Eva
Sources: Slate