Chapata with poolish – {Video Recipe}
Many of you e-mail me asking me how to make my bread recipes but without sourdough, why are you terrified?! Some of you prefer breads made with yeast or pre-ferments with commercial yeast, no wild yeast (sourdough). Well, today I leave you how to make homemade chapata, and without sourdough …
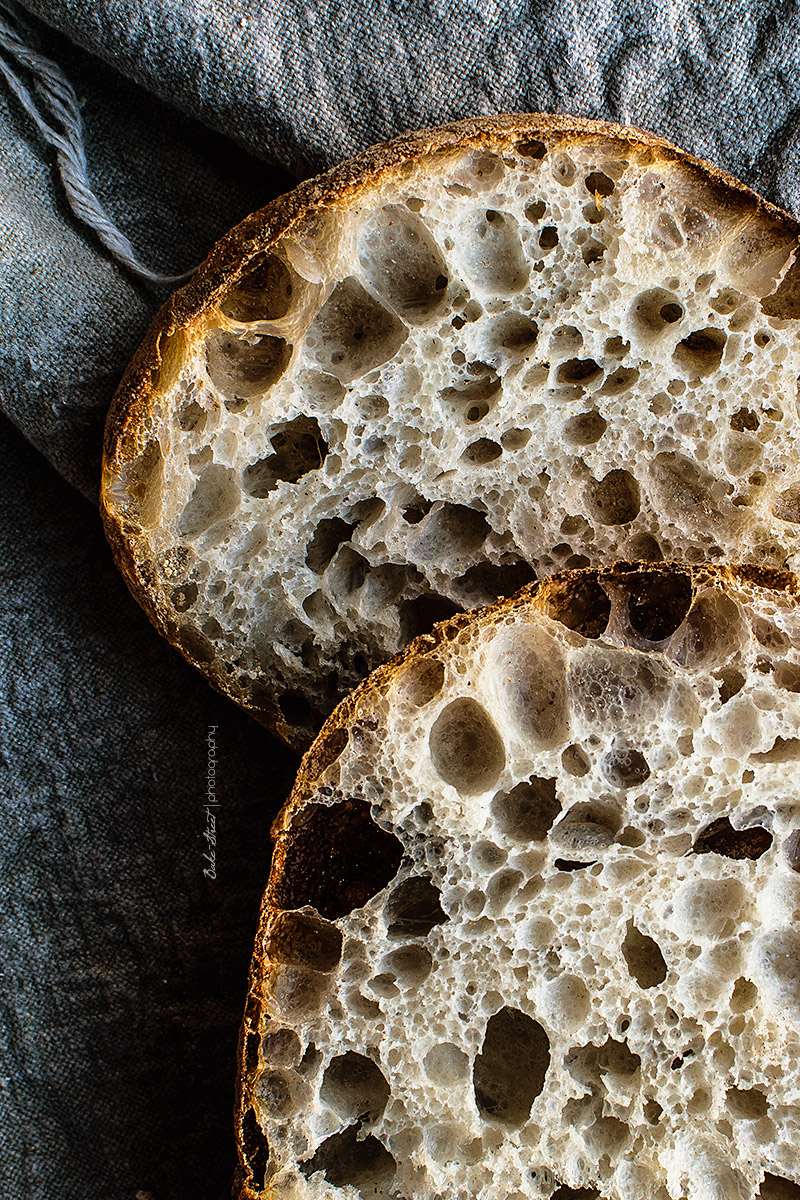
This type of bread usually likes a lot, perhaps because of its rustic look, its thin and crunchy crust, its crumb so spongy… It is true that it is a very attractive and perfect bread to accompany your prefer snack… A good piece of Spanish omelette or smashed tomato with olive oil and a good cured ham make this bread the perfect base to enjoy it.
Well, I bring the bread the rest is up to you 😉
Before you ask me, yes, this bread can be done with the direct method* and without preferments. That is, by adding the yeast directly to the dough.
* In the link to this post of my first basic bread I tell you the difference between direct and indirect method
Is there a difference between making chapata with pre-ferment or adding the yeast directly?
Yes, there is. First the aroma and the taste, in spite of being a pre-ferment of about 12-14 hours, will give spice up to the bread. And second, that we subtly extend its useful life since we give the yeasts time to grow without forcing them throwing an outrage of it to the dough.
But, of course, you are free to choose. In case you do not want to make a pre-ferment you should only take into account the amount of poolish we add to add that amount of water and flour to the dough. The dry yeast, depending on your patience, can be around 0.5 – 1 g.
Remember that if it is fresh yeast the amount of dry yeast is multiplied x 3
What is a poolish?
It was one of the first pre-ferments made with commercial yeast at the end of the s. XIX. Its origin is born in Poland, and therefore, its name refers to the Polish bakers. Later, the process was adapted in Austria and France by some Viennese bakers.
The use of poolish favors the obtainment of lighter loaves and with a less acid and softer flavor as compared to breads made with sourdough.
It is a hydrated dough between 100 – 125%, so we can expect a very liquid and sticky dough.
Its elaboration is very simple; Flour, water, a small proportion of yeast (depending on the fermentation time and temperature under which we go to work) and salt-free. Let it ferment for 4 to 12 hours at room temperature (may be more if the temperature is too low). It has the effect of weakening the gluten resulting in a soft and very spongy crumb.
Depending on the time that we want to use to let ferment our poolish, we can guide this table to know how much dry yeast to use regarding the amount of flour used:
- For a 3 hours fermentation is recommended 0.5%
- 6 hours, 0,23%
- 8 hours, 0,17%
- 12 hours, 0,03 – 0,05 % (the most recommended, best flavor and aroma)
The times are always approximate since we depend on many variables that can condition the final fermentation.
The perfect point for our poolish will be when it has a flat surface appearance and very bubbly, at that time it will have matured. If our poolish is still slightly vaulted, it will still have to rest a little longer.
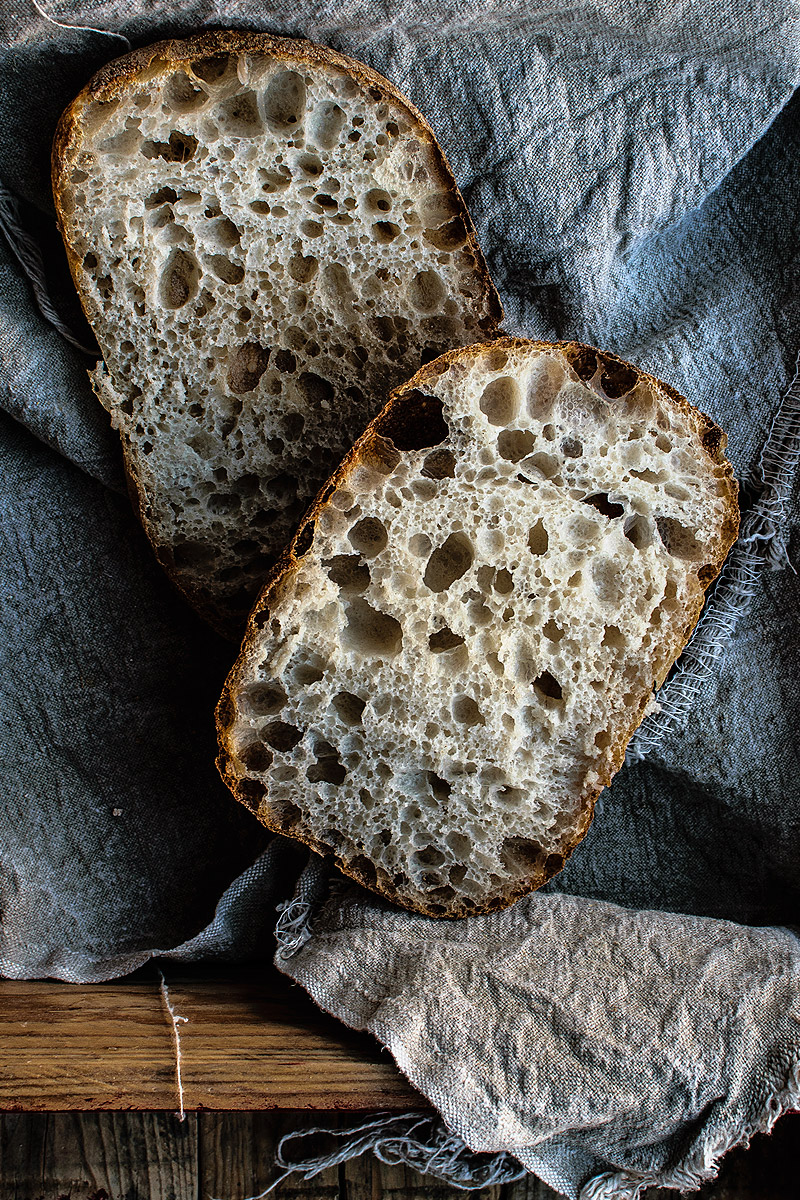
This pre-ferment provides extensibility to the dough so it is perfect if we want to achieve a dough easy to stretch and form with large holes inside.
Chapata origin…
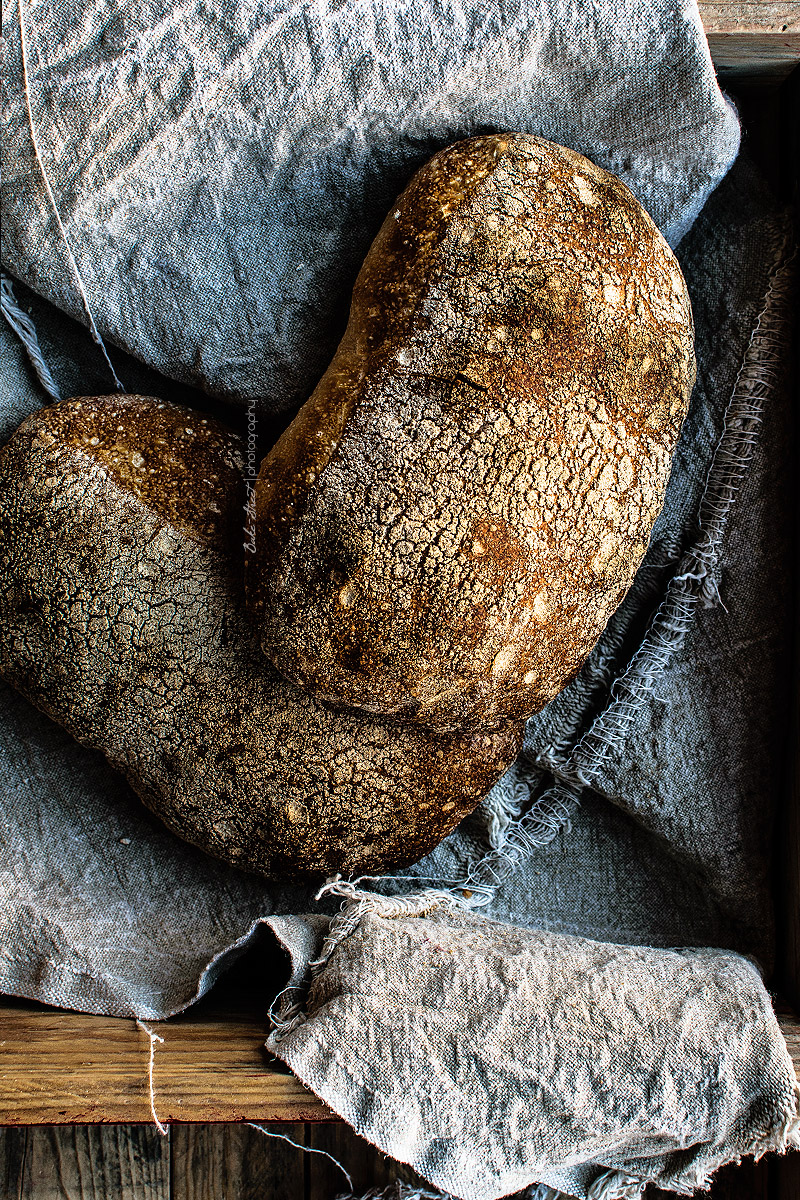
This light bread, crunchy and very honeycomb crumb has its origin in Italy where it is known as Ciabatta. It is a fairly current bread since it emerged in the 80’s by the Italian Arnaldo Cavallari.
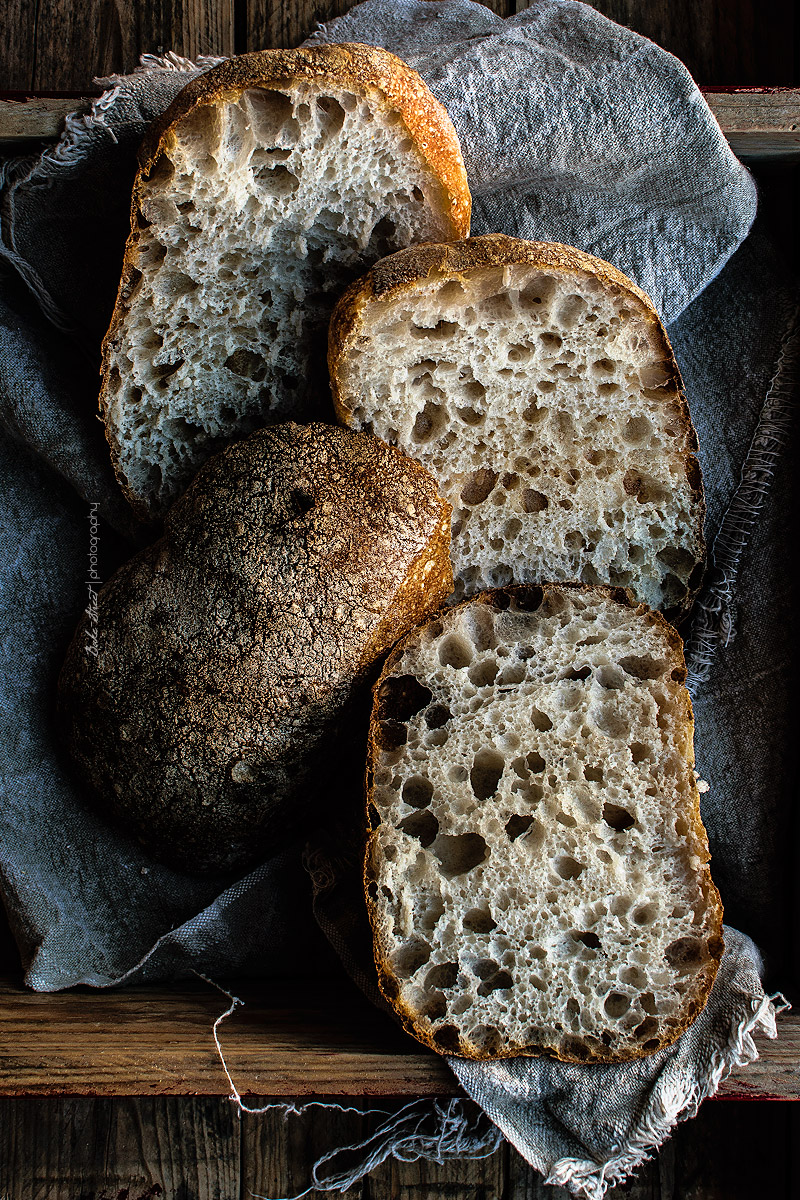
It is a dough with a high hydration and rustic appearance with a very traditional flavor. Roasted aromas, thin crispy crust accompanied by a soft crumb…
The elaboration of this bread does not have more complication, we can enjoy it the same day that we elaborate it (not counting the pre-ferment fermentation time). What you must take into account is that it is a dough with a high hydration which makes its manipulated laborious …
In the video I show you how to knead the chapata by hand, for all those who do not have a kneader. But those who do and you want to carry it out in this way, I’ll give you some tips.
- To dissolve the pre-ferment in the water, use the wire whip, it will completely dissolve it.
- To knead this dough so hydrated, do not use the hook (it will hardly catch a yarn of dough), use the flat beater. It will help to develop much better and more quickly the dough.
- When the gluten is perfectly developed, the dough will completely rolled into the flat beater.
- Finish kneading by hand, besides this dough is holy amazing.
Are the folds obligatory during the first fermentation?
Yes, completely and absolutely.
We need the dough to acquire muscle and strength, the kneading will help but the folds will favor it even more. It is a way to continue kneading and developing our dough.
To prevent hands from adhering to the dough, always moisten before handling.
Shape chapatas
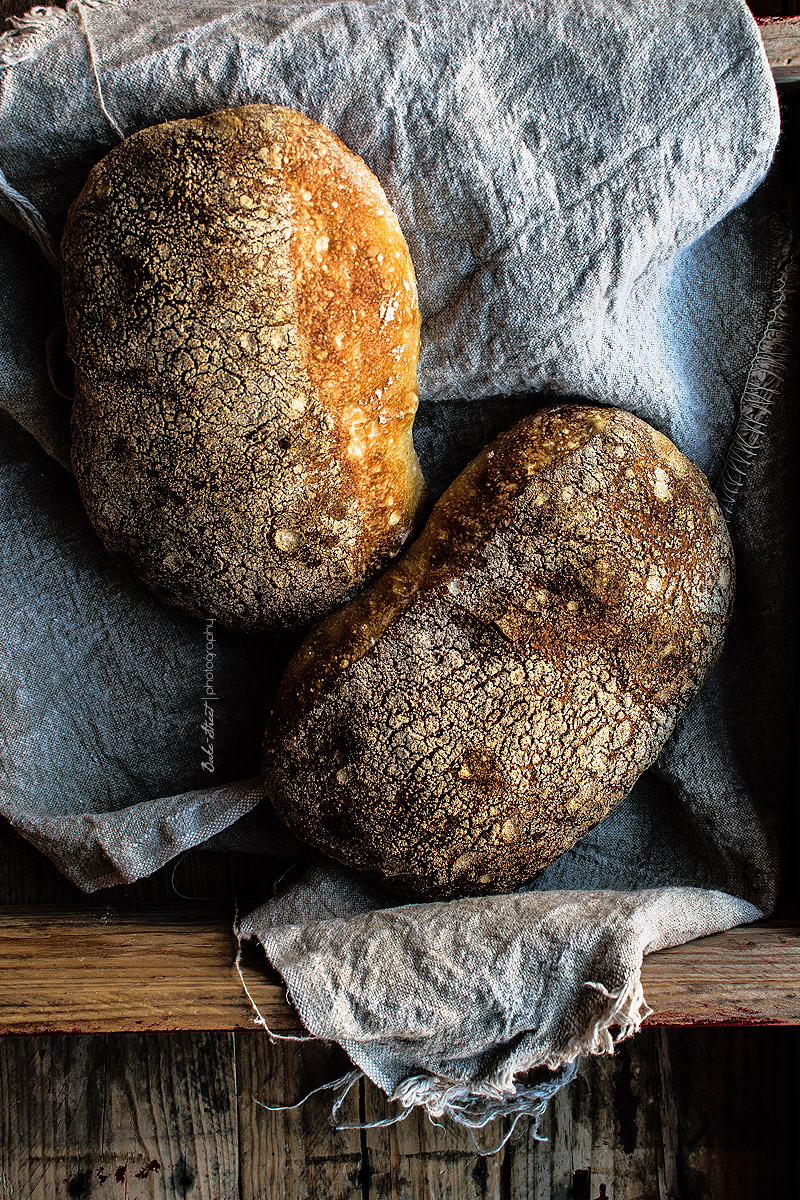
At this point, please be very delicate and affectionate. Touch it as less as possible, just to give it a little shape … and nothing else. Sprinkle flour generously on the work surface and the chapatas surface, without fear. We have to be able to move it without sticking anywhere to avoid tearing that would damage the final result.
In my case I like to use rye flour but you can use wheat flour or semolina if you prefer.
Final proof
At this point observation is of vital importance. There is no exact time since we depend on the temperature and conditions of your dough. In my case it was proofing 2 hours at 70ºF, but in summer it can be ready in 30 minutes.
You can do the pressure test on them to know if they are ready, you can see how to make it in the video.
And we just have to bake them … and enjoy! 😉
CHAPATA
FOR THE PRE-FERMENT (POOLISH):
- 3,4 oz (95 g) plain/ all purpose flour
- 3,4 oz (95 g) water
- 1/8 tsp (0,04 g) dry yeast / 0,12 g fresh yeast
FINAL DOUGH:
- 5,5 oz (155 g) plain/ all purpose flour
- 3,9 – 4,2 oz (110-120 g) water*
- 0,014 oz (0,4 g) dry yeast / 0,04 oz (1,2 g) fresh yeast
- 0,18 oz (5 g) salt
- 5,8 oz (165 g) poolish
* Remember to add water little by little to control the water admits your flour. Pour 3,3 oz (95 g) of water and the rest gradually.
INSTRUCTIONS:
Make the poolish the night before.
- In a medium bowl add the flour along with the water and the yeast.
- Mix until a get homogeneous mixture.
- Cover with film and let proof at room temperature * overnight.
* If we prepare this pre-ferment in a hot season we will place in the fridge overnight.
NOTE: Surely you’re wondering… how the hell do I weigh 0.04 g dry yeast? It is easier than it looks and, of course, approximate. Measuring spoons weigh from 0.1 g. We will weigh that amount of dry yeast and divide it into 2 equal parts, more or less. To one of them we remove what would equal 1/5 part and we already have the amount that we need to elaborate the pre-ferment.
The next day make chapata dough.
In case we have saved the poolish in the fridge, we must remover it 30 minutes before using it.
- In a bowl add the poolish along with the water, dissolve completely with a spoon or whisk.
- Add the flour and mix with a spatula until get a homogeneous mixture.
- Cover with a cotton cloth and make autolysis for 30 minutes.
- Incorporate the dry yeast, previously dissolved in a little water * and salt. Mix again.
- Transfer the dough to a clean work surface and knead making the French kneading.
- Alternate 3-4 minutes of kneading and 5 minutes of resting (as in all the breads we have prepared previously) until we notice that our dough acquires body, muscle and is smooth (although very hydrated). We must observe a smooth surface.
Make bulk fermentation.
- Grease with olive oil a plastic container and place the dough inside.
- Cover and let rest 2 3/4 hours at 70 ° C with a folding every 30 minutes during the first 2 hours. In total we will do 4 folds and, after the last one, we will allow 45 minutes more. We will observe that the dough is spongy, soft and full of air.
- Prepare a tray, lined with baking paper and sprinkle with flour (if it is better rye, better withstand moisture). Set aside.
- Sprinkle very generously with flour a work surface and transfer the dough. If necessary we will help the dough to slide and prevent it from tearing.
- If we make a single chapata, lightly stretch the dough into a rectangular shape. In case of making two small chapatas we will cut the dough in half with the aid of a metallic scraper. We must do it quickly and decisively to prevent the dough from adhering to it.
- With the help of two flexible scrapers, transfer the dough over the tray. Shape, sprinkle with flour, cover with a cotton cloth and let proof until it is puffy. It will take us about 60-120 minutes at 70ºF.
Bake chapatas.
- Preheat oven 480ºF at least 30 minutes prior to baking with your stone or steel sheet on it positioned on final rack. Put inside a pan with volcanic stones, this helps to get steam in the baking.
- Five minutes before you put chapatas into the oven, heat the water (just over half a cup) in the microwave.
- Place chapatas in the oven in the lower part, pour the water on the stones and closed the door. Bake 5 minutes with steam.
- Open the oven door to allow steam goes out, remove the track with volcanic stones with kitchen gloves and reduce oven temperature to 465ºF. Bake for 10 minutes.
- Reduce temperature to 445ºF and bake 5 minutes for 2 small chapatas or 10 minutes for 1 large chapata. Bread will get a better crust this way.
- Turn off the oven and leave it inside with the door ajar for 15 more minutes.
- Remove and let cool completely on a rack.
PRESERVATION:
Before eating the bread is better to let it cool completely.
This type of bread is best consumed the same day we bake it, ideally to preserve it is to cover it with a cotton cloth. If you leave it overnight, wrap it in foil, once completely cold, to help preserve its crunchy texture and tender crumb.
TIPS FOR PERFECT CHAPATAS:
- Always use a wheat flour. A strength flour would bring us much tenacity and the result would not be the expected one. For example a closer crumb.
- Pre-dissolve the pre-ferment in the water to avoid lumps.
- Kneading will be somewhat laborious due to the high hydration. Do not add all the water at once or this work will be a real hell. It is easier to develop gluten in batters with a more moderate hydration and then continue to increase hydration.
- It is a bread that does not want to have a great overspring or mohawk, prolong the final proof to the limit. Our goal is an amazing crumb.
- To prevent the crust from softening after baking, bake the final minutes with convection and let them rest inside the oven with the door ajar to finish drying. Otherwise the internal humidity will migrate to the surface and, after a few hours, we will have a chewy bread.
These breads are great to enjoy at any time of the day. At breakfast, casual food, snack or dinner … they always go perfect.
Now that the weekend arrives do not hesitate to put it into practice, wishing I find out how your have gone 😉
Happy weekend!
Big hugs,
Eva
Source: Advance Bread and Pastry