Capuchina Cake: A Delicious Journey Through Spanish Convent Sweets
Today’s post makes me especially excited to share it with all of you because I had been wanting to prepare the famous Capuchina Cake for a long time. There are recipes that, for some strange reason, make me a little lazy to carry them out. And it’s a strange feeling because it’s not because I love cooking and I’m not usually lazy to prepare almost any recipe.
It’s because I feel “uneasy” when I’m left with a surplus of egg whites. I know it may seem strange, but until I have not located all the quantities to give it a way out, I do not end up deciding to make it. There have been seasons that I have had glass jars in the fridge full of egg whites and, every time I saw them, I got a horrible dread, hahaha.
Capuchina Cake: A Delicious Journey Through Spanish Convent Sweets. It deserves each and every one of the compliments it receives. I must make a confession… I had never tasted this cake before. Yes, I have seen it on several occasions, but never had the pleasure of enjoying it. It is an absolutely exquisite bite, from the texture, consistency, flavor, moistness…. I find it absolutely incredible to achieve such a sensational result with so few ingredients.

Convent sweets: the history and origin behind the Capuchina Cake.
Capuchina cake is one of the traditional nuns’ sweets made in cloistered convents, as its name suggests. Its name refers to the Capuchin nuns, belonging to the Order of the Capuchin Poor Clares, founded by Saint Clare.
This dessert is a sponge cake made exclusively with egg yolks and generously sweetened with syrup.
The Capuchin nuns, officially known as Poor Clare Capuchin Sisters, originated in the Middle Ages, although they did not arrive in Spain until the end of the 16th century, when they began to found their monasteries. As cloistered nuns, they were forbidden to leave the convent and dedicated themselves to a contemplative life, dividing their time between prayer and work. A fundamental part of this work was the elaboration of cakes, with which they helped the economy of the sisterhood and taught a trade to orphan girls or women with problems.
Traditionally, in addition to embroidery and sewing, one of these trades was confectionery, whose products were sold through the lathes of the convents.
Since the founder of the movement was Saint Clare, an Italian follower of Saint Francis, there was a tradition among the people of giving eggs to the monastery to obtain the saint’s favors. For this reason, it is easy to understand why the vast majority of cakes made by the nuns have a high proportion of egg whites or yolks, such as the tocino de cielo, for example.

Use of yolks.
The convents located in areas such as Cádiz obtained the yolks by donation from the winemakers of Sanlúcar, El Puerto de Santa María and Jerez, since the egg whites were used in the clarification of the wines. In this post I will tell you more about this subject.
The convents have played a very important role in the history of traditional Spanish gastronomy, preserving the baking traditions, especially those of Arab origin, as evidenced by the ingredients used: cinnamon, honey, almonds, and the type of sweets in which they specialized, known as “pan fruits” or “fruits of the frying pan”. Some examples are torrijas, fried milk, casadielles, buñuelos de viento or carnival flowers, among others.
It was not until the eighteenth and nineteenth centuries when the first establishments dedicated to the sale of pastries were opened. The Cádiz confectioneries, as their name indicates, were originally owned by Genoese or Venetian merchants established in our city.

How to make an authentic Capuchina Cake at home.
When I looked up how to make the Capuchina cake, on all the websites I saw that they added a small amount of corn starch to the whipped egg yolks. It made perfect sense to me since I thought it would help to keep the cake at the right volume. Until I read an article from a bakery in Madrid where they shared that the traditional sponge cake is made solely and exclusively with yolks.
Of course, this totally changed my perspective because if they do it that way, it can and should be done that way.
I kept researching until I found a video on Youtube where they shared the process of how to make it with yolks only. Plus a very important step; cooking at low temperature in a bain-marie.
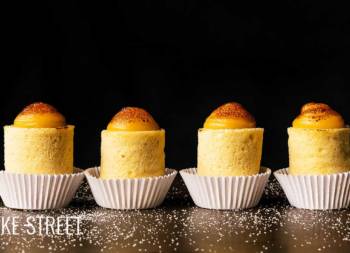
They bake this cake in flan molds, to make an individual dessert, and bake them at 194ºF/90ºC for 40 minutes. In my case, I chose to increase the baking temperature, without overdoing it too much, and reduce the final baking time. Also, in the mold I use for this cake, the thickness of the cake is much lower, which means that the baking time is also greatly reduced.
Another interesting fact that they share and I have only seen here, is that once they take the cake out, they cover it with syrup and let it rest for 24 hours. This rest helps the cake to absorb all the syrup resulting in a sensational texture and juiciness.
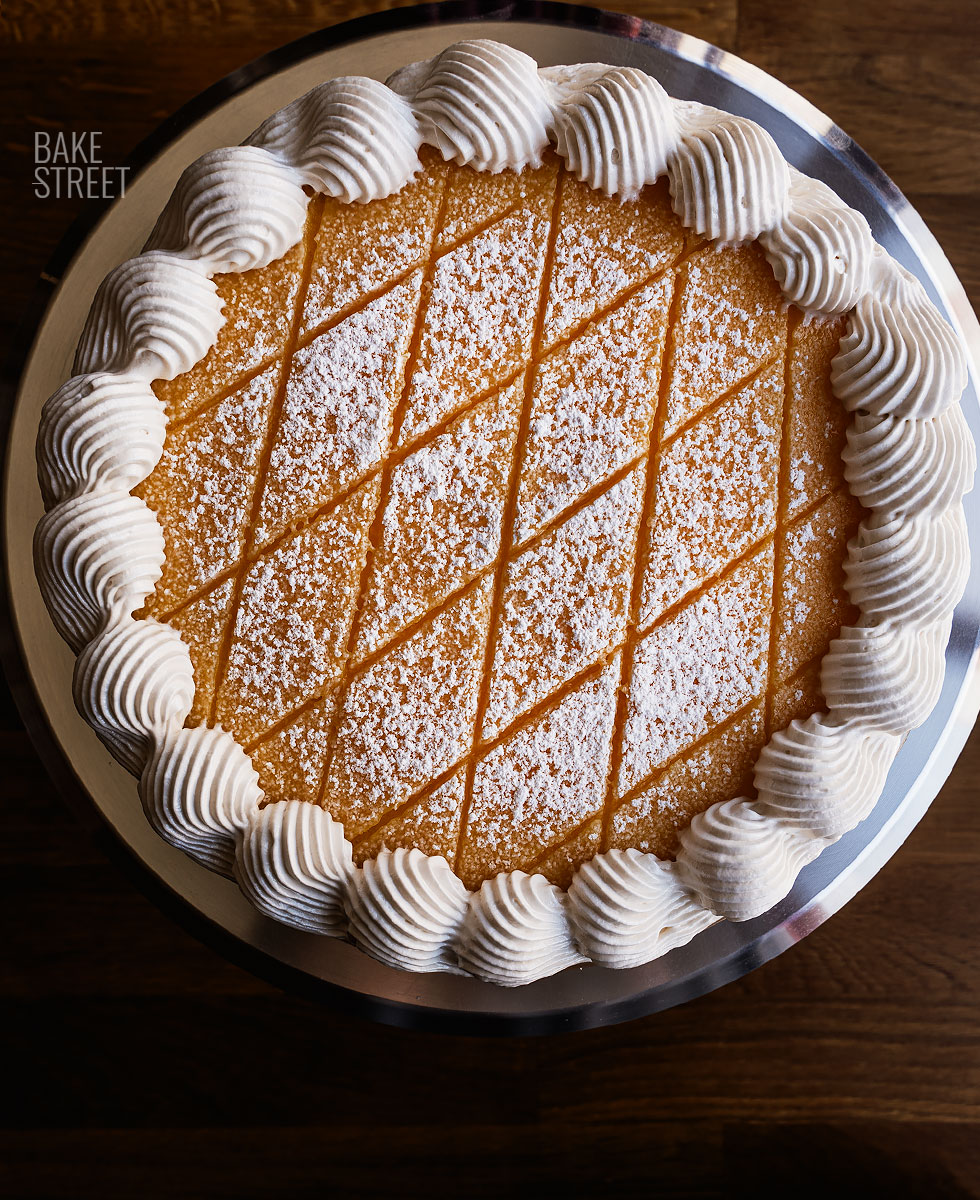
To finish, cover the sponge cake with custard, sprinkle with icing and mark with a electric burner.
In the classic cake format, it is usual to decorate it with coffee meringue. This can be replaced by normal meringue or whipped cream, according to the taste of the people who are going to eat it. Another option is to omit this decoration and serve it only with the yolk and powdered sugar decoration.
Recipe Capuchina Cake
SPONGE CAKE:
- 12 yolks, from large eggs
SYRUP:
- 165 g water
- 200 g sugar
YOLK PASTRY CREAM:
- 2 eggs, large (118 g, in my case)
- same weight of sugar as eggs, shelled (118 g)
- 60 g water
- 10 g cornstarch
ITALIAN COFFEE MERINGUE:
- 70 g egg white
- 150 g sugar
- 34 g water
- 3 drops of coffee extract
- pinch of chocolate coloring paste
DECORATION:
- powdered sugar
MATERIAL THAT WE WILL NEED AND VISIBLE IN THE VIDEO:
- stand mixer or hand mixer
- round mold 23 cm diameter, fixed, not removable
- rotating cake stand
- bowls
- whisk
- saucepan
- digital cooking thermometer
- pastry spatula (optional)
- digital kitchen scale
- cooling rack
- piping bag + Decora S/F18 nozzle
- pastry brush
REMEMBER TO ENJOY SWEETS IN MODERATION. SUGAR SHOULD BE CONSUMED OCCASIONALLY AND NOT BE PART OF YOUR DAILY DIET TO MAINTAIN A HEALTHY LIFESTYLE.
Instructions
FIRST DAY
Prepare yolk sponge cake.
- Preheat the oven to 300ºF/150ºC, heat up and down. Place a dish or tray, in the middle position of the racks, with boiling water inside, enough to cover the pan halfway. During the preheating time, some of the water will evaporate. I will tell you later how to proceed.
- Separate the egg whites from the yolks.
- In the bowl of the stand mixer add the yolks and whisk at medium-high speed until you obtain the ribbon point, letter point or “monter au ruban” in French. You must whisk the yolks until you obtain a voluminous mixture that falls evenly and continuously, like a ribbon or string. The process can take 10-15 minutes.
- While the yolks are whipping, prepare the mold.
- Grease the mold with olive oil, using a pastry brush to help grease the entire surface.
- Place a circle of baking paper on the base and sprinkle the sides with powdered sugar. Set aside.
- Once the egg yolks are whipped, pour the batter into the mold.
- Bake placing the mold inside the pan with water. If you notice that the amount of water has reduced too much, add boiling water until it reaches about half of the mold.
- Bake for 27 minutes. Before taking it out of the oven, check that it is baked by poking a toothpick in the center. The toothpick should come out clean.
- Remove from the oven and place the mold on a wire rack.
While the cake is baking, prepare the syrup.
- Add the water and sugar to a saucepan. Place over medium heat and bring to a boil. The sugar should be completely dissolved.
- Once it comes to a boil, reduce to medium heat, cook for 5 minutes and turn off the heat.
- Reserve until ready to use.
Once the cake is baked, pour the syrup.
- As soon as you take the cake out of the oven and place it on a rack, still hot, prick the entire surface with a toothpick.
- Pour all the syrup carefully over the surface of the cake.
- Let it cool at room temperature and inside the mold.
- Once cooled, cover with plastic wrap and let stand for 24 hours. If it is very hot, I recommend resting in the refrigerator.
- NOTE: During the resting time, the cake will absorb all the syrup resulting in a very moist bite.


Prepare yolk pastry cream.
- In a bowl mix the sugar with the cornstarch. This process helps the cornstarch to integrate better and prevents lumps from forming. Set aside.
- In a medium bowl, whisk the eggs together with the water until homogenized.
- Pour into a saucepan through a strainer to remove the dense part from the eggs.
- Stir in the sugar and cornstarch mixture, place over medium-low heat and cook, stirring constantly with a whisk, until the mixture thickens. It will take about 8-12 minutes.
- Once the mixture begins to thicken, it will do so very quickly. As a guide, the mixture will be ready in density when it has a temperature between 93º-96ºC.
- Remove from the heat and pour the cream into a bowl. The larger it is, the less time it will take to cool.
- Cover with cling film and let it cool completely at room temperature. Once cooled, refrigerate for 2-3 hours before using. If you wish, you can make it the day before and refrigerate it until the next day.
SECOND DAY
Unmold and cover with the egg yolk pastry cream.
- Slide a cake spatula along the sides of the cake.
- Place a plate, where you are going to serve the cake, over the mold and turn it over. Carefully unmold.
- Remove the baking paper placed on the surface of the cake.
- Cover the entire surface of the cake, surface and sides, with a generous layer of custard. Use a pastry spatula for this step.
- Sprinkle the surface with powdered sugar.
- Traditionally, a lattice pattern is created with the help of a pastry burner. In my case I don't have one, so I decided to create the same pattern with the help of a ruler.
Prepare coffee Italian meringue.
- Add the sugar and water in a saucepan, in that order. Place over medium heat.
- Use a cooking thermometer to know the temperature of the syrup. When it reaches 244ºF/118ºC, remove it and add it to the egg whites, previously semi-whipped.
- Add the syrup in a thin, continuous stream over the semi-whipped egg whites, beating at the same time until a firm consistency is achieved. You will obtain a very shiny meringue.
- If we check the temperature, we must beat at high speed until the temperature reduces to 104ºF/40ºC.
- Add the coffee extract along with the pinch of food coloring, to give a subtly brownish hue, and mix for a few seconds to distribute evenly.
- Let stand for 2 minutes before using.
- Transfer into a piping bag with a star nozzle. In my case I used the SF18 nozzle from Decora.
Finish decorating the Capuchina cake.
- Pipe the coffee meringue down the sides of the cake. You can do it following the design I show you in the video or another of your choice.
- Serve immediately.
- NOTE: The meringue should be used to decorate after making it, if you let it stand, it will begin to lose its consistency and after the piping, it will have a different texture.

Notes
- To prepare the mold, grease the base and sides with olive oil. Place baking paper on the base to prevent the cake from sticking to it (and to make it unmold better). On the sides it will be enough to sprinkle with powdered sugar.
- To make the cake you only need egg yolks, no corn starch, flour, sugar... It will be enough to whip the yolks well in the way that I show you and specify.
- It is very important to bake the cake in a bain-marie to favor its perfect texture and tenderness. The size of the mold will always determine the final baking time.
- The sponge cake must rest with the syrup for 24 hours. During this time it will absorb all the syrup, achieving a wonderful texture and moistness.
- To make the egg yolk pastry cream, I recommend mixing the cornstarch with the sugar before adding it to the egg mixture. This process avoids the risk of lumps forming.
- Yolk pastry cream has a very simple process of elaboration, but it requires care and patience when you are cooking it. Do not stop stirring the cream constantly to prevent lumps from forming or to prevent part of the cream from sticking to the base and starting to burn, as this would spoil the final texture and flavor. Maintain a medium low temperature during the whole process.
- I advise you to make Italian or Swiss meringue instead of French meringue, the final texture is much creamier, and it keeps its shape much better over time (once it has been drained).
- When you sprinkle the powdered sugar on the surface, it will remain for a very short time because the pastry yolk will absorb it due to its humidity. You can have a thicker layer, if you want it to hold, but I consider that to be adding too much unnecessary sugar. If you wish, you can omit it.
- .To create the upper pattern, a pastry burner is often used In my case I did it, but only marking the surface (I don't have a electric burner).
- If you are going to make the cake a day in advance, keep in mind that the meringue does not age well in the refrigerator. It acquires a drier finish and the texture changes, it is not as creamy. If you make it and whip it the day before, I advise you two things; you can prepare the meringue just the day you are going to serve it or decorate it with whipped cream, this withstands the passage of time better. You can also flavor it if you wish with coffee or vanilla flavoring.
- With the surplus egg whites you can prepare a Portuguese egg white pudding, Molotof, macarons, dry meringues...
- Once the cake is finished and assembled, it can be kept for 2-3 days refrigerated.

I give you my word that you are going to fall in love with this Capuchina Cake. Surely many of you have tried it on several occasions, but the pleasure of being able to make it at home, with such a wonderful result? It is priceless.
As you will see, the process is quite simple. It only requires us to follow the detailed steps to achieve a good result. It is a cake that will allow us to give our loved ones the best dessert, sweet or temptation that you can imagine.
I can't wait for you to prepare it and share your experience with me.
I remind you that you can watch all my videos on my YouTube channel. If you subscribe and turn on the little bell, I will be eternally grateful!
I wish you a wonderful Sunday afternoon and happy Easter!
Lots of love,
Eva
Sources: GG Almirez, Pastelería Díaz Miguel