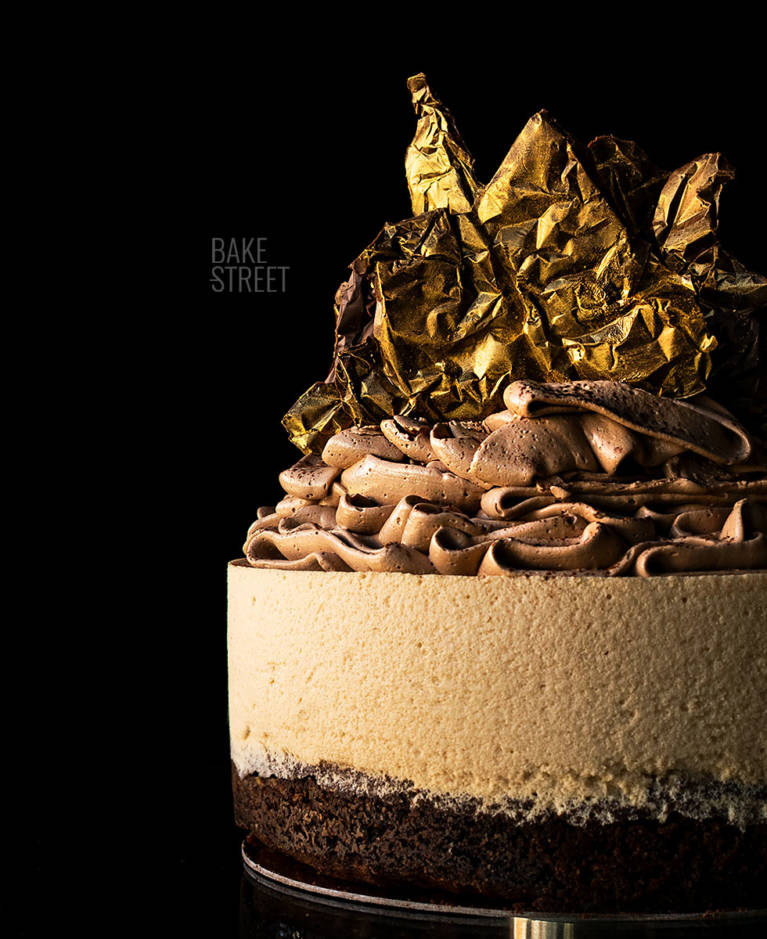
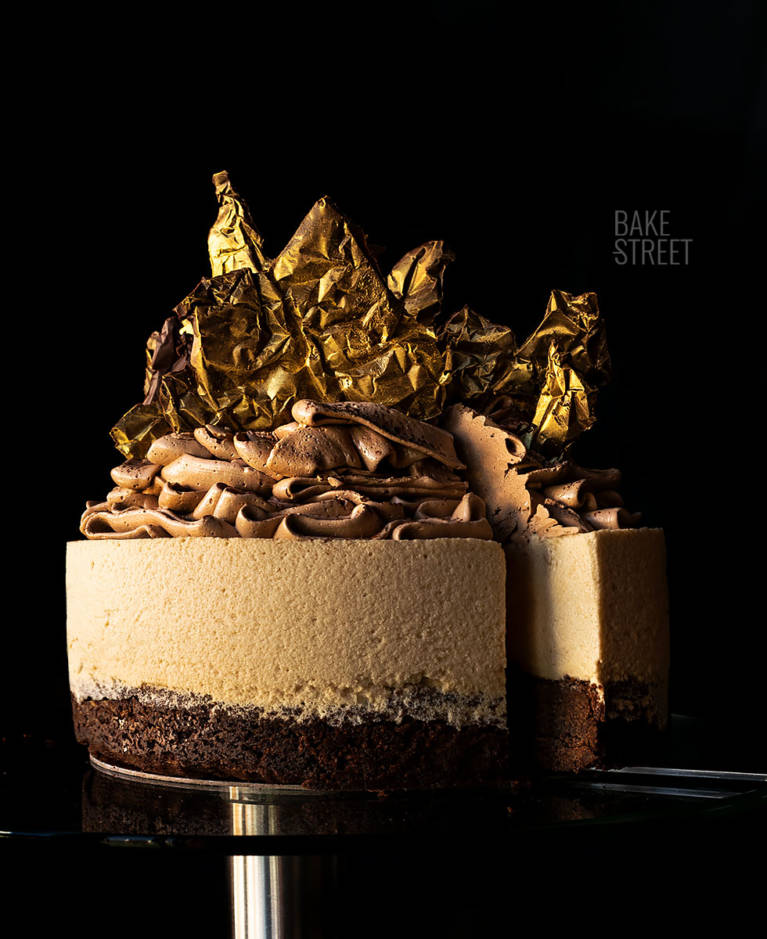
Brownie coffee mousse cake
It didn’t take me long not to make cakes… hahaha. I can’t help it, I miss them! Not only do I enjoy thinking about them and making them, which is something I love, but also in the final moment. Tasting them. Today I bring a much simpler version than all the last ones, even less elaborated. But that doesn’t mean, at all, that it isn´t delicious. I tell you that this Brownie coffee mousse cake is going to be your perfect dessert for this weekend.
We can’t do the whole process in the same day because the mousse must rest in the cold for it to set. But removing this, it is a cake to which we will not have to dedicate much time and we will obtain a wonderful result.
Brownie coffee mousse cake.
To make this cake we will only have to prepare 3 preparations; brownie, mousse and a chocolate SMBC. Simple, right?
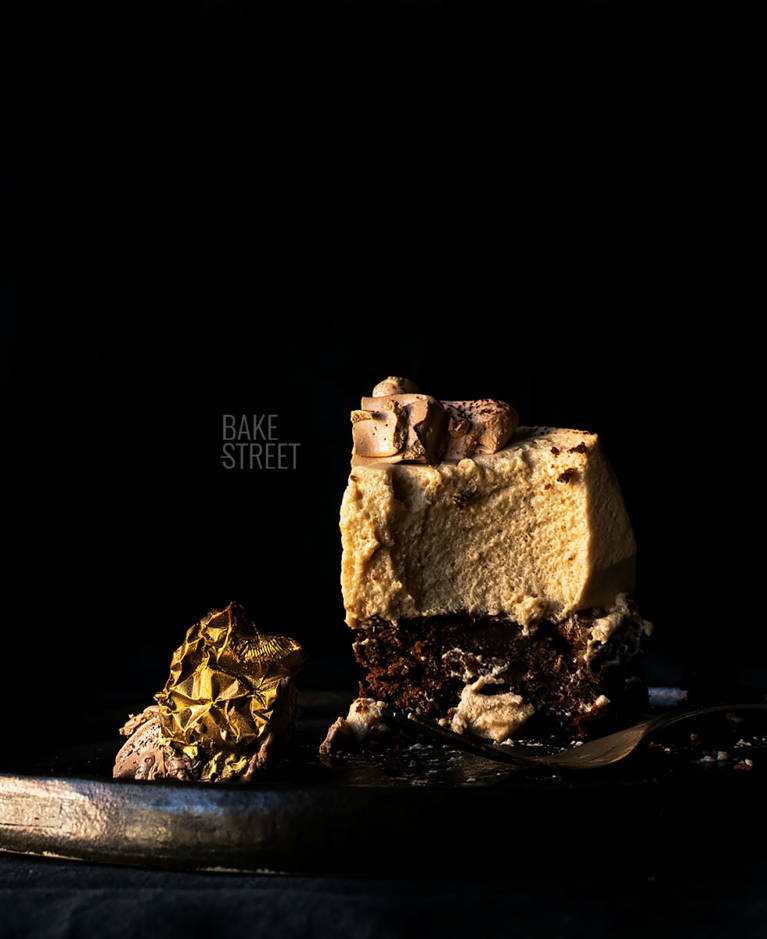
The base of our cake will be a brownie with walnuts (or another type of nut or even chocolate if you prefer). It’s true that there’s nothing in the world better than a juicy, melting brownie… But this time we will have to make a small sacrifice and cook it a little more. Ok, I’m not saying make a dry brownie that can’t be eaten. But we need it to be firm so we can keep the whole cake, especially when we cut it.
On the brownie we will put a coffee and Orujo liquor mousse. This is outstanding! If you are coffee lovers, here you are going to fall in love. Promise!
It’s not the first time I’ve prepared this mousse, in fact I made it 1.2oo years ago to make these mousse chocolate cups (please, don’t laugh, I’ve been blogging for a short time, hahahaha). Anyway. That was the first time I made this mousse and, seven years later, I still like it the same or even more.
To decorate the top, I wanted a cream that would keep its shape while having a silky, flexible texture. Of course, you could only do this with a Swiss Meringue Buttercream. I chose to make it with chocolate to accompany the brownie of the base and because it is the ideal companion for coffee. Along with the caramel, of course.
The top decoration.
To decorate the top, I was pretty sure about what I was going to do. I’ve been following Tortik Annuchka for IG for a long time. In fact I follow this account and all the others that have because they do an extraordinary work. They are authentic masters making cakes, with very clean and impeccable finishes, without forgetting their wonderful originality… Seriously, go and see them because they are incredible.
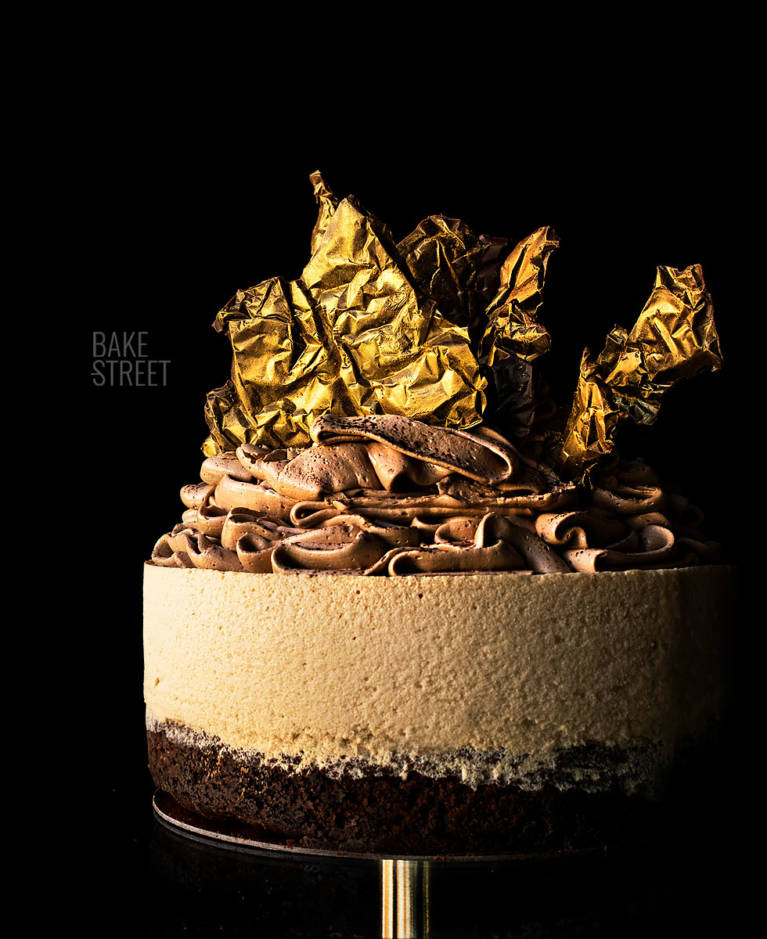
One of the decorations they make is just the one I show you in this post. Chocolate sheets with a look that simulates a metallic finish. For it what they do is to pour chocolate on aluminum foil, previously wrinkled, to spread it and to cool it. When removing the paper, we will obtain the texture of this. Then we only have to paint it with a metallic food colorant and that´s all.
They use it to cover cakes and the result is simply stunning. I wanted to start a few steps down and make a simple top decoration.
As you can see on this occasion I bring you a very attractive cake, but infinitely simpler than others. Right? Lol
Ingredientes for a 6 inch cake
FOR BROWNIE:
- 150 g black chocolate 70%
- 125 g unsalted butter at room temperature
- 2 large eggs
- 75 g sugar (result is better with dark muscovado sugar)
- 30 g cake/pastry flour
- 60 g chopped walnuts
- pinch of salt
FOR COFFEE AND ORUJO LIQUOR MOUSSE:
- 125 g fat cream + 50 g icing sugar
- 50 g egg whites + 50 g sugar
- 75 g crème frâiche
- 2 gelatin sheets (4 g)
- 70 g freshly brewed coffee (131º-113ºF/55º-45ºC)
- 10 g Oruj0 liquor
FOR CHOCOLATE SMBC:
- 68 g egg whites, at room temperature
- 122 g sugar
- 160 g unsalted butter at room temperature
- 85 g black chocolate 70%
FOR DECORATE:
- 100 g black chocolate 70%
- edible gold powder
- cocoa powder
Instructions
FIRST DAY
Make brownie.
- Preheat oven to 338ºF/170ºC.
- Grease a 6 inch/15 cm diameter Push-Pan mould with butter. Sprinkle with flour and turn to remove the excess. If you wish, we can place a circle of baking paper on the base. Set aside.
- Cut the dark chocolate 70%, reserve.
- Prepare a saucepan with a little water, enough to generate heat but making sure that it does not touch the base of the bowl that we will place on it.
- In a heat-resistant bowl add the chocolate and place in a bain-marie, over the saucepan with water, at medium-low heat. Leave until it is completely melted, stirring from time to time.
- Once we have the melted chocolate, remove from the heat, add the butter at room temperature and mix with the help of a spatula until completely homogenized. Set aside.
- In a large bowl add the sugar together with the eggs and whisk.
- Pour the chocolate mixture over the egg mixture while stirring, you will see that will acquire a denser texture.
- It incorporates the flour, previously sieved, and the pinch of salt and integrate with soft and enveloping movements helping us with a silicone spatula. Finally add the walnuts, lightly chopped, and mix again to distribute evenly.
- Pour the dough into the mould, tap and bake for 50 minutes.
- Remove from the oven and let it cool completely on a rack inside the mould.
- Once it has cooled down completely, unmold.
- With the help of a cake cutter, cut off the top to achieve a straight surface. If we find any area with walnuts, we will have to make use of a saw knife to avoid spoiling it.
Make whipped cream for coffee mousse.
- Before we get ready to whip the cream we must make sure of two things:
- Cream must be cold 24 hours before used it.
- The bowl in which we are going to make whipped cream must be cold. I recommend to use one aluminium bowl and freeze 20 minutes before beat it.
- If you want to know how to make whipped cream, you can do it in this video.
- Pour heavy cream into freeze bowl and beat with an electric mixer into low speed.
- Once cream is becoming to form stiff peaks, add sugar little by little stirring the whole time. Increase speed gradually but without reaches high one. Ideally use medium speed.
- Before finish to beat the cream, add vanilla extract along and beat until get a perfect whipping cream. Be sure not to over-beat, otherwise cream will become lumpy and butter-like.
- Cover with plastic wrap and chill until used it.
Make coffee and Orujo liquor mousse.
- Fill a bowl with very cold water and put the gelatine sheets inside. Let it hydrate for 15-20 minutes.
- Whip the egg whites. To do this, we will do it in the same way as if we were going to make SMBC. In other words, place them in a water-bath with the sugar until they reach 165ºF/74ºC and then assemble them. Set aside.
- Prepare a coffee, in my case in the coffee maker grinding the grain in the moment, and set aside.
- Check the temperature of the coffee, it should be around 113º-131ºF/45º-55ºC.
- Drain the gelatine and put it into the coffee. Dissolve with a teaspoon.
- Pour into a large bowl and add the crème fraîche, mix well until completely incorporated.
- Add a small quantity of whipped cream and begin to integrate with the help of a silicone spatula. We will do it with soft and enveloping movements, without stirring the mixture.
- Once it is integrated, add another small amount of whipped cream and repeat the same process. We will do this step in several batches and will not add more until the last one is completely integrated.
- Repeat this same process with the meringue. We integrate it in batches and with soft and enveloping movements.
- Set aside.
Assemble the cake.
- Place an anti-slip disk on the base of the Push-Pan mould 6 inch/15 cm to fix the cake disc.
- Put the disc and place the brownie on it.
- Place a sheet of acetate inside the mould. This will help us to remove the cake in a cleaner way.
- Pour the coffee mousse. Ttap gently the mold, on a cloth placed on a work surface, to seat the mousse.
- Cover the surface with film and refrigerate for a minimum of 4 hours or, if you wish and ideally, until the next day.
- If you want the acetate to be demoulded very cleanly, you can freeze the cake for 3-4 hours.
SECOND DAY
Make chocolate Swiss Meringue Buttercream.
- In a heat-resistant bowl, add the egg whites along with the sugar.
- Place on a water-bath at medium low heat. Stirring constantly, leave until the egg whites reach 165ºF/74ºC. For it we will help ourselves of a digital thermometer.
- Remove from the heat, pour the egg whites into the bowl of the KitchenAid or a stand mixer and whip at medium high speed until a firm and shiny meringue is obtained.
- Once we have the firm meringue, begin to add the butter cut into squares little by little and at the same time the mixer continues whipping.
- Once we have all the butter added, increase the speed and finish whipping.
- Stop, scrap the cream with the help of a spatula and add the chocolate.
- Whip again at high speed until the ingredients are completely integrated.
- Set aside.
Make the top decoration.
- Melt the chocolate in a bain-marie, set aside.
- Take a sheet of aluminium foil, wrinkle it and stretch it slightly.
- Pour the chocolate over it and spread with the help of a spatula.
- Refrigerate until it hardens completely. Ideally, keep it in the freezer for 30-40 minutes.
- Take it out from the fridge/freezer and remove the aluminium foil from the chocolate.
- In this case it doesn't matter that it breaks us in pieces since it is the way that we need it to decorate the cake.
- Brush the surface with edible gold powder.
- Refrigerate until the moment of use.
Decorating the cake.
- Put SMBC into a piping bag with a Wilton 150 tip.
- Decorate the upper part forming folds, as I show you in the video.
- Place the chocolate pieces on the surface. The ideal is to help us with some tweezers.
- Lightly sprinkle the surface with cocoa powder.
- Serve.

Notes
- If you don't like them or you can't eat walnuts, they can be replaced by another nut or even chocolate chips.
- The brownie's cooking will be a little higher than we usually bake it because we need the inside not to be too creamy. Otherwise the cake could crumble. But the result is not dry at all.
- You can use coffee powder and dissolve it in water if you do not have a coffeemaker.
- If you don't want to use liquor in the mousse, you can omit it. Just as if you prefer to replace it with another type that you like more or have at hand at home.
- Coffee mousse has the perfect consistency and texture to be a mousse, but if you want the cake to have a little more firmness, add one more sheet of gelatin.
- To unmould the cake cleanly we can either freeze it or spray the acetate with a demoulding spray.
- The top decoration can be replaced by meringue, cocoa whipped cream or even cocoa powder if you prefer.
- The cake is best served tempered so that the brownie acquires the perfect consistency. As soon as you get out of the fridge, it will be harder.
- We can keep it refrigerated for 2-3 days.
I hope that soon you will prepare this Brownie coffee mousse cake and tell me how it has gone. If you have noticed, this time I have left you a recipe for a mold a little smaller than in other occasions. That way we can make a "weekend" cake so that when Monday arrives we don't have any pieces left in the fridge.
If you want to make a bigger version, just calculate the proportions and you're done.
The combination is amazing; a juicy brownie base (not like a perfect brownie, let's remember), a very soft and airy mousse with a coffee flavor and a point of liquor, crowned with a chocolate cream and chocolate sheets... Heaven!
I wish you a wonderful weekend, see you on Monday!
Big hugs,
Eva