Sakura Dream Cheesecake
Today I come with a very special recipe to celebrate my birthday with all of you. Unfortunately, it does not have a specific origin, since it is my own creation that I have carried out combining different elaborations. But, this is a good start and starting point. I present to you this Sakura Dream Cheesecake.
Those of you who have been reading me for a long time, know that I have a close and inexplicable love for Japan. It is a place that attracts me and with which I have a special bond, even though I have never been there. At least in this life. The thing is that every time I elaborate something from there, it activates an emotion in me that makes me feel good, a lot of peace. For that reason, I decided to create this cake to celebrate my 18th birthday, hahaha. Well, okay, some more. But few more, don’t go thinking…
Making the Sakura Dream Cheesecake.
This year I have considered several options to prepare my birthday cake. In fact, since last year, I have wanted to give you a Peruvian cake, but I think it has too much food to be eaten in summer. With these hot weather, I think, I do not feel like it too much. So I decided to leave it for the arrival of autumn, when you will surely prepare it with much more enthusiasm.
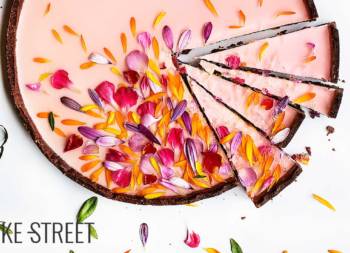
Looking for inspiration to prepare the cake, I came across this marvel that immediately captivated me. I saw it and knew that this was the recipe I was going to recreate, at least in appearance (distantly, because theirs is much better). I deduce that this little cake is very similar to the traditional Mont Blanc, only that they have created a magnificent design and style. I personally fell in love with it.

I thought about adapting this sweet in cake format, but I had to think about seasonal ingredients and elaborations. I had to think of seasonal ingredients and elaborations that would be good to eat in this heat. I was very clear that the “top” or high filling of the cake was going to be a Japanese cheesecake. It is a cake that you can eat at 104ºF/40ºC as well as at 23ºF/-5ºC. It is always appetizing. This cheesecake has a soufflé texture, with a soft and delicate flavor, slightly moist, as if we were eating cotton….
For the base I thought it would be nice to adapt this plum cake that I left you some time ago and, instead, use cherries and white chocolate. It is a spongy, soft and delicate cake. On top of it, you will find a thin layer of cherry jam, topped with a Japanese cheesecake.
Decoration.
The exterior decoration is inspired by Mont Blanc, but I didn’t want to use chestnut puree. Since it is a cake based on Japanese culture, I immediately thought of the cherry blossom bean paste in salt, Sakura An. This paste is made with a base that, surely, many of you already know. Especially if you are lovers of Japanese gastronomy. It is Shiro An or sweet white bean paste, which is then seasoned with cherry blossoms in salt, Sakuracha. This preservation method originated in China and was brought to Japan during the flourishing Nara period (710-794).
The Sakura cherry blossom is one of the most fascinating and incredible phenomena on the planet. Come spring, you can enjoy a floral spectacle filled with shades of pink as you make your way through them.

In fact, there is a Japanese tradition, Hanami(花見, its translation would be “looking at flowers”), which consists of observing and contemplating the beauty of flowers with an attitude of wonder at the phenomena of nature. This celebration began in the Meijiera and has been preserved ever since.
Japan’s samurai culture also had great admiration for this flower as samurai (like cherry blossoms) were considered to have a short life span. The bushidō (武士道) or “way of the warrior,” created by Inzao Nitobe, is known as the code of the samurai.
According to legend, Sakura flowers were originally white. But they were dyed pink when mixed with the blood of the warriors at the foot of the trees. The samurai, when committing a serious breach of the code of ethics, would commit seppuku or also erroneously called harakiri. It is said that they chose these places to take their own lives, so that they could have one last experience of beauty before dying by their own hand.
The Sakura cherry blossom represents innocence, simplicity, the beauty of nature, gentleness, youth and rebirth.
Details of Sakura Dream Cheesecake.
Since the cake takes inspiration from cherry blossoms, these beautiful flowers could not be missing. To make them I thought of several options; plastic or modelable chocolate, marzipan…. But looking for some alternatives I came to rice paste, known as Rice Clay. I had never heard of it, it seemed super curious. So I started to investigate.

I found many recipes, I watched several videos, (this, this and this among others) and what fascinated me the most was the final finish. It is impeccable, delicate, fine, wonderful. It is true that it takes a little time, because after mixing all the ingredients you have to steam it for 15 minutes. But, believe me, it is well worth the time invested with the result obtained.
I didn’t want to complicate your life so much, I made a “dough base” that you can adjust the hydration afterwards. The result is incredible, it molds very well and dries in a few hours.
To make the branches I used chocolate. If it is very hot, it is horrible to work with. In case you have a very intense summer, you can still make cocoa cookies, which is what they make in the cake on which I based it. And it will give you few headaches.
Recipe Sakura Dream Cheesecake
CHERRY AND WHITE CHOCOLATE SPONGE CAKE:
- 75 g unsalted butter, room temperature
- 50 g sugar
- 1 egg large + 1 yolk (85 g total)
- 75 g cake flour
- 35 g corn starch
- 15 g whole milk, room temperature
- 3 g baking powder
- pinch of salt
- 150 g cherries
- 50 g white chocolate drops, I used Callebaut W2
- cherry jam, to cover the sponge cake after baking
JAPANESE CHEESECAKE:
- 130 g cream cheese
- 90 g whole milk
- 30 g unsalted butter
- 3 egg yolks large + 3 egg whites large
- 25 g cake flour
- 12 g corn starch
- 65 g sugar
- 3 g vanilla extract
- 5 g lemon juice
SAKURA-AN:
- 250 g white beans
- 20 g Sakura cherry blossom in salt (Sakuracha)
- 200 g sugar
- 3 g salt
- pinch of coloring paste, I used the color “Strawberry” powder, you can also use the color “Claret” from Sugarflair (can be replaced by red rice yeast or beet powder)
RICE CLAY:
- 20 g rice flour
- 15 g glutinous rice flour
- 30 g corn starch
- 15 g tapioca starch
- 7 g glycerin
- 30 g water
- 38 g corn syrup
- 8 g unsalted butter, room temperature
- pink food coloring powder or paste
CHOCOLATE BRANCHES:
- 75 g dark chocolate 70%
- cocoa powder
MATERIAL WE WILL NEED AND VISIBLE IN THE VIDEO:
- stand mixer or manual eletric rods
- rotating cake stand
- 20 cm diameter, removable pan
- 15 cm diameter, removable pan
- wide metal tray, for bain-marie baking
- cooling rack
- bowls
- whisk
- silicone spatulas
- curved pastry spatula
- saucepan
- digital kitchen scales
- modeling tools
- scissors
- gold or red flower stems
- flower wires
- small brush
- piping bag + JEM 235 nozzle
REMEMBER TO ENJOY SWEETS IN MODERATION. SUGAR SHOULD BE CONSUMED OCCASIONALLY AND NOT BE PART OF YOUR DAILY DIET TO MAINTAIN A HEALTHY LIFESTYLE.
Instructions
FIRST DAY
Prepare Sakura An.
- To make the pickled cherry blossom bean paste, follow the process explained in this post. Note that you must soak the beans for 12 hours.
- Once you have prepared the Sakura an bean paste, store in a container, cover with cling film and refrigerate until ready to use.
Prepare rice clay.
- Mix all dry ingredients in a bowl, set aside.
- Add all the liquid ingredients together with the butter in a saucepan, cook over medium heat until they come to a gentle boil.
- Pour the liquid ingredients over the dry ingredients and mix until amalgamated.
- Knead, carefully as the dough may still be hot, until you have a homogeneous dough with no dry ingredients remaining. It is a dough that cracks easily.
- Grease a piece of aluminum foil with butter, this step helps to prevent the dough from sticking to the foil.
- Place the dough on the aluminum foil, giving it a rectangular shape, and cover it so that it is completely covered.
Cook rice clay.
- Steam for 15 minutes.
- Remove and let stand for 5 minutes inside the aluminum foil wrapper.
- Knead, while moistening with water, until the dough is elastic and pleasant to handle.
- Depending on the climate you live in, you will need to add more or less water. You must be careful not to exceed the hydration of the dough to be able to model it and keep its shape well.
- Form 2 pieces, or as many as you wish, roll, butter the surface and wrap well with plastic wrap to prevent it from drying out.
- Dye one of the portions with pink powder coloring, add a small amount and knead very well to achieve a uniform color.
Form cherry blossoms.
- To form each cherry blossom, you must use two stems and a piece of floral wire. Prepare several, the amount of flowers you want to create and set aside. In the video you can see how to do it.
- Form the cherry blossoms, in the video I show you how to do it without using molds.
- Once you have them all ready, let them dry for 12 hours.
- After that time, paint the inside of the flowers with pink powder coloring to achieve depth and realism.
- Set aside.
SECOND DAY
Prepare cherries.
- Wash the cherries very well and remove any damaged ones.
- Cut the cherry in half, remove the stone.
- Set aside while you prepare the cake batter.
Prepare sponge cake.
- In the bowl of the KitchenAid, add the butter and sugar, beat until you obtain an airy, creamy and whitish mixture.
- Add the egg and egg yolk, mix until well blended and a good emulsion is achieved.
- Meanwhile, mix the flour with the corn starch, previously sifted, the baking powder and the salt.
- Add half of the dry ingredients, little by little, while mixing.
- Add the milk along with the vanilla and continue mixing.
- Finally, add the rest of the dry ingredients and mix just until it is integrated and no flour remains.
Pour in the mold and bake.
- Preheat the oven to 347ºF/175ºC, heat up and down.
- Grease and line a 20 cm diameter baking pan with baking paper.
- Pour the mixture into the mold and smooth the mixture as much as possible.
- Place the cherry pieces all over the surface of the cake, sinking them slightly. Smooth the surface.
- Bake for 30 minutes.
- Remove and let stand for 5 minutes in the mold. Unmold, turn upside down and let cool completely on a wire rack.
- Wrap in plastic wrap and store in the refrigerator until the next day.
Prepare japanese cheesecake.
- Preheat the oven to 284ºF/140ºC, heat up and down.
- Place a baking pan inside and pour hot water in it. Enough to cover approximately 2 fingers of the pan.
- Line only the base of a 15 cm Push-Pan or springform pan with baking paper. If desired, cover the base with aluminum foil to prevent water from seeping through. Set aside.
- Separate the egg yolks from the egg whites.
- In a bowl, add the milk, cream cheese and butter.
- Place over a saucepan of boiling water and mix with a whisk. Stir constantly until all the ingredients form a homogeneous mixture.
- Remove the bowl from the saucepan and add the egg yolks, mix until homogeneous.
- Add the dry ingredients, through a sieve to sift them, and mix with the whisk until you obtain a homogeneous mixture without lumps. Do not over-mix in any case, just mix until there are no more dry ingredients.
- Pass the mixture through a sieve to remove any lumps that may have formed. Set aside.
Whip egg whites.
- Add the egg whites and lemon juice to a large bowl and whip with an electric whisk until foamy.
- At this point, add half of the sugar and continue whipping.
- You will notice that the egg whites begin to become firmer, add the rest of the sugar and finish whipping until you obtain a meringue that forms soft peaks. Do not over whip the egg whites, as this will result in a dry and porous meringue. This results in a different cheesecake texture than the one we are looking for.
Fold the meringue into the cheesecake mixture.
- Add a small amount of meringue to the cheese mixture and integrate with a whisk. Attention at this point!
- You should not whisk the mixture, but make smooth and delicate movements. To do this, start by making gentle circular movements on the surface and continue to extend the path down towards the cream until you reach the bottom. It is important to do this carefully so as not to break the meringue bubbles.
- By doing this process in this way, it will be much easier for those who find it difficult to integrate the meringue into a mixture with a silicone spatula.
- Pour this cheese mixture over the meringue and integrate in the same way you did the previous time. You can do this with a whisk or a silicone spatula. Remember to always reach the bottom of the bowl and make a smooth, upward and wrapping upward movement to integrate the meringue well with the cheese mixture.
Pour in the mold and bake.
- Pour the mixture into the reserved pan.
- With the help of a toothpick, smooth the top of the cheesecake. Draw a spiral on the surface, so it will help to smooth it and remove any bubbles near it.
- Carefully and gently tap the mold a couple of times against a work surface and place in the oven in the pan with hot water.
- Bake for 35 minutes at 284ºF/140ºC.
- Reduce the heat to 257ºF/125ºC and bake for another 40 minutes.
- Once the baking is finished, turn off the oven and let stand for 15 minutes inside the oven.
- Remove from the oven and let it cool inside the mold, on a rack.
- Cover the surface of the mold with plastic wrap and refrigerate until the next day.
THIRD DAY
Form the chocolate branches.
- Melt the chocolate and temper at 86ºF/30ºC. Pour into a piping bag.
- Fill a bowl with cold water and ice.
- Pipe the chocolate, making sure to form branches.
- Sink the chocolate slightly in the cold water to harden more quickly, remove with tongs and place on paper towels to remove excess water.
- Refrigerate for 1 hour to allow the chocolate to harden so you can handle it without any problem.
- Before placing them on the cake, you can brush them with cocoa powder.
Assemble Sakura Dream Cheesecake.
- Place a non-skid on a rotating cake stand and place a cake stand on top of it.
- Spread a small amount of Sakura An paste on the disk.
- Place the chocolate cherry sponge cake.
- Cover the surface of the cake with cherry jam.
- Unmold the cheesecake and place on top of the sponge cake.
- Put the Sakura An paste in a piping bag with JEM 235 nozzle and decorate the cake simulating the Mont Blanc decoration.
- Finally, decorate the outside with chocolate branches and cherry blossoms.


Notes
- To make the cake I used fresh cherries. If you wish, you can use canned cherries, although I consider that natural fruit is a better option.
- When making the cake, it is important to achieve a good emulsion of the butter with the eggs, as well as mixing just until the dry ingredients are integrated. You should not beat longer to prevent the gluten from developing and the cake from becoming dense and compact.
- Since the cake contains fruit, I recommend keeping it refrigerated for up to 6-7 days.
- It is important to use whole milk and fat cream cheese, that is, neither semi-skimmed nor skimmed. The final result will be better.
- It is important to follow the cheesecake process as I specify for the final result to be good.
- When integrating the meringue into the mixture of cream cheese and egg yolks, you must do it carefully to avoid breaking the bubbles that you have created when whipping it. Remember that it is very important not to beat it or make sudden movements. You must make delicate, smooth and enveloping movements. The whisks will help us to integrate it easily.
- For the final baking result to be good, you must preheat the oven well. Baking should be done in a bain-marie to promote a moist environment and achieve a cheesecake with volume.
- The baking temperature is also very important if we do not want the cheesecake to crack or, on the contrary, collapse when it comes out of the oven. A very high temperature will make the cheesecake grow very fast and will result in the appearance of cracks. It is preferable to bake at a lower temperature and allow it to rise gradually while the top sets. If, on the contrary, we have undercooking, the cheesecake will take volume during baking, but when we turn off the oven and take it out, it will collapse, go down and give us a flat and rough surface. In addition to a possible tighter final texture.
- When you finish baking it is important to let it rest for a few minutes in the oven so that the cheesecake keeps its volume.
- Before unmolding, let it cool completely in the mold.
- All the tips to make the bean paste with cherry blossom, Sakura An, you can see it in the post I elaborated telling the whole process.
- The rice paste, known as Rice Clay, is made with the ingredients listed. I believe that none of the ingredients can be omitted or replaced since I have looked at dozens of recipes and all of them keep the same ingredients. The difference between them lies in the quantities to use and parts of the process, but the ingredients are the same in all of them. Many recipes use Crisco, in my case I preferred to use butter.
- Rice dough, as I show you how to make it, is hydrated after cooking. In this way, you can adjust the hydration of the dough according to the place where you live, with more or less humidity.
- Rice dough shapes very well. You must let it dry completely before painting it and using it to decorate. It cannot be eaten.
- Be careful when handling the chocolate branches, with the heat they can easily lose firmness.
- The decoration is completely optional, you can adjust it to your personal taste.
- You can keep the cake refrigerated for 5-6 days, counting from the moment it is completely assembled. It should be covered with plastic wrap to prevent it from drying out.


Thank you for joining me for another year and sharing wonderful moments together. What I like most of all, is that it is always around a table, even if it is virtual. I send you a little piece of this wonderful Sakura Dream Cheesecake and I hope you enjoy it very much. Thank you always for your time and support.
By the way, I remind you that you can watch all my videos on my YouTube channel. If you subscribe and turn on the little bell, I will be eternally grateful!
For my part, I will take a short break from the web until the end of August, more or less. That way I will disconnect a bit, advance projects and prepare recipes for the return from vacation.
I hope you are having a wonderful summer, that you rest, enjoy and do everything that makes you happy! See you when you get back.
Lots of love,
Eva