How to make Glass Bread with yeast – Pan de Cristal
I must confess that the bread I brought you today was almost a personal challenge for me. I’ve been wanting to get into high-hydration breads for a long time, but I have to admit that they always gave me a bit of respect. Working with handles that are 100% or even 115% hydrated makes us sweat, hahaha. But, today I leave you How to make glass bread with yeast – Pan de cristal.
I detail that it is made with yeast because I also want to leave you a version of this bread, in the future, made with sourdough. That way we will be able to see the difference made with one or the other in terms of texture, aromas, flavours and results in its crumb.

Glass bread – Pan de cristal.
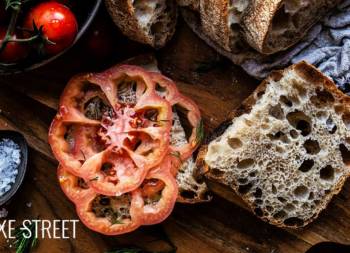
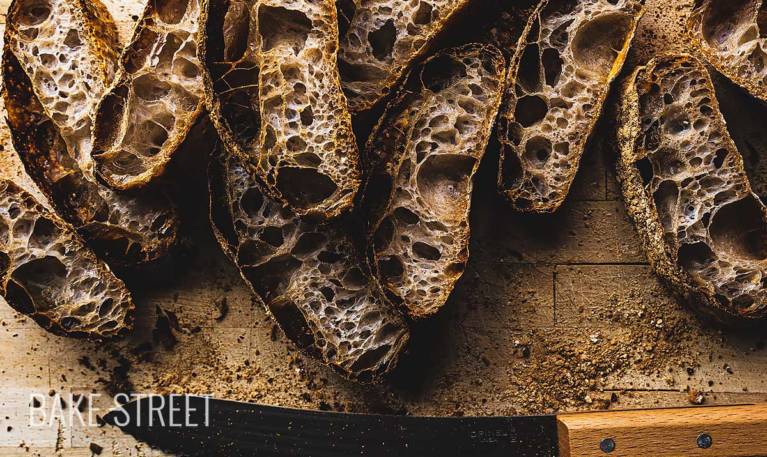
If there is something characteristic of glass bread, it is, without a doubt, its incredible fine and crispy crust accompanied by a soft crumb that is practically non-existent due to its high level of hydration.
This bread was created by Jordi Nomen in 2004. Apparently it all came about because he was tired of hearing that the bread crumb is fattening. So he decided to create a light and airy crumb bread. To do this he worked on a dough with a high percentage of hydration that would allow to obtain a very honeycombed crumb, avoiding to obtain a denser and tighter one.
Jordi not only achieved what he wanted to do but also created a bread that has become a real delicacy.
Nowadays, this variety of bread can only be found in a limited number of establishments in Barcelona. Apparently the original recipe is kept with suspicion. It is a type of bread that arrives in the shops pre-baked and it is in each bakery where it is finished baking to be sold to the public.
Thanks to its fame, many bakers have worked on recipes to achieve the formula of the glass bread and there are already several versions of it.
Making glass bread – pan de cristal.
I’m not going to lie to you… It’s a dough that requires a lot of effort and is NOT easy to work with. In my case the whole kneading process took 3 hours without counting rest. Plus the folding that takes place later during the first fermentation.
Some time ago I left you this coca bread, very similar to the glass bread, and chapatas. But nothing compares to this dough… Really. I’ve never worked with anything like this before.
As it is a highly hydrated dough, we have to develop the gluten very well before adding all the water. We already know that gluten develops in the presence of water, but it develops better in its “ideal environment”. In other words, a dough with 60-65% hydration would be the ideal dough to work with. And, as we well know, this will not always be the case.
When a bread has a very low presence of water or, on the contrary, a very high one, in both cases, carrying out the development of gluten is going to be very complicated. In the case of the latter, what we will have to do is add the water little by little.
Since we are going to use a flour with a lot of strength, what we will do is make an autolysis with 78% hydration. We will knead very well and start integrating the rest of the water little by little. It is vitally important to have a perfectly developed gluten before adding more water. If we do this, it will not be difficult for you to integrate the rest of the hydration into the dough. Even the oil. It will be very easy for you, believe me.
But until you get to this point, you’ll go through a little hell.
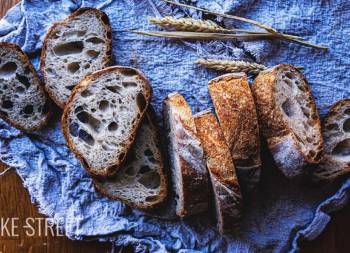
In my case I baked the bread twice. The first time I added up to 88% final hydration, I was a bit of a coward, hahaha. And the second time, I added 100%. Seeing how the dough was and the results, I think I could have added even a little bit more. But I think I’ll save that for the next one.
The next picture is of a glass bread with 88% hydration, the first test I did.

Rubaud Method.
I’ve been working my doughs with Rubaud method for some time now. It is a kneading method created by Gérard Rubaud in which gluten is kneaded and developed following a gentle and delicate process. It consists of taking the dough, stretching and scooping inside a bowl. Ideal type of kneading for highly hydrated dough, but I also tell you that you will be exercising your arms. Yes, both of you. Because to make the process easy, you’ll have to switch from one to the other.
Apparently they say that the Rubaud method is based on the Feldenkrais method. It is a type of somatic alternative physical therapy devised by the Israeli Moshe Feldenkrais (1904-1984) in the mid-20th century. Proponents of the method claim that, thanks to it, the connections between the brain and the body are reorganized and, therefore, body movement and psychological state are improved.
It allows people to “rediscover [their] innate ability for graceful and efficient movement” and that “These improvements will often be generalized to improve functioning in other aspects of [their] life.
It is curious that it is now that the method that Rubaud used for baking is becoming more popular. Not only in the process of kneading, but also in the times of autolysis and the addition of yeast/levain dough and salt. The video showing his way of working is from 2011, but he most probably already used this method in his breads before.
In my case I met this baker and his way of working thanks to Trevor, a baker that I recommend you to follow if you don’t do it already. It is with this kind of thing that you are aware of how much there is to learn (you never know everything about anything) and how much valuable information there is in the world.
Coil folds and final proof.
When working with high hydration doughs, we must try to strengthen the gluten mesh. Not only will we do this with the kneading, where we have done 90% of the work, but we will also do it through the folds.
In this case I have done 5 coil folds every 45 minutes. In the video you can see not only how to make them, but also how the dough evolves as I carry out the folds and time passes. The dough gains strength despite having 100% hydration, but it also gains volume.
For me the world of bread is simply fascinating… Few things make me enjoy it as much as working with these doughs.
Once we have carried out the entire folding process, refrigerate the dough in the cold for 12-14 hours. In this way we develop flavours and aromas in our future glass bread.

Shaping glass bread – pan de cristal.
This type of bread does not really require shaping. In fact, we must manipulate the dough as little as possible. We only have to divide the dough into two pieces, as similar as possible, move it to a tray and let it make a final fermentation. This can vary between 90-120 minutes. You know that fermentation is always conditioned by the outside temperature. If it is very hot, it can even be less time.
Do not touch the bread, do not stretch it, do not crush it, do not cut pieces to make it more beautiful … The bread will be wonderful as it comes out. Handmade things are like that, unique, different, rustic… Don’t throw away pieces of bread to achieve a perfect rectangular shape. In my humble opinion, it’s not worth it.
The glass bread must be baked at a very high temperature. As it is a highly hydrated dough, we must give it a strong heat stroke to encourage it to take on volume during the first few minutes of baking. For the same reason we will use steam at the beginning.
We will finish the baking of the pieces with air because we must try to dry the bread well to avoid that the possible humidity that remains in the interior, migrates to the surface leaving a soft crust. The result should be a very thin and crispy crust.
Recipe Glass bread - Pan de cristal
- 400 g strong flour or Manitoba flour
- 400 g water
- 1,7 g of dry yeast
- 10 g olive oil
- 8 g salt
Instructions
FIRST DAY
Prepare the dough for the glass bread.
- Mix the flour with 310 g of water. Reserve the rest.
- We can do it in the KitchenAid. Knead with the help of the hook or do the process by hand, if you prefer.
- Mix until there is no more flour left, it can take about 2 minutes.
- Cover it with a film or shower cap and make autolysis for 2 hours.
- After this time, incorporate the yeast dissolved in 15 g of water. Mix with the dough to integrate it and start kneading.
- To knead the glass bread I do the whole process manually and carrying out the Rubaud method. It is a type of kneading that does not hit the dough, it is a kneading process that develops the gluten mesh without stressing or being rough with the dough.
- Once it has been integrated, dissolve the salt in 15 g of water and add it to the dough. We continue kneading with the same technique.
- Add 15 g more water and knead again. At this point we have a total of 355 g of water incorporated into the dough. At this point we have to work the dough very well to obtain a perfect development of the gluten.
- When the dough has developed perfectly, start to add the rest of the water little by little. I recommend adding 10-12 g each time and kneading it until it is completely integrated into the dough. You will notice that once the gluten has developed, it has no problem integrating the rest of the water into the dough.
- Once we have added the 400 g of water and have a perfectly developed dough, add the olive oil. We carefully integrate and knead it until it becomes part of the dough. It won't take any effort, it integrates very well.
Do the first fermentation combined with coil folds.
- Grease a tupperware or recipient with olive oil and put the dough inside.
- Fold the dough, cover and leave to rest for 45 minutes at 75ºF/24ºC. Make the coil fold, as I show you in the video. Cover again and leave to rest for another 45 minutes.
- In total we will make 5 coil folds, one every 45 minutes, and after making the last one, we keep it in the cold until the next day. In my case it was 14 hours at 39ºF/4ºC.
SECOND DAY
Shape glass bread.
- Take the dough out of the fridge and let it rest for 1 hour at room temperature.
- Prepare a board/tray, line with baking paper and sprinkle with flour. Set aside.
- Sprinkle a work surface very generously with flour and dump the dough over. It is very, very important to handle the dough correctly so as not to damage the structure and, consequently, the internal alveoli.
- With the help of a metal scraper, divide the dough into two equal pieces or as similar as possible in size.
- If you want it to have a more defined shape, you can cut the ends to give it a rectangular finish. But I do not advise it, we will be wasting bread just to have a "prettier or more attractive" shape.
- With the help of two scrapers, or in case we don't have any with our hands, we will pass the dough from the table to the board. Place the scrapers/hands underneath, close them as if it was an accordion and arrange them on the table/tray while we stretch the dough.
- Dust the surface with flour, cover with a cotton cloth or film and let it rest for 2 hours at room temperature, in my case at 78ºF/25.5ºC.


Bake.
- Preheat the oven 30 minutes before baking at 482ºF/250º C with a steel or stone sheet and a bowl/tray with volcanic stones that we will place inside from the moment we turn on the oven, in this way they will also take the temperature.
- If you don't have a steel sheet, a perforated trays work very well. Remember to preheat the oven with it inside.
- Five minutes before putting the bread in the oven we heat water (more than half a cup), we can do it in the microwave.
- Put glass breads in the oven at the bottom. Slide the bread with the help of the wood board on the tray or steel plate.
- Pour the water on the stones, close and bake for 8 minutes with steam.
- After this time remove the tray with volcanic stones, close, reduce to 464ºF/240 º C and bake 10 minutes.
- Lower the heat to 446ºF/230ºC and bake 3 more minutes. We finish the cooking by baking to 446ºF/230ºC fan for 5 more minutes. This last baking step is very important to help the crust stay crisp.
- Take it out of the oven and let it cool completely on a rack.

Notes
- We will use a flour with a strength of W=300 or strong flour, if you have a stronger flour it could also be valid. Like Canadian strong flour.It is important to use a flour with a lot of strength because in addition to working with a high hydration, we will subject the dough to a long process of fermentation.
- Not all flours have the same absorption capacity. If you use a lower strength flour, reduce the amount of water when you mix the ingredients for autolysis. You can always add more later when you are ready to knead. Remember one thing: "the dough is always rectified with water, never with flour".
- Do not omit the time of autolysis, it helps us to hydrate the flour and reduces the time of kneading. Among other factors very beneficial for the dough.
- If you use fresh yeast instead of dry yeast, you should add 3 times this amount. In other words, for each gram of dry yeast, 3 g of fresh yeast are used. In this case it would be 6.6 g of fresh yeast.
- Kneading will be laborious due to high hydration. Do not add all the water at once or this step will be a real hell. It is easier to develop gluten in doughs with more moderate hydration and then continue to increase hydration. In my case the kneading process took 3 hours without including resting time.
- We will retard the dough in the fridge to prolong this step and favour the development of flavours and aromas.
- To prevent the crust from softening after baking, bake the final minutes with air/convection/fan. Otherwise the interior humidity will migrate to the surface and, after a few hours, we will have a leathery bread.
- The ideal is to eat the bread the same day we bake it because it does not have much useful life.

I can assure you that the work and effort of carrying out this bread, is worth a lot. That is why I decided to leave you How to make glass bread, so that you lose your fear of high hydration doughs and let them become part of your life.
It is true that it is not easy to work with these doughs, but they have something that hooks. They make you fall in love. You can be sure that I will continue to try breads of this type. But I think I must first buy some flours that are suitable for this type of dough.
I hope you'll take heart from it and tell me about your experience!
I wish you a wonderful Sunday!
Big hugs,
Eva
Sources: Panaderos.com