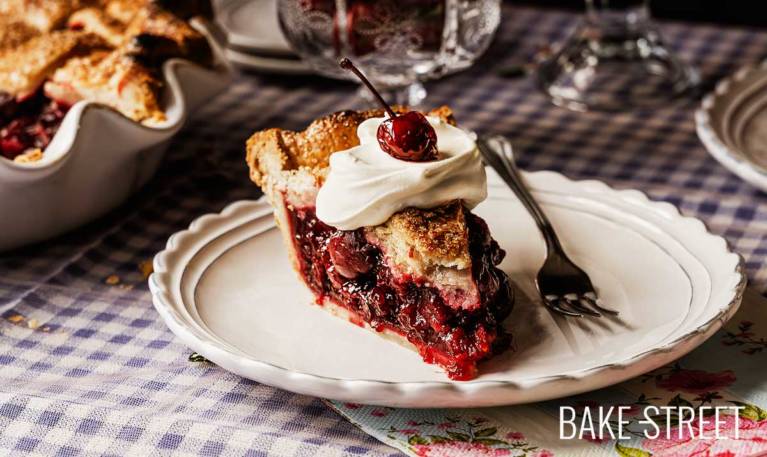
Cherry Pie with flaky pie crust
I don’t know if you’re like me, but I’ve always wanted to bake traditional American pies with the idyllic movie visualization where we take them out of the oven, in our retro chic kitchen with pastel colors, vases of flowers and beautiful appliances. And we let them cool on the kitchen window ledge overlooking a beautiful garden. I have finally been able to fulfill that dream, in part. Today I bring you a wonderful Cherry Pie with flaky pie crust, only in my case, it has cooled on a rack on the kitchen counter…
It would have been wonderful to place it on the window ledge, with its little translucent and embroidered curtain placed in the middle of it, and fill the neighborhood with the wonderful aroma of the cherry pie moved by the evening breeze. I visualize it as a dream, but that magic is hard to achieve living in the city.
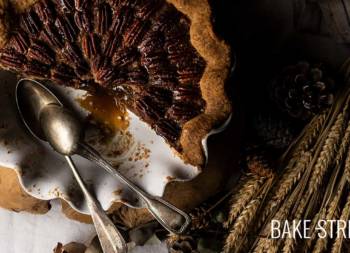
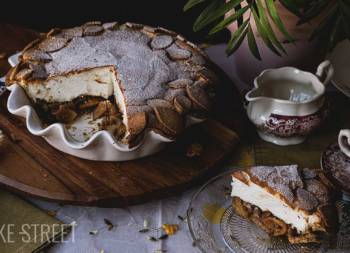
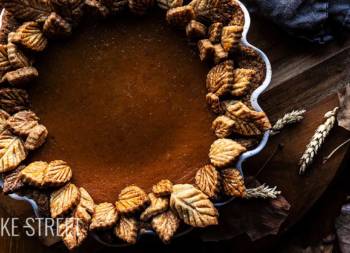
This is one of the classics of American pastries along with the exquisite Pecan Pie or the classic Pumpkin Pie. I still have some more to bring you, but little by little I will increase the repertoire of these cakes of American gastronomy.

Origin and history of the famous Cherry Pie.
The cultivation of cherries spread throughout Europe thanks to the Romans. In fact, historians believe that the first cake in history was made by the Romans, who in turn “borrowed” this idea from the Greeks.
But their cakes were far from today’s cakes in taste and appearance. They baked the fillings, both sweet and savory, using the reed plant as a container. The recipes for Roman pies were not always clear, and the fillings could be made with various combinations of ingredients.
As a curious fact, the first written Roman pie consisted of a filling made with rye flour, goat cheese and honey.
Thanks to the Romans’ evolution of their pastry making process, their knowledge reached Europe around the 14th century. The cakes were baked with a thick, coarse dough which, once again, only served to contain the filling, which was then discarded.
The first European pies were not the ones we know today. Often called “pyes“, they had a rather grotesque recipe. They were meat pies made with various poultry and small prey. The pie dough was called “coffyn” and many of these pies consisted mainly of dough with small amounts of filling.
In pies with poultry filling, the feet were inserted into the crust and used as handles to eat the pie.
First versions of Cherry Pie.
As we know it today, they became popular in England during the 16th century. Recipes for fruit pies, including cherry pies, began to appear in cookbooks of the time. Queen Elizabeth I is known to have enjoyed these pies.
European settlers brought their recipes and culinary traditions with them to North America. Cherry pie was adapted using the varieties of cherries available in the New World making cherry pie a symbol of American culture, especially in rural areas and at harvest time.
During the 20th century, Cherry Pie came to be seen as a typically American dessert, associated with the image of home and hospitality. Cherry is a seasonal fruit symbolizing summer, and cherry pie is often served at celebrations such as Independence Day (July 4).

Making Cherry Pie.
If I had to evaluate the difficulty of this recipe, perhaps I would say that it could be of medium complexity. Not because of the process itself, which you will see is very easy, but because of the steps it requires along with times and temperatures, which I do advise you to follow. It is a recipe that requires a little time and love, but it will not be complicated to carry out at all.
When it comes to making the famous Cherry Pie, we will see that there are plenty of doughs that we can use to prepare it. In my case, among all of them, the one I like the most is the “flaky dough”. Do not think that this is going to require a difficult process, not at all. In fact, to prepare this dough, we will only have to mix the ingredients and stretch and fold the dough several times. Do you remember the blitz puff pastry recipe that I have left you on several occasions? Well, the process is very similar, if not almost identical.

Then we will prepare the filling, the most laborious step will be to pit the cherries… The rest is very simple, in 15 minutes we will have it ready. And finally, comes the most fun or entertaining part, assemble and decorate the cake. In my case I leave you the most classic presentation, but of course, you can carry out the one you like the most.
Before baking, brush the cake with beaten egg and sprinkle the surface with Demerara sugar.
What is Demerara sugar?
“Demerara” refers to a type of sugar resulting from a process of partial refining of cane sugar while retaining some of the molasses for flavor. it is a variety of sugar very similar to turbinado, moscovado, Mexican piloncilo and brown sugar. A notable characteristic of this variety of sugar is that its flavor offers distinctive natural notes of caramel and toffee with a bit of earthy molasses complexity.
Recipe Cherry Pie with flaky pie crust
FLAKY DOUGH:
- 360 g cake flour
- 250 g unsalted butter, cold and cubed
- 15 g sugar
- 130 g water, very cold
- 8 g apple cider vinegar
- 4 g salt
CHERRY FILLING:
- 1 kg cherries, pitted fruit weight
- 150 g sugar
- 20 g lemon juice
- 80 g water, lukewarm
- 40 g corn starch
- 4 g vanilla extract
- 2 g almond extract
- red food coloring paste, Extra Red (you can see the quantity in the video)
- 30 g butter, cold and cut into cubes
FOR DECORATING:
- one beaten egg
- Demerara sugar
FOR SERVING:
- crème fraîche or one scoop of ice cream
- Maraschino cherries (recipe in this link)
MATERIAL WE WILL NEED AND SHOWN IN THE VIDEO:
- KitchenAid stand mixer or stand mixer
- bowls
- wide frying pan
- digital kitchen scale
- whisk
- metal rolling pin
- Emile Henry ceramic mold (27 x 21,5 x 4 cm, 1 liter capacity)
- perforated trays
- pastry brush
- cooling rack
REMEMBER TO ENJOY SWEETS IN MODERATION. SUGAR SHOULD BE CONSUMED OCCASIONALLY AND NOT BE PART OF YOUR DAILY DIET TO MAINTAIN A HEALTHY LIFESTYLE.
Instructions
Prepare flaky dough.
- In the bowl of the KitchenAid add the flour along with salt, sugar and cubed butter.
- Mix with the paddle or flat beater on speed 1 until you get a sandy mixture. It will take about 30-40 seconds.
- Add cold water along with the vinegar and mix again until it is integrated, it will take about 30-40 seconds. You should not work the mixture too much, just until you get the consistency I show you in the video. As you can see, sandy.
- Transfer the mixture to a work surface and compact into a rectangle.
- Cover with cling film and store in the freezer for 30 minutes.
Make first and second single fold.
- Lightly dust a work surface with flour.
- Roll out the dough with a metal rolling pin. At first you will notice that the dough cracks easily, but that's okay. As you make the folds, its consistency will improve.
- Make the first simple fold, fold the dough as if it were a triptych.
- Sprinkle the work surface lightly with flour again and proceed to stretch the dough again.
- Before starting to stretch it, press with the rolling pin all over the surface of the dough creating a perpendicular pattern (I show it in the video). This step makes it easier to stretch the dough to maintain the shape without creating different proportions at both ends.
- From time to time check that the dough does not stick to the work surface, to do this lift carefully. If it does stick, sprinkle lightly with flour and continue working.
- Make the second single fold.
- Cover the dough with film, put it in a bag and store in the freezer for 30 minutes.
Make the third and fourth fold.
- Lightly dust a work surface with flour.
- Roll out the dough in the same way as before.
- Make the third single fold.
- Cover with film, put inside a bag and store in the freezer for 30 minutes.
- Finally, make the fourth and last fold of the dough.
- Proceed in the same way as in the previous folds. When finished, store in the refrigerator wrapped in film and in a bag, while you prepare the cherry filling.
Prepare the cherries.
- Wash the cherries thoroughly under cold running water. Remove any cherries that may be damaged.
- Proceed to pit them. If you have a device for this purpose, a cherry pitter, perfect, you can use it. Otherwise, proceed as follows.
- Remove the stem from the cherry, take a glass bottle and place the cherry in its mouth. Press with the help of a chopstick where the cherry stem was until you reach the stone. Start with the chopstick and it will come out cleanly.
- Repeat this same step with the rest of the cherries.
- As you can see in the video, the cherry pits come out of the bottle without any problem.


Cook cherries.
- Dissolve the corn starch in the warm water. At first you will notice that it is complex to dissolve, but as you mix, it will begin to integrate smoothly.
- Once it has dissolved, add the coloring and mix again until homogenized. Set aside.
- Add the cherries to a large skillet along with the sugar, cook over medium heat until they begin to release juices.
- Once at this point, add the lemon juice along with the aromas and cook, stirring constantly, until you observe that the cherries release a lot of juices.
- Add the colored starch mixture to the cherries and cook, over medium-low heat and stirring constantly, until the mixture thickens slightly. It will take about 15 minutes.
- Remove from heat and let cool completely before using.
Divide and stretch the dough.
- Divide the dough into two parts, one of them (the one you will use for the base) should be slightly larger. In my case, the dough for the base weighed 415 g, taking into account that the total dough weighed 765 g.
- Cover the dough you are not going to work with with cling film and refrigerate until ready to use.
- Lightly dust a work surface with flour and roll out the dough for the base. You must give a dimension greater than the size of the mold, taking into account even the height of this to be able to place the dough in one piece. My mold is 27 x 21.5 x 4 cm (1 liter capacity).
- Place the dough in the mold and adjust carefully. Do not remove the excess dough for the moment.
- Place on a tray and refrigerate.
- Stretch the other piece of dough, remember to give a dimension superior to the size of the mold. Place the dough on a Teflon sheet.
- Cut strips, with the width you prefer, place on a tray and refrigerate until ready to use. It is important to keep the dough cold until the moment of baking.
Fill with cherries and decorate the pie.
- Pour the cherry filling, which should already be completely cold, into the pie pan lined with the dough.
- Decorate the top of the cake with the strips as shown in the video. If you prefer, you can carry out a different decoration.
- Cut off the excess dough.
- Roll up the edges and press them to the mold so that they are tight.
- Seal the edges of the dough with a fork.

Bake cherry pie.
- Brush the dough with beaten egg.
- Sprinkle the surface of the cake with Demerara sugar or another variety of sugar if you prefer.
- Bake on the lowest rack of the oven, in a preheated oven at 410ºF/210ºC, hea up and down, for 15 minutes.
- Reduce to 374ºF/190ºC and bake for 25 minutes, reduce to 356ºF/180ºC and bake for 20-25 minutes more to finish baking. In the final 20 minutes, you may need to cover the edge of the pie with aluminum foil to prevent over-browning.
- The temperature of the filling at the end of baking should be 91º-93ºC (195º-199ºF).
- Remove from the oven and let it cool on a wire rack. You can eat it warm or cold, as you prefer.
- When serving it, you can accompany it with a scoop of ice cream or, as I like the most, with crème fraîche and a Maraschino cherry, in this post I show you how to make them at home.

Notes
- To make flaky pastry, which reminds us a lot of the blitz puff pastry, the ideal is that all the ingredients are cold. By mixing, we raise the temperature and we want to keep the dough as cold as possible.
- The butter adds a lot of flavor, I recommend using a good quality one.
- Do not over mix the ingredients more than what I detail in the process and show you in the video.
- Respect all the resting and freezer/fridge times of the dough to achieve a good result.
- Some recipes use the cherry filling already made, packaged. I recommend making it at home from scratch, especially now that cherries are in season.
- If you wish, you can omit the coloring from the cherry filling, but the end result will be a brownish, visually unappealing filling.
- In my case I use Sugarflair Extra Red paste colorant, but if you wish, you can use the colorant of your choice. Remember to adjust the amount to the final shade you like.
- The filling must be completely cool before incorporating it into the mold lined with the dough.
- The top decoration can be carried out with the suggestion I leave you or another of your choice. If you decide to place the dough as a topping, remember to pierce it so that the filling releases steam during baking and to prevent the dough from puffing up too much and breaking.
- For the top decoration I use Demerara sugar, but you can use another variety of sugar or even omit it if you prefer.
- I recommend you to follow the steps specified for baking, both the position of the mold (which favors the base to bake correctly, taking into account that the filling is very moist) and the times. Remember to check the temperature of the filling before taking the cake out of the oven.
- It can be eaten warm or cold, your choice.
- You can keep it refrigerated for 4-5 days.


If you like cherries and enjoy seasonal recipes, without a doubt you have to try the famous Cherry Pie with flaky pie crust.
Within the complexity of pastry recipes, I think we can classify it as intermediate. Not because it is complex, which it is not, but because of the time it requires along with the steps to carry it out. But it is worth every minute invested in it.
The result is a tart with an incredibly delicious dough, with an incredible buttery aroma and an exquisite flaky texture. The filling is very generous, fresh, moist and quite light. It is not cloying at all. Without a doubt, I highly recommend serving it with crème fraîche or crème fraîche and Maraschino cherry.
I remind you that you can watch all my videos on my YouTube channel. If you subscribe and turn on the little bell, I will be eternally grateful!
I wish you a wonderful Sunday afternoon and happy Easter!
Lots of love,
Eva
Sources: Days of the Year, Liber and Company