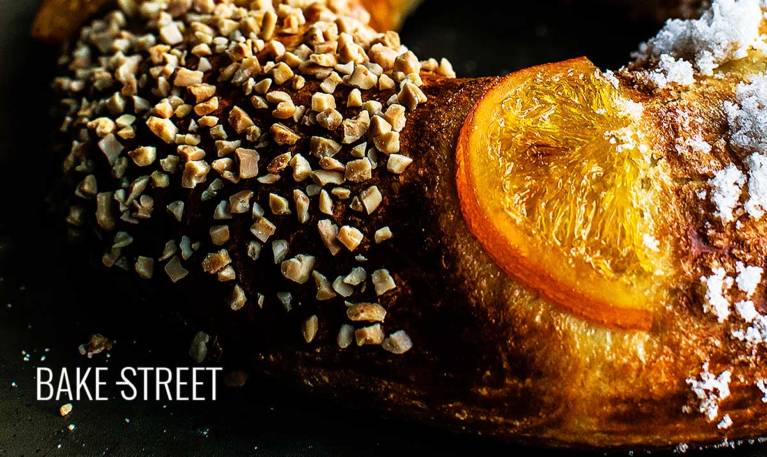
Roscón de Reyes, traditional sweet bread
Happy New Year! How were your holidays? I hope very well, happy and in very good company. We still have yet to enjoy one of the most beautiful of all, the magical night with the visit of His Majesties the Magi of the Orient.
For my part I can’t be happier, this year ended in the best possible way and it was an unexpected trip to Paris for our anniversary. Four fabulous days that went by in one hour.
We return with a great souvenir of its streets, lights, landscapes, its impressive Eiffel Tower that falls in love in any of its planes, Montmartre at night accompanied by artists immortalizing portraits of strangers, its impressive Notre Dame rising in front of the Seine, its language so elegant and seductive that captures all your senses… A beautiful, magical, extraordinary and incredibly captivating city. No doubt we’ll be back, it stole our hearts.
So this year we have started with great enthusiasm, many new projects, energy, happiness and goals that, whether they arrive or not, will make us enjoy the road without a doubt.
And since we don’t want the Three Wise Men not enjoying a good snack, before going to another home, I’ll leave you my last recipe of Roscón de Reyes.
This recipe is the one I share in my face-to-face workshops, the most up-to-date of all the ones I have done so far and which I hope you will enjoy very much in your homes. I am always in constant evolution, improving and perfecting this type of processing and, before continuing to improve a little more this one, I leave it to you so that you can enjoy it.
I always like to share with you the story about the creations I do, but this time I did. You can find it in the first recipe I made for the blog (this version is only in Spanish, but it’s older), so if you want to know a little bit about its origin, meaning and evolution, you can do it through this link

Ingredients for 2 medium pieces or 1 large
PREFERMENT:
- 5,3 oz (150 g) bread flour
- 3,52 oz (100 g) whole milk at room temperature
- 0,21 oz (6 g) dry yeast
FOR THE DOUGH:
- 12,35 oz (350 g) bread flour
- 7 oz (200 g) plain flour
- 3,52 oz (100 g) whole milk at room temperature
- 0,12 oz (3,6 g) dry yeast + 1 Tbsp of milk
- 3 large eggs (5,65 oz/160 g)
- zest of two oranges and one lemon
- 3,52 oz (100 g) unsalted butter at room temperature
- 1,25 oz (35 g) orange blossom water (not concentrated, in that case, less quantity)
- 0,42 oz (12 g) Cointreau
- 0,35 oz (10 g) aged rum
- 1 tsp vanilla extract
- 5 drops natural orange extract
- 5 drops natural lemon extract
- 7,75 oz (220 g) sugar
- 1/2 tsp salt
GARNISH:
- 1 beaten egg for brush
- 100 g sugar
- 2 Tbsp orange blossom water
- 5,3 oz (150 g) laminated almond or crocanti
- candied fruits (optional)
- candied oranges (recipe below)
FOR CANDIED ORANGES:
- 2 firm oranges
- 35,2 oz water + 12,35 oz (350 g) sugar
- water, without specific measure, for the first 3 boiling steps
Instructions
Candy the oranges.
- Wash well the oranges and dry. Cut thin slices and set aside.
- In a large pot add enough water to cover the oranges, place over medium-high heat and let it boil.
- Drain the water, cover again with new water and repeat the same process, a total of 3 times. This process will help us remove the bitterness from the peel.
- Drain all the water from the last cooking and pour 35,2 oz of water together with the 350 g of sugar and orange slices.
- Place over medium heat and leave until a thick syrup is obtained. We must have them until the syrup reaches the "thread point". We can prove it by taking a little syrup with the fingertips (previously dipped in cold water) and when separating both fingers form a small thread.
- Remove the pot from the heat, remove the oranges from the syrup with a pair of tweezers and drain them. They can be placed on a chocolate grid or a tray lined with baking paper.
- Let them cool completely.


Make the preferment.
- In a bowl pour the milk at room temperature together with yeast and flour. Mix well with a spoon to homogenize the dough.
- Once we have the ingredients more or less integrated, we end up kneading with our hands until we amalgamate it completely. We must achieve a smooth and homogeneous dough.
- Shape a ball and make a cross at the top using a sharp knife.
- Fill a bowl with warm water, but not too hot, and submerge the ball of preferment.
- It will fall to the bottom of the bowl but after about 5-10 minutes (if the milk we have used is cold it will take longer to rise) it will float to the surface. This occurs due to the creation of air inside. This method will help us to know when the preference is ready to use. We will note that it will have increased considerably in size.
- Remove from the bowl, drain lightly and set aside in a bowl to add to the dough later (its texture will be similar to a sponge).
Prepare the dough.
- We can take this step forward while we wait for the preferment, which is in the water, to float.
- Wash the lemon and orange well, dry and grated without reaching the white part. Set aside.
- In a large bowl pour the milk together with eggs, extracts and liqueurs. Mix with the help of a whisk to integrate all the ingredients.
- Once we have the preferment ready, cut and add to the mixture of liquid ingredients.
- Mix again with the whisk until it dissolves completely. This step will help us to integrate smoothly into the dough avoiding lumps forming in it.
- Add the sugar, salt and zests, mix again.
- Dissolve the dry yeast with a tablespoon of milk. Set aside,
- Slowly add the flour and integrate it with a silicone spatula. Once the flour is fully integrated, add the yeast and mix again.
- Transfer the dough to a clean work surface and start kneading making the French kneading.
- Work the dough for about 15-20 minutes in total alternating with rest, so the process will be much simpler and less laborious until we develop the entire gluten mesh.
- Once we have developed gluten (remember to check it by testing the membrane), add the butter at room temperature.
- We will do this little by little so that it is easier for us to integrate it and we will not add more until the previous one has been fully integrated.
- When the butter is completely integrated we will knead for a few more minutes making the French kneading. We must obtain a smooth and shiny dough.
- Grease a container or bowl with oil and place the dough inside.
- Cover with its lid or plastic film and let it rise for 4 or 4 1/4 hours at 70º-71ºF. The time is indicative, always remember that this one will have to double its volume.
Preshape.
- On a clean work surface, lightly sprinkle with flour. Dump the dough and degass very gently.
- Make a ball and let rest covered with a cotton cloth for 15 minutes.
- Line a tray with baking paper. Grease your hands lightly with oil and shape the roscón like a doughnut.
- Insert your fingers in the center and pick up the dough, lift in the air and turn to enlarge it. Care must be taken when handling and to maintain the same thickness over the entire surface.
- We will made a large hole since after the rising time and baking this one will close.
- Grease the surface with oil and cover with film. Let rise for 4-5 hours at 70-71ºF, it should almost double its size.
Bake.
- Preheat the oven to 380ºF.
- Beat the egg and brush the surface of the roscón gently.
- Place the candied fruit, if we have chosen to put them, or the candied oranges.

Prepare the wet sugar.
- Add the sugar in a bowl and some drops of orange blossom or water (in our choice).
- Mix with the fingertips. Once it has a clumped texture, we will use it on the roscón for garnish.
- Sprinkle the almond on the surface too.
- Bake for 23-25 minutes for a large one or about 16 minutes for 2 pieces. It must take a light golden color. The inside temperature must be 203-207ºF.
- Remove from the oven, place on a rack and let it cool completely.
- We can fill them with whipped cream, truffle, pastry cream... the combinations are infinite although this sweet is very well eaten by itself.

Notes
- Advice for checking the condition of the gluten mesh: To check the condition of the gluten mesh we must always do so after a rest. The main reason is that if we check after kneading, the dough will be very tense and will crack when it is stretched. But if we let it rest, it will relax and we can stretch it by checking its condition.
- What if I want to make the process in two steps? If you want to organize the preparation in two days to avoid spending too many hours on the same day, you can place the dough in the fridge. You should do it at this point: once the dough is in the container, let it rise at room temperature until it grows 1/3 of its volume. At that moment place it in the fridge and let overnight. The next morning remove from the cold and let temper for about 2 hours. If the dough doesn´t double its volume, let it reach this point.
- What happens if I can't make the final dough the next morning because I work until noon? In that case you can leave the dough in the cold until noon without much fear. You just have to make sure that when you leave the dough outside, once in the bowl/tupper before placing it in the cold, it is not grown than what you specified in the previous paragraph. It will hold without problems and will not overferment, so that you can make the dough the evening before and leave it ready for when you return the next day at lunchtime.
- In my house it is very cold, what can I do to slightly accelerate the fermentation process and make the temperature more suitable for the yeasts? On many occasions you ask me about temperature and rising times, especially in winter. Many kitchens in your homes are very cold and the doughs take a long time to rise. In my case when I want to lightly accelerate the rising process, what I do is the following: I turn on the light from the oven, just the light, without turning it on even at low temperatures, even if you can control them at 86ºC. Place the dough inside (if you have a thermostat to measure the temperature, great!, close the oven and let the dough rise. The interior will reach about 82ºF, if it´s more I recommend to turn off the light and keep the door closed. Do not exceed 86ºC in order not to damage its final taste.


I hope you'll cheer up with this Roscón de Reyes and tell me how you've done. From here we wish you a wonderful night and an extraordinary year.
Happy Three Wise Men' night!
Big hugs!
Eva