I have always liked very laborious recipes or with many steps in their preparation process. For me they are a challenge, as well as a meticulous organization that I like to carry out very much. Then it is very rewarding to be able to observe the results. But it is also true that simple recipes are always welcome, those that we can prepare in less than an hour and enjoy them as we like. An example of this is the scones.
It is difficult for any of us not to know at this point these incredible bread rolls typical of the United Kingdom and originating in Scotland. But, for those of you who have not yet heard of them, I will tell you a little more.
Scone origin.
This roll was made with oatmeal and without baking powder and baked on a griddle. Originally it was round and flat with a size similar to that of a medium plate and it was customary to cut it into triangular portions to serve it more comfortably.
In the past, this large round scone was called a bannock, although today it is called a scone regardless of whether it is round or triangular.
By the time the yeasts or baking powder came onto the market, they also became part of the scones. And from there, they began to be baked instead of being cooked in a frying pan or griddle.
Different types of scones.
Today we can find scones of many types, both savoury and sweet. Elaborated with a wide range of flours, sugar, honey, fruits inside, aromatic herbs, cheese… It is a very versatile preparation and allows for a wide variety of ingredients and combinations.
In Scotland, this type of salted roll is called soda farls and potato scones are called tattie scones. The latter are usually fried instead of baked or grilled, and are part of the breakfast.
There is another type of scone, lemonade scone, made with lemonade and cream instead of butter and milk. I didn’t know this one, and I found it rather curious.
As you can see the ingredients vary a lot, but what they all hold together is the method of carrying them out. Mix the ingredients without overworking the dough, fold several times with the dough to achieve a laminated or layering effect, shape and cook.
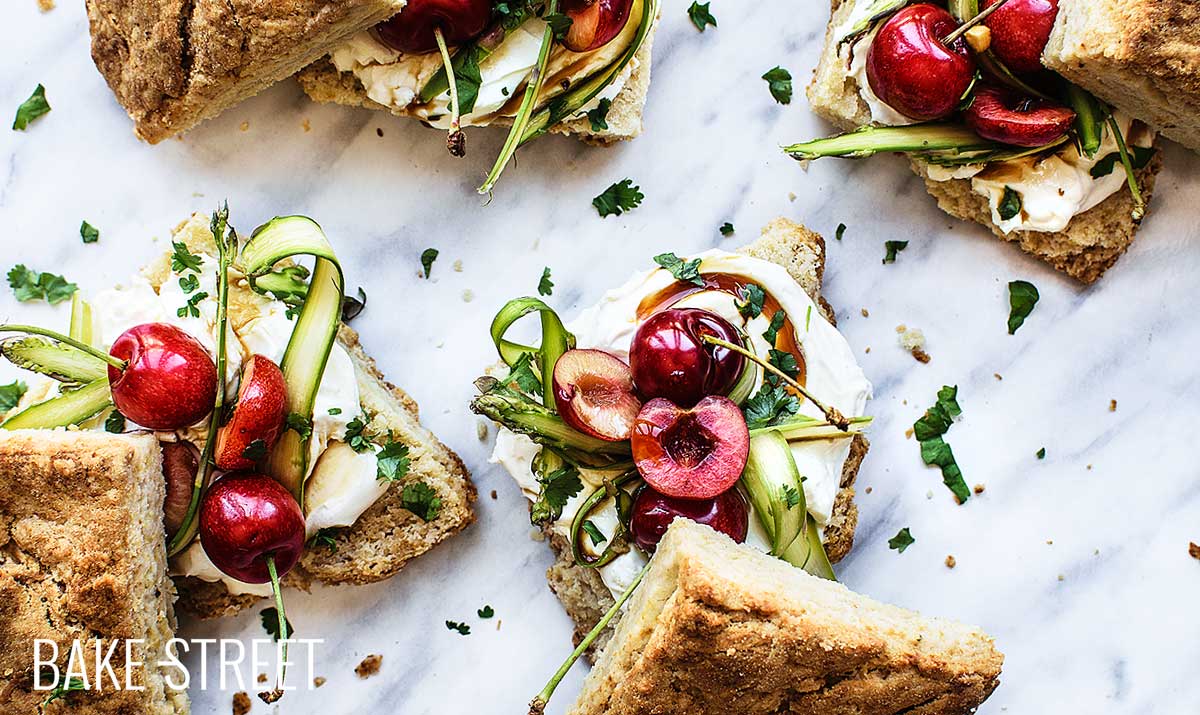
The way of presenting them is entirely up to us. In my case I chose to make a salty version and serve them with a little mascarpone cheese, fresh asparagus and cherries.
Ingredients for 4 pieces
FOR SCONES:- 12,1 oz (345 g) AP flour
- 6 oz (170 g) cold unsalted butter
- 4 oz (115 g) buttermilk
- 0,14 oz (4 g) baking powder
- 0,7 oz (2 g) baking soda
- 0,17 oz (5 g) salt
- black pepper to taste
- mascarpone cheese
- fresh green asparagus
- cherries
- fresh cilantro
- 0,3 oz (8 g) tamari
- 0,5 oz (15 g) water
- 0,35 oz (10 g) honey
- 1 garlic clove, finely chopped
- 0,17 oz (5 g) rice vinegar
Instructions
Make scones.
- Grate the cold butter, set aside.
- In a large bowl add the flour together with the grated butter, the baking powder, the baking soda, ground black pepper and salt. Start mixing with a silicone spatula until a sandy mixture is obtained.
- Pour in the buttermilk and mix again.
- Dump onto a clean work surface and start folding over itself. At the same time we try to amalgamate the ingredients, but without overworking.
- Give round shape with a diameter of 18 cm approximately and flatten.
- Place on a tray lined with baking parchment. Using a knife, divide the disc into 4 parts and separate them.
- Place in the refrigerator for 30 minutes.
Make the sauce.
- Mix all the ingredients in a medium bowl.
- Refrigerate until the moment of its use.
Bake.
- Preheat the oven to 425ºF (220ºC).
- Brush the surface with melted and cooled butter.
- Bake at medium height for 25-30 minutes. If they start to brown excessively, we can cover with aluminum foil.
- Remove and let cool completely on a rack.
Stuffed and serve.
- Using a mandolin, cut the green asparagus lengthwise.
- Cut the scones in half lengthwise.
- Spread with mascarpone cheese, decorate with green asparagus, cherries and chopped fresh cilantro.
- Serve with the sauce.
Notes
- We can use the type of flour we want; whole wheat, wheat, oats, rye, chickpea... Bearing in mind that each of them will leave us with a different result.
- Buttermilk can be replaced with milk or vegetable drink, if you prefer.
- It is important that the butter is always very cold when we work with it.
- Do not knead the mixture too much, enough to amalgamate the ingredients, but without obtaining a homogeneous and smooth dough. Note in the photos how the texture of these should look like.
- You can make them the size and shape you like best. In my case they were big and thick, so the baking time was a little longer than when we made smaller cones.
- If you want a sweet version, reduce the addition of salt and add a little sugar or honey. You can also add spices if you wish.
- The filling is completely optional and you can adapt it to your taste.
- Once they are completely cold, we can keep them in an airtight container for 2 days.
