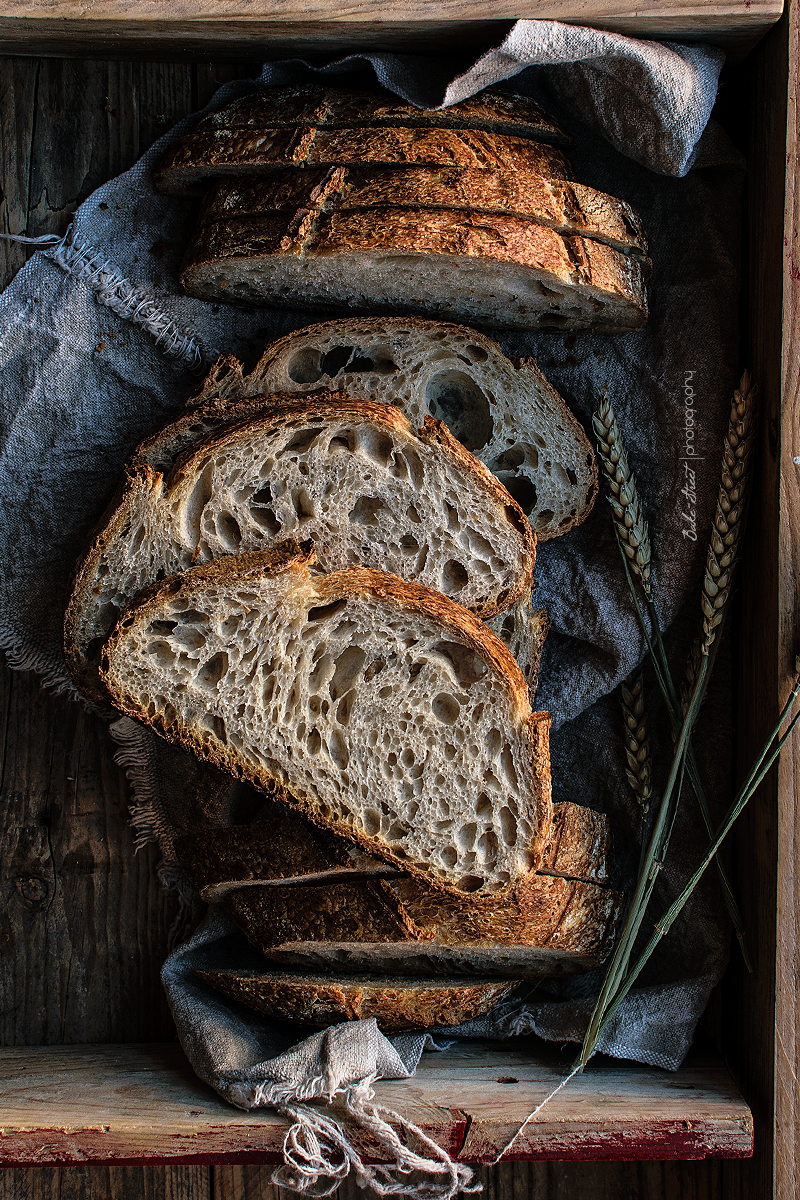
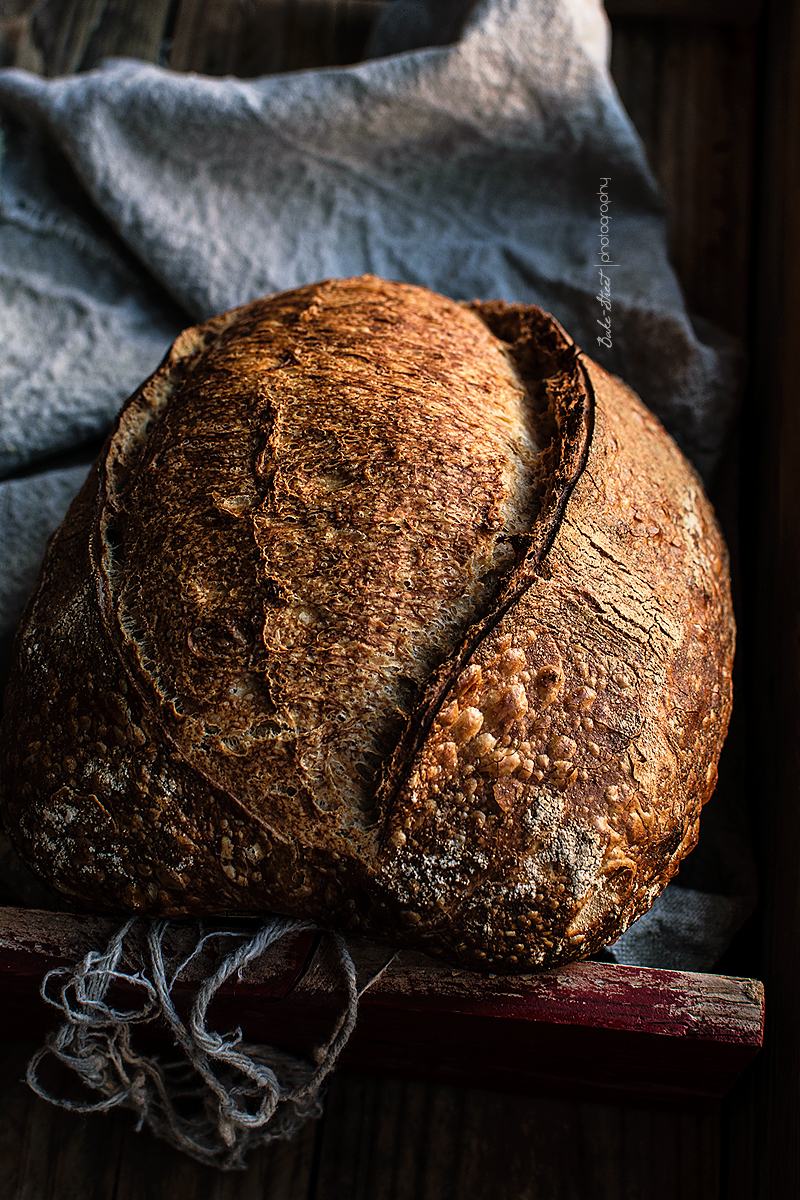
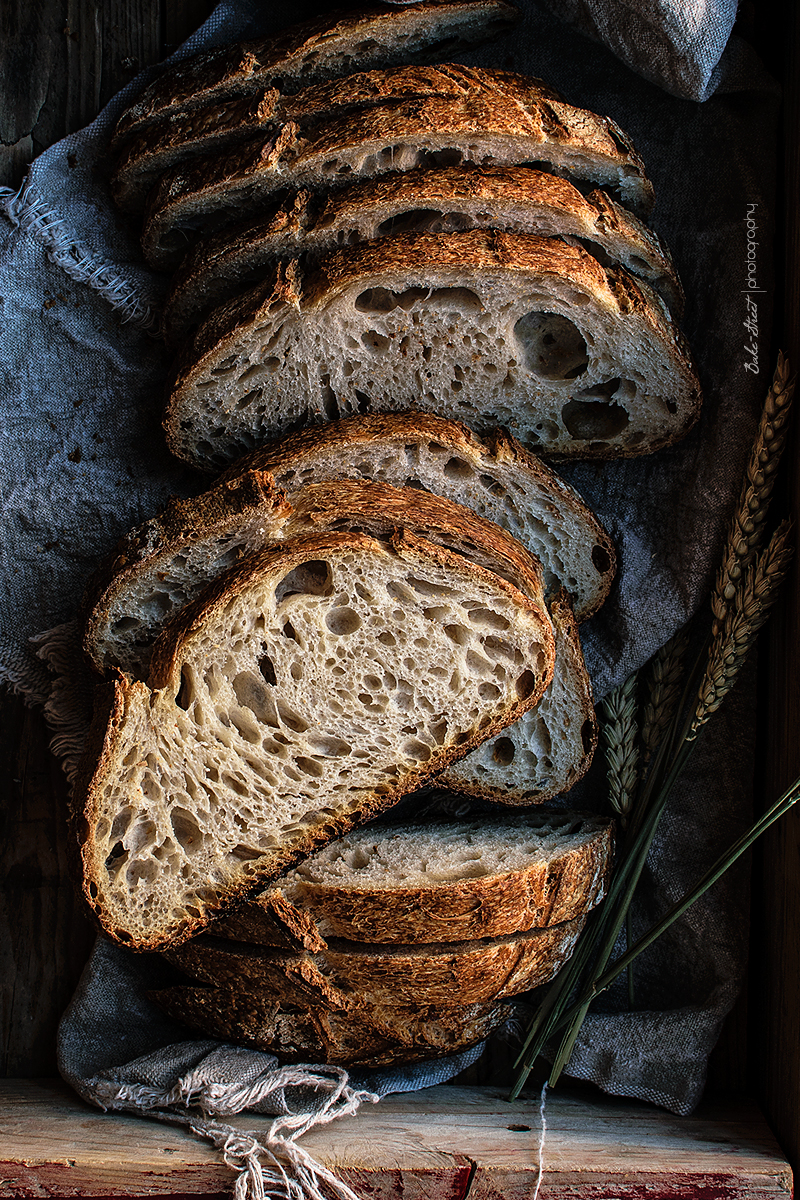
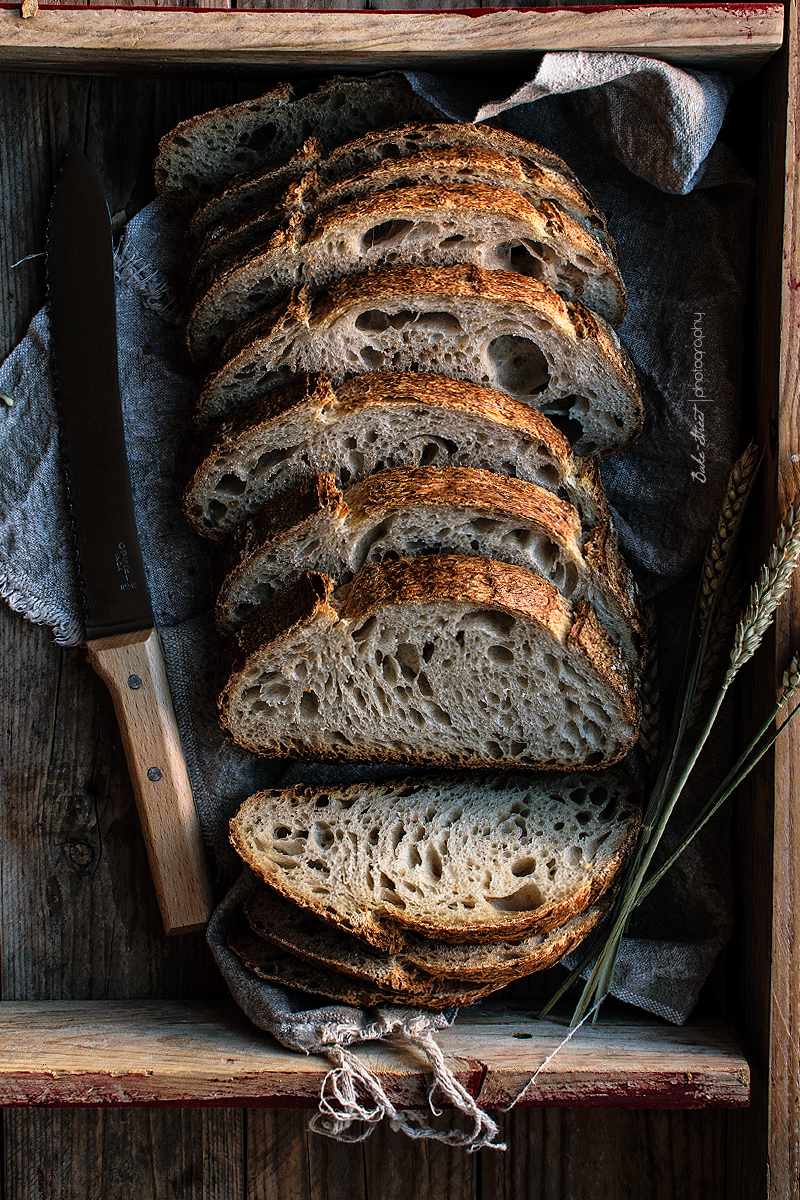
Basic Bread, my first sourdough bread
One of the questions that you mainly make me is how to make a basic bread or how to make my first sourdough bread. You have many doubts about how to carry out the whole process or how to start it; how can I start my sourdough, how must I feed it, what must I do to preserve it for a long time, how I work with it, how can I make my first bread with good results …
Well, today I will try to join all those doubts that you have done to me for many years and solve them in this post. Surely I have some left in the ink because this world bread is too extensive, but I will try to answer the main or more common.
Start from scratch.
Many of you have already had a first contact with doughs and you have already made yeast breads. It is always good to start from the basics so that you can observe how a dough behaves, how you work with it and what happens during periods of fermentation. To make bread your eyes and hands are really important. There are no exact measurements, no exact steps, observation and knowledge of the dough will be your key to success.
A good baker is who knows his doughs and knows how to listen them.
And how does this come about? With time and practice, here we can not accelerate the process. Experience and daily work will be the key to your perfect loaves.
First of all, we should know which method we are going to use:
- Direct method: add baker’s yeast directly to the dough, without making any preferment.
- Indirect method: we previously make a preferment that we will add to the dough.
What kind of preferments we can use?
- With commercial yeast: depending onthe hydration, you can make a poolish, sponge or biga.
- With natural yeasts: sourdough.
What are the benefits of using preferments versus commercial yeast?
The main advantage of using preferments is to give our doughs all the fermentation benefits to the final doughs, including gas, alcohol and acidity. Without forget flavor, aromas and the useful life of the bread.
All benefits, everywhere you look.
How do I start my sourdough?
In my blog you can find two posts in which I explain the process of how to make sourdough. You can do the traditional method* or this one how to make water yeast fruits*. Both are simple to make and work just as well, you can choose the one you prefer.
* Both available in Spanish.
COMMON DOUBTS ABOUT SOURDOUGH:
- Can I use any type of flour? Yes, you can use the one you prefer. The more strong the flour has, the longer it will last. But it can be made with wheat, whole wheat, semolina, rye, spelt …
- What is a 100% hydrated sourdough? It means that the dough has the same amount of water as flour. The percentage always refers to flour, so that if is specified “50% hydrated sourdough” it means that it is made with half of water than flour.
- Sometimes I read in books, articles … feed sourdough in proportion 1: 1: 1 ,what is it? This specifies the proportion in which we should feed our sourdough. In this case it would be the same amount of all the ingredients (sourdough: water: flour) If we found a ratio of 1: 3: 3 would add one part of dough for three parts of water + three parts of flour. An example would be to feed 5 g of dough + 15 g of water + 15 g of flour.
- These proportions … what does it benefit me? It takes more time to grow, it leaves us a margin of time to prepare our bread.
- My sourdough has got brown liquid above it … it has died. No, it has not died. To kill it is very complicated, I have tried leaving it 5 months at the end of the refrigerator without feeding and always revive. What has happened is that it has decanted, nothing more. To re-activate it we will take some of the lower paste (we discard the rest) and feed it. A few hours later will be like a motorcycle.
- My sourdough does not grow and is very liquid, it is dying. No, it is not dying. What happens is that it lacks food, the amount of water and flour is much less than the amount of sourdough that you are feeding. This leaves us with a sourdough of very liquid consistency and hardly able to grow. Feed it well and this problem will disappear 😉
- When I start my sourdough is moldy … oh, here we must discard it. It has been contaminated and the strains that come out are not what we are looking for. It is best to start over in a clean glass container.
- I will not use my sourdough for months, what must I do? Feed it and place in the fridge. Another option is to dehydrate it … store in small containers and hydrate it again when you want to use it. But, it takes a little longer to wake up.


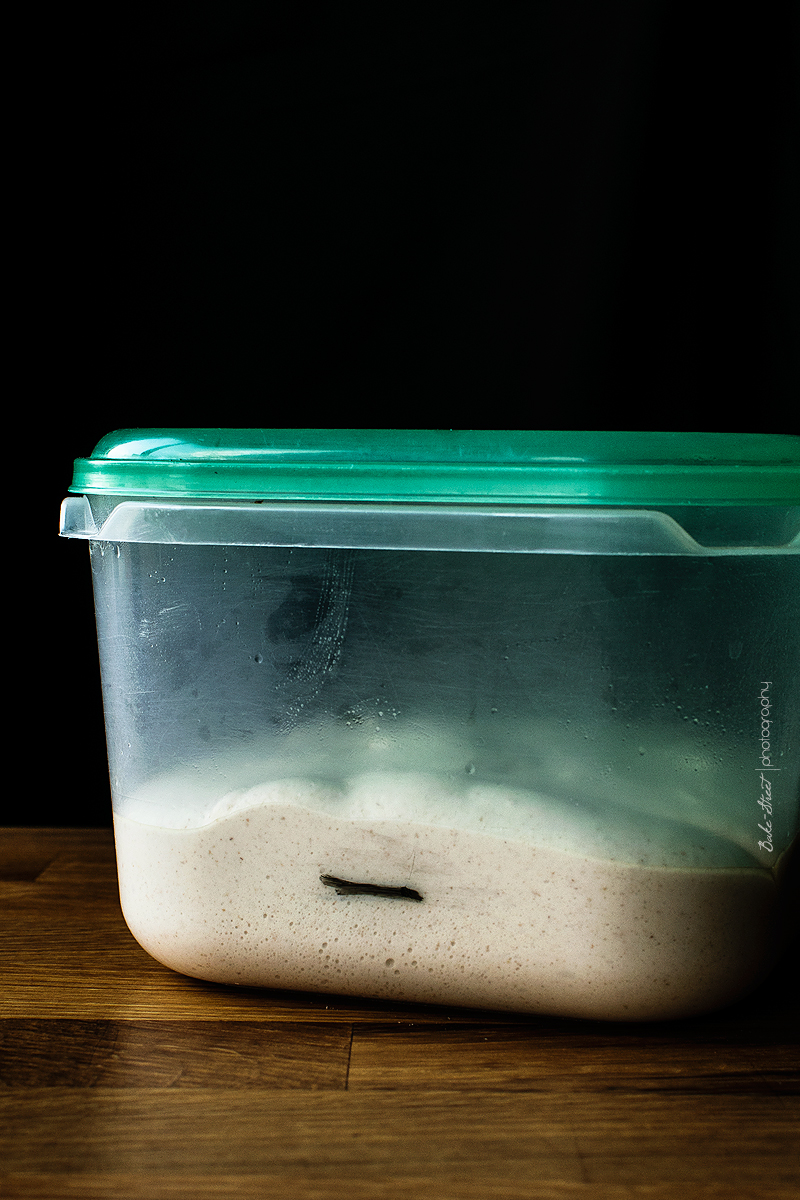
Sourdough 100% hydrated ready to use in a baking process
So far everything is simple, we know how we can work with a doughs and what preferments to use. Now flour comes into play, this subject brings you down the path of bitterness. Perhaps the great variety that there is in the market can make us doubt if there is something better or worse for our breads, and the truth is that no. The most important thing is that we like it and we are comfortable working with it.

Sourdough inside ready to use
Flours, that world so immense.
To make your first bread I always recommend wheat flour (bread flour) with a strong of 180-190 or a semolina flour, durum wheat.
What is the strength of flour? A strength flour is a flour with a high content in proteins, attention, this does not mean that all flours with a high index of proteins are strength flour. For example, rye has a lot of protein and hardly any strength. The strength flour is given by three characteristics that make up gluten:
- Extensibility: capacity of the flour to be stretched.
- Elasticity: the ability of the flour to return to its initial state.
- Tenacity: ability of a dough to resist the stretching process.
It is important that these three characteristics have a good balance between them so that when we work the dough will be easier. Do not resist much resistance or have too much elasticity and do not return to original state.
Gluten will allow us to develop the dough, hold released gases in the fermentation to give structure and volume to the bread.
Other type of flours.
Wholemeal flours are more delicate to work due to their bran content and flours such as spelt, tritordeum … are recommended once we have made a first contact with other varieties. They are less stronger flours and if we are not accustomed to dealing with this type of flours, we can over-ferment bread easily.
In my recipes you will see that I always feed my sourdough with a small percentage of rye. I like to do it because it gives a lot of joy to the sourdough and a very interesting crust color after baking. But if you do not like it or you do not have it, you can avoid it without much problem.
Before putting your hands in the dough … what is the baker´s percentage?
The baker´s percentage refers to all the ingredients used in a recipe and are expressed in percentages with respect to the total weight of flour used, this will always be 100%. From there, we can calculate the remain ingredients.
Put the hands in the dough…
Autolysis, what is it and what is it for?
It is a method invented by Raymond Calvel whose purpose is to improve and accelerate the baking process. It consists of mixing water with flour and let it rest to hydrate. During this time the proteins in the flour will absorb the water and swell, completely moisturizing and beginning to improve gluten.
With this we reduce the kneading time, in addition to reducing the oxidation of the dough produced during the kneading. It favors many aspects, including a greater final bread volume.
When we make bread we can work with different hydrations, to start I recommend you to work between 60-65% hydration. This percentage is very comfortable to work, to knead and to manipulate. In the future, add more water (here it is important to know the product with which we work to know its absorption capacity), and work with other types of kneading.
In this case we will make the kneading hard, in this video you can see how to do it. When you work with more hydrated doughs, use the French kneading to work with them. Of course the dough mixer is a good option, you are free to use it if you wish 😉
When you knead the dough do not hit the dough, it is necessary to work with care. If you hit very hard, all you will get will be to tighten it and the final result will be a more compact crumb. It is also not necessary to knead 18 hours in a row, ideally to combine kneading with rest. You will notice a great improvement every time you touch the dough again.
Once we have a developed dough we will make bulk fermentation. During this time it will be good that we do folds from time to time.
How does it benefit me to fold in the dough?
- It helps us to degas the dough.
- Equals temperature.
- Increases the strength of the dough, the most important.
As you can imagine, folding does not benefit the same in all doughs. The greater your hydration is, the more folds we can make. And vice versa. In this case we will make only two folds, more quantity does not benefit us. We must always use each process with consistency.
Dough bread after make bulk fermentation at room temperature and ready to preshape
We shape our bread.
It is important to preshape bread always. It will help to give uniformity and to organize the dough in case there are cuts or dough portions inside.
After preshaping the dough, it should always rest because when we manipulate it becomes tense. It will not let us shape it. Cover, let stand between 15-20 minutes and proceed to shape the bread.
To begin it will be perfect to make a round loaf (a boule), I know that it usually seems unattractive but it is the simplest. If you want to make a batard, perfect too. In this link you will see how to shape it.
The way to shape it is the least important thing … The most important thing is to apply tension to the dough. this way we will get a perfect oven spring.
Final proof.
Due to time it is always best to make final proof in the fridge, as well as very comfortable. The next day we just have to remove the bread from the fridge and bake it. So that once shaped, we will place the dough in the banneton, cover well with film and chill it until the next day.
The time from final proof will depend on the hydration of the dough, the activity of the dough, the flour, the temperature … around 8-10 hours to even 20-24 hours.
Can I make bulk fermentation in the fridge? Of course, you only have to place the dough (inside an airtight container) in the fridge when it has grown 1/3 of its volume (remember that in the cold will continue growing for a while) and remove the next day. Let sit at room temperature for 2 hours so you are able to manipulate the dough, shape and let proof.
How do I know when it has proofed the right time? With your sight and your touch, observation is very important. But, there is always a tip, in this video you can see how to make the pressure test with your finger and know if it is ready to bake. It is approximate but quite useful.
If we press over the bread with the fingertip and dough recovers slowly leaving a small cleft, it will be ready. If pressing quickly recovers, you will still have time to bake it.
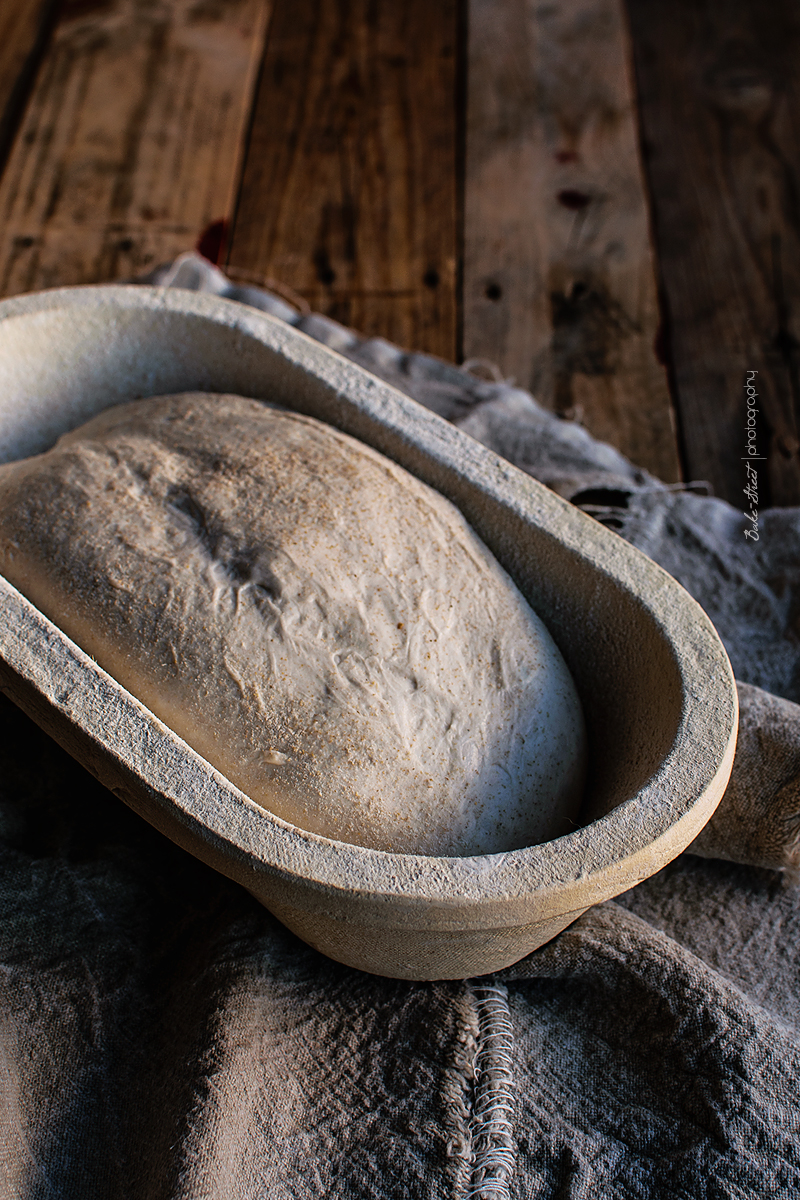
Dough bread after make final proof in the fridge and ready to bake
How do I score bread?
To start the best is to make simple cuts/scores, straight lines. Creativity can come later when we are sure of ourselves to make this step. Always try to make the cut of followed, without hesitation, and slightly tilting the blade forming a 45º angle. Everything will be fine 😉
And from here the bread will go to the oven, following the process that I specify below.
Baking process…
It is really important to preheat the oven before baking the bread, this will help it to grow. Physical, biological and enzymatic changes will occur. During the whole fermentation phase, the yeast are producing carbon dioxide, when the dough is transferred into the oven this process accelerates resulting in an expansion of the bread.
Part from the carbon dioxide was also present in the dough, thanks to the heat it changes from liquid to gaseous state and results in an expansion of the dough while it is taking temperature.
Of this last step there are two very important factors:
- Steam
- Hot
We need during the first baking minutes the bread has steam, this will favor the bread expansion and will help us to obtain a greater volume. But along with this point it is important that the upper heat is not excessive, otherwise we will be able to seal the bread and we will not allow it to expand well. Which will leave us a more compact bread.
For this, ideally, is to turn off the upper heat.
A well cooked bread has an inside temperature around 203º-210ºF (95 °-99º C)
And once the whole process is done … let the bread cools on a rack. In spite of having taken it out of the oven, the cooking continues inside. So be patient and wait 😉

SOURDOUGH BASIC BREAD:
SOURDOUGH 100% HYDRATION:
- 6.34 oz (180 g) 100% hydration starter refreshed with 80% Shipton Mill wheat flour and 20% Shipton Mill rye flour
Here you can read how to make water yeast fruits or here how to make common sourdough (By the moment, both are only available in Spanish)
FOR THE DOUGH:
- 18 oz (510 g) bread flour (I used Pani Ylla flour)
- 10,1 fl oz (300 g) water
- 0.38 oz (10,8 g) sea salt
| INGREDIENTS | BAKER´S % | SOURDOUGH | REST | TOTAL |
| Shipton Mill Wheat | 11,25% | 67,5 g | 67,5 g | |
| Bread flour, Pani de Ylla | 85% | 510 g | 510 g | |
| Shipton Mill Rye | 3,75% | 22,5 g | 22,5 g | |
| Water | 66,3% | 90 g | 308 g | 398 g |
| Salt | 1,8% | 10,8 g | 10,8 g |
INSTRUCTIONS:
FIRST DAY
Make basic bread dough.
- In a large bowl add flour with leaven and water, mix with your hands until it is well hydrated and looks smooth. Cover with plastic wrap or cotton cloth and allow to make autolysis for 60 minutes.
- Transfer to a work surface, without flour, and knead. Combine kneading with resting to get almost a complete developed dough.
- Knead 2-3 minutes and let sit 5-6 minutes. Total time kneading will be roughly 10 minutes without time resting.
- Before the first rest, add salt and mix with your hands making sure it is completely incorporated.
Make bulk fermentation.
- Grease with olive oil a bowl or recipient and put the dough inside. Cover and make a bulk proof for 5 hoursat room temperature. My home temperature was 70ºF. Turn and fold after 40 minutes and a second fold after 90 minutes.
- Let rise until almost double in sized.
- Dust with rye flour a banneton, set aside.
Shape the dough.
- Preshape into a boule (ball), be careful not to degas too much, and allow to bench rest for 15 minutes cover with a cotton cloth.
- Shape a batard, how I showed you in the video.
- Place seam-side up in banneton, cover with a cotton cloth and put in the fridge for 20 hours.
SECOND DAY
Bake the loaf
- Preheat oven 450ºF at least 30-40 minutes prior to baking with your stone or steel sheet on it positioned on final rack. Put inside a pan with volcanic stones, this helps to get steam in the baking.
- Transfer the bread from the banneton over a wooden board cover with parchment, seam side down. Score the bread.
- Place the bread into the oven and pour boiling water over the pan with volcanic stones. Close the oven door immediately to trap the moisture.
- Bake for 20 minutes at 430ºF.
- After first 20 minutes, open the oven door to allow steam goes out, remove the track with volcanic stones with kitchen gloves and reduce oven temperature to 410ºF. Bake for 10 minutes.
- Reduce temperature to 375ºC and bake 10 minutes more. Finally bake with convection at 375ºC for 10 minutes. Bread will get a better crust this way.
- Total bake time is 50 minutes.
Ending the bake…
- Once bake has ended, turn off the oven and let sit the bread inside the oven with the door ajar for 15 minutes. Remove from the oven and let cool over a rack.
PRESERVATION: Bread can be stored for up 3-4 days cover with cotton cloth. If the beginning is dry, cut the first slice and inside will be still tender. You can cut the bread into slices, cover with plastic film and freeze. This way is the better to make perfect toast each morning. You can use the bread slice from the freezer and put into the toaster, they will be perfect 😉
You already have all the tools to make your first basic sourdough bread. Be patient, do not be in a hurry, and if something goes wrong, do not worry. Remember that we always learn from our mistakes not from our successes, these are the ones that let us learn and know what we have done wrong and what we must improve.
Continue always and do not give up.
Big hugs!
Eva